How to Replace Rear Brakes 2002-07 GMC Envoy
Created on: 2020-07-08
This video shows you how to install new rear brake rotors and pads on your 2002-09 GMC Envoy.
Tools needed
-
Torque Wrench
14mm Socket
17mm Wrench
Pry Bar
18mm Socket
19mm Socket
Brake Parts Cleaner
Safety Glasses
Gloves
Copper Anti-Seize
Wheel Chocks
Brake Grease
Drain Pan
Floor Jack
Wire Brush
Okay, friends. One of the first things we need to do is safely raise and support the vehicle so your wheel's off the ground. Once you've done that, we're gonna come right here to your center cover, use a nice little pry bar and go ahead and pop this off. Now that we've done that, we're gonna remove all 6 of our 19-millimeter lug nuts and take the wheel off. Now that the wheels off of here, we're gonna go ahead and take this caliper off of the bracket. To do that, use your 17-millimeter and hold on to this area right here. That's the caliper slider. On the other side, you're gonna find a 14-millimeter bolt. All right. There we are. That one loose, do the same to the other one. Take the caliper off and quickly inspect it. What I mean by that is looking right along this rubber boot right here, and make sure you don't see any fluid. If you see fluid coming out of here, you have a caliper issue, and it needs to be either serviced or replaced. This one looks fine, so let's set it aside and move along. Now it's gonna be time to get the pads out of here. You might notice that they're frozen inside the bracket. Obviously, that's gonna be an issue. Take a nice punch chisel, whatever you might have, even a pry bar and just get the pads out, and then, of course, we'll recycle them.
Moving along, we're gonna remove the 18-millimeter head bolts that hold the caliper bracket to the differential. There it is, friends. Next, it's gonna be time to get the rotor off of there. Sometimes what you might notice is the rotors might have these little clips that are supposed to be holding the rotor on there. A lot of times you can either just pull them off. You might have to pry them off or even grab them with some cutters. Go ahead and grab onto that rotor. Give it a wiggle and remove it. Now that we have that off of there, it's a good idea to take a quick look around. You wanna double-check your e-brake shoes. That's these right here. You also want to take a peek behind there and make sure that you don't have any leaks of any sort. Assuming everything's good, we're gonna go ahead and clean up the mating surface where the rotor is gonna ride. Now that we have the majority of this cleaned up, it's important to make sure you get along the areas in between the studs and the hub area. Now we're gonna be using a little bit of chemicals, so you wanna make sure you have a collection bucket and some parts cleaner. Let's clean this down. Before we go ahead and install our rotor onto the vehicle, it's important to make sure that you clean all the braking surfaces.
The reason for that is because it's gonna have a chemical that's put on there during shipping to prevent rust or damage of any sort. Okay. So now, before we go ahead and start spraying this down with any copper Never-Seez, we wanna take our brand-new rotor, right here, slide it on, and we wanna gauge to see how far we need to adjust the emergency brake. It's always a good idea to try to adjust your emergency brake. To do that, if you were to come from the back side with your screwdriver, come in between where the lever is, right behind here, and then I'm just gonna try to pry like as if I'm pulling on that emergency brake. Then I'm gonna try to spin that rotor. What we wanna do is make it so it doesn't spin when you pull on this, but when you let go, it needs to be able to spin without any drag. This area right here with the knurls is the area where you'd adjust. If I was to go right here and lift up, that's gonna de-adjust, and if I was to go right here and bring it around clockwise, that's gonna adjust it out a little bit and make it tighter. Now going with the assumption you have your emergency brake adjusted up the way it needs to be, let's go ahead and put on a little bit of copper Never-Seez on the mating surface where the rotor's gonna ride. Put the rotor on there and start on one of your lug nuts.
Now we've made our way over to the bench with our caliper bracket. The reason for that is because we need to strip it down and clean it up. Let's take a small pocket screwdriver, get right in between here, and take these tins off. We'll set these tins aside for recycling. Next we're gonna remove the slider. You might need to use a small pocket screwdriver just to peel it up and away from the area that it's stuck on to. Pull that right out of there. Set it aside. Do the same to the other one. Okay. Now we're gonna remove the slider boot. Should come right off. Just give it a quick check-over. Make sure it's not worn or torn in any way. Do the same to the other one. I like to clean them up, of course. Set those aside. Now we're gonna put a little bit of cleaner inside here. Just be careful because when you spray stuff in, stuff always comes out. You could use a boar brush of some sort or some kind of wire brush and try to clean it out inside, or, of course, you can just use a rag. It doesn't have to be anything special. Give it a nice twist. Stick it inside there, and twist as you keep going in. Okay. Go and pull it out. It looks pretty nasty. Look inside. Make sure it looks nice and clean. If it looks like it's pitted or it's in any way gonna cause an issue with the slider, you're gonna need to continue on.
I'm gonna do the same to the other side here. One last thing before we move along, you wanna look down along this area right here where that boot's gonna ride. Make sure that there's no crowd or anything like that that's gonna cause an issue for sealing of the boot. If there's an area that moisture can get in, obviously, it's gonna cause an issue internally. Let's move along to cleaning up the sliders. Get off any of the gunk that might be on there. As you clean them up, you wanna inspect the slider. Make sure it's not rusted or pitted or anything. If there's some sort of issue that might cause a binding issue, you're gonna wanna take care of it now. Also, when you're cleaning, look at this ridge right here. That's also another area that that slider boot's gonna ride. It needs to be clean as well. Let's just open up that boot, take our rag, and then just clean up the inside as well. Close it back up. We'll do the same to the other one. Now it's gonna be time to clean up the area on the bracket where those tins are gonna be. You wanna clean up this area right along here and, of course, either of these sides. To do that, you could use your small pocket screwdriver.
You could use a scraper of some sort, a nice wire brush, or if you have one of these nice sanding tools right here, you could try to clean it up. One thing to mention if you're using something like this, be careful not to take off too much of the metal of the actual caliper bracket itself because then you'll get pad slap noises. Next thing we wanna do is use a little bit of Moly grease. This is just plain old caliper grease, and it's nothing special. The reason for using a little bit of grease on here is for vibration dampening, noise reduction, and it also keeps moisture out so rust doesn't build up again. Now that we have those nice and lubed up, let's go ahead and put on these tins. Should just slide right in there. Clip in so they're nice and secure. Make sure it doesn't fall off. Do the same to the other side. Perfect. Next it's gonna be time to get our caliper slider boots back on here. Before we go ahead and slap them on there, we wanna make sure that there's a nice little bit of lubricant going along that little edge that I told you to clean out. That's gonna help keep moisture out of there which is super important. Take your caliper slider boot here, pop it on there and give it a couple good twists. That's gonna make sure that everything's nice and lubricated. Next we're gonna take our caliper slider pin.
We're gonna lubricate the long part of it here, and then you also wanna make sure you get up into this groove. There we are. That's a decent amount. We'll slide it in there. Give it a nice twist. Make sure everything's nice and situated. Do the same to the other one. Slide it right on in there. A couple twists. Let's get back over to the vehicle. It's important to make sure that we clean up any of this old threadlocker that's on our bolts because we need to put on some new. Now with those bolts nice and cleaned up, we've put a little bit of threadlocker on there, we've got our caliper bracket, let's get it back on the vehicle. Once you bottom them out, go ahead and torque them to 148 foot-pounds. Now it's gonna be time to get our brake pads in the vehicle. You're gonna notice that two of the pads out of the set are gonna have this wear indicator right here. The pad with the wear indicator needs to be on the inside, and it also needs to be facing upward. Okay. I've got that one in there. You definitely wanna make sure that it's not to the point where you have to hammer it in. It needs to be able to slide around a little bit, okay? Do the same to the outer pad. There we are. Slides around. Slides around. It's gonna be time to push in our caliper piston.
Some people like to open up their bleeder screw, but what you might find is if you open up the bleeder screw, it might break off. So, if you don't wanna deal with that, you could just try to push it in but just push it in slowly. There we are. That looks great. Now we just need to add a little bit of that caliper lubricant here. When you're applying the caliper lubricant, I like to go right around the metal part of the piston and then on each of the ears of the caliper. You don't need to go anywhere else. Slide it right over the pads and the sliders and then go ahead and grab on to your bolts. Got our caliper bolts. I used a little bit of threadlocker on it because that's how I roll. We're gonna bottom these out. Torque these to 23 foot-pounds. All right. Let's get the wheel up on here. Start on all your lug nuts, bottom them out, and then we'll torque them to 103 foot-pounds. Let's torque these in a crisscross manner. Now it's gonna be time to put on your center cover. If you were to look at the back side, you're gonna see something that looks a lot like a valve stem. Line that up with your valve stem then just give it a nice loving bonk. Make sure it's completely secured.
All right. Now I know you think you're done, but you still need to pump up the brake pedal, and then we're gonna go out there and double-check that brake fluid level. Right underneath the hood, you're gonna see your master cylinder. It'll tell you what type of fluid to use. You can give it a little shake and just double-check to make sure you can see it's up at that maximum line.
Shop Products


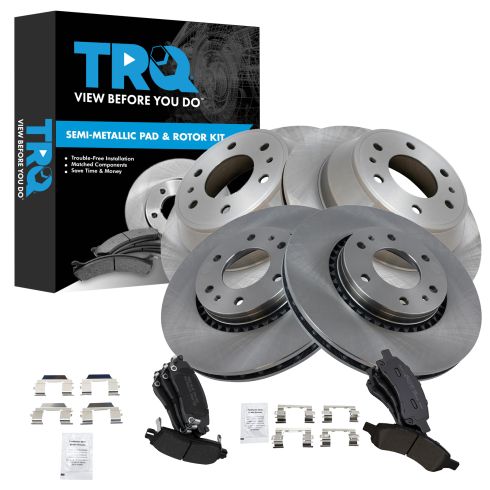
Chevrolet GMC Buick Isuzu Saab Front & Rear Semi-Metallic Brake Pad & Rotor Kit TRQ BKA04920
Part Details:
- Semi-Metallic
- (1) Rear Semi-Metallic Brake Pad Set
- (1) Front Semi-Metallic Brake Pad Set
- (2) Front Brake Rotors
- (2) Rear Brake Rotors
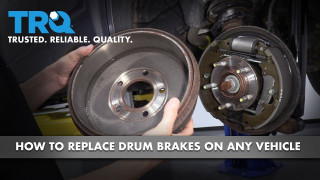
How to Replace Drum Brakes on Any Vehicle
The common features of drum brakes so that you can learn how to replace the brakes on your specific vehicle.
