How To Replace Rear Brakes 1998-2004 Dodge Intrepid
Created on: 2011-04-02
Learn how to replace the rear brakes in a 98-04 Dodge Intrepid when you watch this video.
-
step 1 :Removing the Wheel
- Loosen the lug nuts with the vehicle on the ground
- Raise the vehicle with a floor jack
- Secure the vehicle on jack stands
- Remove the lug nuts
- Pull off the wheel
-
step 2 :Removing the Brake Pads
- Pry the pads into the caliper with a pry bar to reset the pistons
- Remove the two 10mm bolts from the brake caliper
- Pull the caliper aside
- Unclip the brake pads from the caliper
- Pull the brake pads out of the caliper
-
step 3 :Inspecting the Brakes
- Check the thickness of the brake pads
- Check that the brake caliper slides move smoothly
- Check for gouges on both sides of the brake rotor
-
step 4 :Removing the Brake Rotor
- Slide off the brake rotor
- If the rotor does not come off easily, adjust the emergency brake
- Pull off the rubber plug from the backing plate with a flat blade screwdriver
- Turn the star wheel adjuster down with a brake spoon
-
step 5 :Installing the New Brake Rotor
- Slide on the brake rotor
- Turn the star wheel adjuster up with a brake spoon, while turning the rotor
- Push the rubber plug into the backing plate
-
step 6 :Installing the New Brake Pads
- Push the brake pads into the caliper
- Put the caliper into place
- Start the 10mm bolts into the caliper
- Tighten the 10mm bolts to about 20 foot-pounds of torque
-
step 7 :Reattaching the Wheel
- Slide the wheel into place
- Start the lug nuts by hand
- Tighten the lug nuts preliminarily
- Lower the vehicle to the ground
- Tighten the lug nuts to between 90 - 100 foot-pounds in a crossing or star pattern
Tools needed
-
Flat Blade Screwdriver
Torque Wrench
Pry Bar
Jack Stands
Brake Spoon
19mm Socket
10mm Socket
Ratchet
Floor Jack
1/2 Inch Breaker Bar
Brought to you by 1AAuto.com, your source for quality replacement parts and the best service on the Internet.
Hi, I'm Mike Green. I'm one of the owners of 1A Auto. I want to help you save time and money repairing or maintaining your vehicle. I'm going to use my 20-plus years experience restoring and repairing cars and trucks like this to show you the correct way to install parts from 1AAuto.com. The right parts installed correctly: that's going to save you time and money. Thank you and enjoy the video.
In this video, we're going to show you how remove and replace the rear brake shoes and discs on this 2004 Dodge Intrepid, same as any '98 to '04 with the rear disc brakes. Tools needed are jack and jack stands, 10mm and 19mm sockets with ratchets and appropriate extensions, a brake spoon if you run into a little trouble removing your rotor . and I'll show you that . , a regular screwdriver and torque wrench.
You're going to start by removing your wheel. If you have hand tools you're going to want to start with the wheel on the ground. Loosen your lug nuts, and then, raise and support the vehicle and then remove it. I've got air tools and I'm going to use them. We'll use fast forward here as I remove the wheel the rest of the way. We'll use fast forward in this video quite often, just to get through the monotonous stuff.
Next you want to reset your piston. You can see the piston's right here. As the pads wear down the piston pushes out. You can start. I'm going to start over here. I'm going to pry and you can see that piston go back into the caliper some. As I get it a little further, you should be able to reach right in here. I can't quite yet. Now, I can reach right in here and pry that all the way out. Now you can see that your caliper will move right back and forth. Now, you want to remove two 10mm bolts back here. Now, your caliper comes right up and off. Your inner pad is just held in there with a clip; it pulls out. Then your outer pad has got a couple clips here, and comes off.
As far as condition, you can see our outer pad is pretty thin while our inner pad is still thicker. That indicates that maybe some of this needs to be lubed up, but it looks like it's moving pretty well. Then check the condition of our rotor. Even though this rotor looks a little rusty, that's probably just because this car's been sitting for awhile. If you run the back of your fingernail along the outside and then also on the inside, it's nice and smooth. So this rotor is in fine shape. We can just put new pads on this vehicle. 1A Auto carries the rotors and they do fit correctly.
The rotor may come right off like that. You can see this is your emergency brake pads in here. If you're having trouble getting your rotor off, what you'll want to do is back off your emergency brake pad and I'll show you that with the rotor off. With the rotor off, you can see right down here, this is how your emergency brake adjusts. This star wheel, right here, spins and when you have the rotor on, you can reach that on the backside here, now. There's a little plug right here. Use a screwdriver to pry it out. Then, to adjust it, you'll need a brake spoon. I'm filming it from this side here. You turn the star up to adjust the shoes out. Then if you're having trouble getting it apart, you want to bring it down and that brings the shoes together and makes it easier to get the rotor off.
I'll put my rotor back on. I might have to use a little bit of force. I'll spin the wheel. Tighten up back here. I'm going to fast forward through here. The goal here is to tighten them up so you have an even amount of friction from your emergency brake. Then also put that rubber plug back in, once you're finished.
Now, like I said, this outer pad should be replaced, but the owner of this vehicle didn't want to replace the brakes just yet. We actually replaced the hub for them. The outer pad goes down in and then you pull on this bracket. Put that down in. This inner pad goes down in and then pushes into that piston. Now, this goes right down on. You might have to push your slides back here. This one actually went way in. Push those all the way back. Put your caliper right on. Start your bolts in. I'm just going to push them in and then move the caliper a little bit. Keep twisting them. With a 10mm socket and ratchet, we'll speed it up here while I snug up those 10mm bolts. Once you get them kind of tight you'll want to torque them to 20 foot-pounds with a torque wrench. Now with our torque wrench and an extension we'll click these to 20 foot-pounds.
Now we'll put our wheel up on there, and we'll start our lug nuts first by hand, all five of them. Then we'll use our air wrench to tighten them preliminarily. Now with our vehicle on the ground we want to torque the lugs nuts to anywhere between 90 and 100 foot-pounds using a star pattern. Then very, very, important: whenever you work on your brakes first get into your car, pump your brakes a bunch of times. Then put your car in gear, and make sure the brakes hold you. Then do a stop from like five miles an hour and ten miles an hour before you go out and road test the vehicle.
We hope this video helps you out. Brought to you by www.1AAuto.com, your source for quality replacement parts and the best service on the Internet. Please feel free to call us toll-free, 888-844-3393. We're the company that's here for you on the Internet and in person.
Shop Products


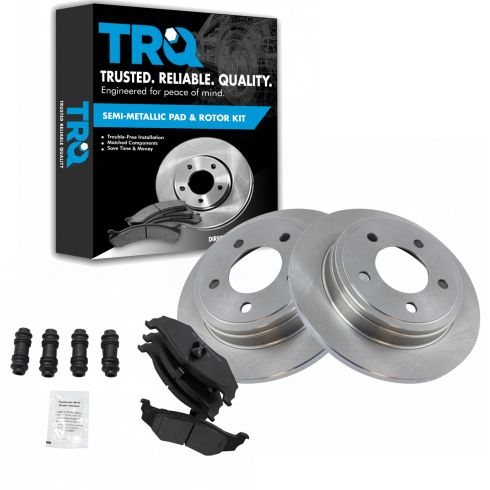
Dodge Chrysler Eagle Rear Semi-Metallic Brake Pad & Rotor Kit TRQ BKA11487
Part Details:
- Semi-Metallic
- Premium Posi
- Solid
- 10.63 in. (270mm)
- 5 Lug
- (2) Rear Brake Rotors
- (1) Rear Semi-Metallic Brake Pad Set
How to Replace Front Brakes 2002-05 Mercury Mountaineer
That squealing sound means it's time for new brakes! Save money and do it yourself. Learn how by watching this video from 1A Auto!
