How to Replace Rear Brakes 2007-11 Honda CR-V
Created on: 2018-07-23
How to repair, install, fix, change or replace your own worn, squeaky, fading old brakes on 09 Honda CRV
-
step 1 :Removing the Wheel
- Loosen the 19mm lug nuts with the vehicle on the ground
- Raise the vehicle with a floor jack
- Secure the vehicle on jack stands
- Remove the lug nuts
- Pull off the wheel
-
step 2 :Removing the Brake Pads
- Remove the Phillips screws from the rotor
- Remove 12mm bolts from the brake caliper
- Pull the caliper aside
- Pry the brake pads off from the caliper and caliper bracket
-
step 3 :Removing the Brake Rotor
- Remove 17mm bolts from the brake caliper bracket
- Pull off the brake caliper bracket
- Remove the plug from the rotor
- Adjust the adjustor with a flat blade screwdriver to release the brake shoes
- Pull the rotor off
-
step 4 :Preparing the New Brake Pads and Rotors
- Press the squealer to the new brake pad
- Transfer the rubber boots over from the old rotor to the new rotor
- Remove the brake pad slides and clean them with a wire brush
- Apply grease to the caliper slides
- Clip in the brake pad slides
-
step 5 :Installing the New Brake Rotor
- Clean the rotor with brake parts cleaner
- Line the holes on the rotor with the holes on the hub
- Slide the rotor on
- Tighten the Phillips screws to the rotor
- Plug on the dust cap
- Put the caliper bracket back into place
- Start the bolts by hand
- Tighten the bolts to 79 foot-pounds of torque
-
step 6 :Installing the New Brake Pads
- Clean the pad surface with brake parts cleaner
- Apply grease to the brake pad tabs
- Press the brake pad into the caliper
- Install the new brake pad into the bracket
- Put the caliper on
- Thread bolts by hand
- Tighten bolts to 17 foot-pounds
- Remove the lug nut from the rotor
-
step 7 :Reattaching the Wheel
- Slide the wheel into place
- Start the lug nuts by hand
- Tighten the lug nuts preliminarily
- Lower the vehicle to the ground
- Tighten the lug nuts to 80 foot-pounds in a crossing or star pattern
-
step 8 :Testing the Brakes
- Pump your brakes repeatedly until they feel firm
- Test your brakes at 5 miles per hour and then 10 miles per hour
- Road test the vehicle
Tools needed
-
Socket Extensions
17mm Wrench
17mm Socket
19mm Socket
Brake Caliper Piston Rewind Cube Tool
Brake Parts Cleaner
Flat Blade Screwdriver
Phillips Head Screwdriver
Bungee Cord
Anti-Seize Grease
Ratchet
Wire Brush
12mm Wrench
Brake Caliper Compressor Tool. Single Piston. Screw Style.
Hi, I’m Mike from 1A Auto. We’ve been selling auto parts for over 30 years!
I'm going to take this wheel off. I'm going to use the 19 mm socket and a breaker bar, loosen up the lug nuts. Just one at a time before we put the wheel up in the air. Now we'll raise and support the vehicle. Now we're going to take the lug nuts off. Just use the socket to help us. I'm going to take the tire off.
All right, next we're going to take off these two Phillips head screws. Sometimes you might need an impact driver, but other times you can just use a Phillips head screwdriver. Then you just twist them off, hopefully they're loose. If they're real tight, use an impact driver. It works well. Right, this caliper is kind of rusty and the bolts are kind of rusty. I'm just going to take a wire brush before I take these bolts out so that my socket fits a little bit better. I'll just wire brush the bolts for a second.
Now I'll take a 12 mm socket and a ratchet and loosen these bolts up. That one out. If the caliper pin starts spinning, you can put a wrench on that. Can use a 17 mm wrench to hold it from spinning. Pull that bolt out. We pull this bolt out. Now I can grab the caliper. I'm going to twist it back and forth. Just to loosen it up a little bit and it compresses some of the piston. I'm going to pull it straight out because the pad is going to come with it. Next, I'm going to take a bungee cord and put it around the caliper. I'm going to secure it up here. Go around the strap, the assembly. Loop it a couple of times if you have to. Spin it right through there. There, then that'll keep the tension off the brake line.
Next I'll pull this brake pad off. The other one is in the caliper. You can pull this one off here. Just pull it straight out like that. See those clips slide into the piston? Next we're going to take these two caliper bracket bolts out. I'm going to use a 17 mm socket and a breaker bar. Loosen these up. Right, once we get those broken loose, then we'll just use our smaller ratchet and a 17 mm socket and take them out. Once they're loose enough we'll take them off by hand. Once they come out, we'll pull the bracket straight back.
Next we can grab the rotor. Pull it straight out. If it was difficult to remove, you can use a hammer and hit in these locations and you should be able to pop it right off. I'm going to take this little plug off of this rotor. Just use a little flat blade tool get underneath here. Or you can also, from the backside, we can take and push it through, just like that. We'll set that aside and put it in our new rotor.
This is our old brake rotor and pads. This is our new brake rotor and pads from 1AAuto.com. If you look at the pads, the pads are exactly the same, the years are the same, this little retainer that goes into the piston is the same, the squealer is the same. You're going to want to match these up per side. This happens to be the driver's side. The other pads are the same.
For the rotors, the hat's the same height. The inside has the drum for the parking brake. Get yours at 1AAuto.com and you'll be ready to rock and roll. We're going to clean this caliper bracket up. First, we're going to take these guide pins out. Slide that out. We're going to use some brake parts cleaner, and then wipe it down with a rag. Also going to use a little brake parts cleaner in the hole here. We can also take the rag and clean some of that out. Then we'll take some brake caliper grease. Put it on the pin. Then slide it back in. We'll do the same with the other one.
Next we're going to clean this up with a wire brush. We're just going to go like this on here. We can take this pad, slide out, or anti-rattle clip, clean up the bottom of this a little bit. Then in here we'll just clean this up. Reinstall this. Now we're going to do the same with the other side. Now it's nice and clean. All right, before we put the rotor on we're going to want to clean up this hub. We're just going to use a wire brush and if there's any loose rush, scrape the loose rust off. This one doesn't look too bad, so it's pretty good. Make sure it's all even.
Going to install the rotor backwards, and we're going to spray it down with brake parts leaner and use a rag to wipe it off. The brake rotors come with a sealer on it, so you want to get that off. We'll flip it over. We're going to line these two holes up with these two holes. Install that, and then we'll clean this side and wipe it down with a rag. Right, to make it easier to install the brakes, we're going to install these screws next. Tighten these down. I'm just going to snug them down, not too tight. Just snug. Use a Phillips head screwdriver to tighten these down, just like that. That'll prevent the rotor from moving around while we're trying to get the brake pads on. Next we're going to install this plug, goes right here. Push that on. With a little flat-bladed screwdriver you can fish it in there, just like that. Next we're going to install our brake caliper bracket. Slide that on there. Take the bolts, get the bolts started. I'll take a ratchet and snug these up.
Next we're going to use this torque wrench with a 17 mm socket. We sell this torque wrench at 1AAuto.com. I'm going to torque this to 79 foot-pounds. Before we put these one we're going to want to lubricate the ears on these and put a little bit on the surface right here. Do the same for this one. A little bit of lube on the ears like that, then put a little on the face right here, just like that. Next we want to install one of the new brake pads right there. That's the one that goes on the outside. Now I'm going to grab the caliper and we're going to take off the bungee cord. Now we want to compress this piston. We're going to use one of the outside old brake pads, I'm going to slide that on there.
Now I'll take this caliper compressor tool. We sell these at 1AAuto.com. Loosen this up a little bit. So we line this up like this, start to tighten it. I'm just going to watch the piston as it goes in. Just go slow. What this is doing is it's pushing brake fluid back through the lines and up to the master cylinder, into the brake reservoir. We will not have to bleed this system after doing this because we didn't disconnect the line when replacing these brake pads. Next we're going to take this brake pad with these ears and we're going to slide it into the brake caliper piston. You're going to line it up. Sometimes this can be a little bit tricky. All right, so we're going to push it down, get those ears to line up. Once you get the ears lined up, you can take the pad and push it in like that. Make sure that's secure. Then we can slide the caliper over the other brake pad and on the bracket, like that. Then we'll take the caliper bolts, install these caliper bolts. Now I can use my 17 mm wrench and 12 mm socket and ratchet. We'll tighten these bolts down. We're going to use the torque wrench with a 12 mm socket and I'll use the 17 mm wrench to hold the guide pin. We're going to torque these to 17 foot-pounds.
Right, now we're going to install the tire and the lug nuts. Use the socket and snug these down. Now I'm going to lower the vehicle and torque the vehicle. Now we're going to torque these lug nuts down. We're going to use a 19 mm socket in this torque wrench. We sell this torque wrench at 1AAuto.com. We're going to torque it at 80 foot-pounds in a start pattern. You want to do it in a star pattern so that the wheel gets torqued evenly. Perfect. After we do this brake job we're going to want to make sure we pump the brake pedal. There's going to be an air gap between the caliper piston and the brake pads, so you want to make sure you pump up the pedal and get rid of that air gap. Make sure the pedal feels good.
Thanks for watching. Visit us at 1AAuto.com for quality auto parts, fast and free shipping, and the best customer service in the industry.
Shop Products


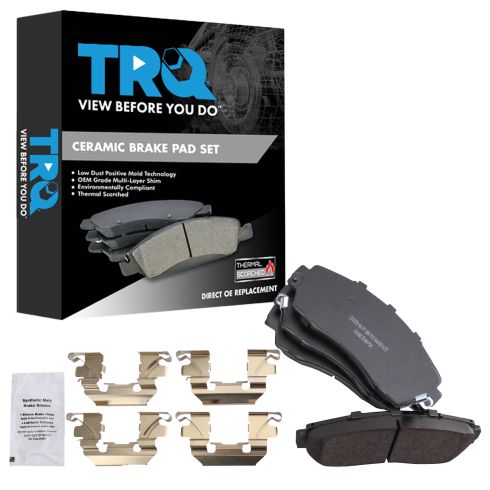
Honda Acura Front Ceramic Brake Pads TRQ BFA73187
Part Details:
- Premium Posi
- Ceramic
- Contact Point Grease
- Hardware
- Ceramic
- Yes
- 58 mm
- 58 mm
- Yes
- 13 mm
- 0.51 in
- 13 mm
- Mechanical
- 2.28 in
- Yes
- Bonded
- Yes
- 18 mm
- 0.51 in
- Yes
- 4
- 18 mm
- Standard Replacement
- 155 mm
- 2.28 in
- 0.71 in
- 155 mm
- 0.71 in
- Yes
- 6.1 in
- 6.1 in
How to Replace Front Brakes 2005-10 Chrysler 300
Check out this video to learn how you can replace the worn or squeaky front brakes on your 05-10 Chrysler 300.
