How to Replace Rear Brakes 2006-13 Volkswagen GTI
Created on: 2018-05-07
How to repair, install, fix, change or replace your own worn, squeaky, fading old brakes on 06, 07, 08, 09, 10, 11, 12, 13 Volkswagen GTI
-
step 1 :Removing the Wheel
- Use a 17mm Socket and a breaker bar to loosen the lug studs/bolts
- Lift and support the vehicle
- Remove the lug studs/bolts completely
- Remove the wheel
-
step 2 :Removing the Caliper and Brake Pads
- Using a 13mm wrench, remove the caliper mounting bolts
- Slide the caliper out and secure it with a bungee cord
- Pry the pads out of their slots and remove them
-
step 3 :Removing the Caliper Bracket and Brake Rotor
- Using a 14mm triple square bit, remove the two caliper bracket mounting bolts
- Remove the caliper bracket
- Using a T30 Torx bit, remove the screw that holds the rotor to the hub
- Remove the rotor
-
step 4 :Preparing the Brake Parts
- Using a wire brush, clean up the caliper bracket where the pads attach to it
- Remove and clean the caliper slide pins, then re-lubricate them with caliper grease
- Using a wire brush, clean up the hub where the rotor sits
-
step 5 :Installing the Brake Rotor and Caliper Bracket
- Reinstall the rotor
- Secure it with the T30 screw
- Reinstall the caliper bracket and hand tighten the bolts
- Torque them to 90 newton metres
-
step 6 :Installing the Brake Pads and Caliper
- Grease the ears of the pads with caliper grease
- Insert the pads
- Push the caliper piston back in using the special tool, a 1 inch wrench, and a 14mm wrench
- Reinstall the caliper
- Tighten the bolts by hand
- Torque them to 35 newton metres
-
step 7 :Reinstalling the Wheel
- Reattach the wheel
- Tighten the lug studs/bolts
- Lower the vehicle
- Torque the lug bolts to 120 newton metres
-
step 8 :Testing the Brakes
- Pump the brake pedal until firm after the job is done, to remove any gaps between the pads and the caliper
Tools needed
-
14mm Wrench
Torque Wrench
T30 Bit
E14 Socket
1 Inch Wrench
17mm Socket
3/8 Inch Breaker Bar
13mm Wrench
Hi, I’m Mike from 1A Auto. We’ve been selling auto parts for over 30 years!
In this video, we're going to be replacing the rear brakes on a 2010 Volkswagen GTI.
All right, first we're going to remove the wheel. On most Volkswagens they have these little caps that cover over the lug bolts. You're going to have to grab the tool from your tire kit and it's like a hook, and you'll grab in the cap and pull it straight out. This vehicle does not have that, so we're just going to take our 17 millimeter socket and our breaker bar and break them loose. Take our lug bolts out. When we get to the last one, I'm going to hold the wheel on because there's nothing that holds the wheel up. You can grab the wheel and pull it off.
Next, we're going to take our caliper off. I'm going to use a 13 millimeter wrench, break it free. They'll spin out by hand. If you have to, you can put another wrench on the inside to hold the caliper slide from spinning. We're going to use the bungee cord around our shock. That'll prevent it from falling.
Next, we'll pull our pads out.
Now we're going to take our caliper bracket bolts out. It's these two triple squares. This is a 14, going to use it on our adapter and a breaker bar. These are really tight. It's good to have a long breaker bar when taking these off. All right, to get the top one we're going to use a short breaker bar so we can fit it, and a long pipe. All right, that's in. We're using the long pipe for extra leverage so that it's easier to break it free. I'll also use a socket and extension for extra leverage. There we go. Now we're just going to use a regular ratchet, and get it from over here too. You can spray a little rust penetrant on this bolt so it comes out a little bit easier. Now hold the bracket on the outside while I pull this bolt out so the bracket won't fall, the caliper bracket. All right, we've got it loose. We don't have to pull the bolt out all the way. Next, we're going to pull this bolt out that holds the rotor to the wheel bearing. I'm going to use a T30 and a ratchet. Pull the bolt out. We're going to take a lug nut and put it on. Next, we're going to take a big hammer and we're going to hit all around this surface here, and that should pop it free. Now we can pull this bolt out and pull our rotor off.
All right, as you can see this is our old rotor and brake pads, and this is our new rotor and brake pads from 1AAuto.com. As you can see if you look at the two, they are identical. They have the same notches, same curves, looks the same. It's got the same quiet shield on the back. The rotors, you can see they have the same lug hole patterns, the same machined surfaces. The back is the same, same height. The new rotor has these extra holes for venting and slots for better performance and handling. It's recommended that you check our website to determine which side the rotor goes on. This happens to be a passenger side rotor. This is, if you order our parts from 1AAuto.com you'll be ready to rock and roll.
Now we're going to clean up our caliper bracket. You want to take these pad slides out. You're going to use a wire brush. These look pretty good on the bottom of here. Not too much, so I'll just put those back in and wire brush them. Next we're going to pull our caliper slide pins out, just pop off. Use a little brake clean and a rag. Going to use a little bit of caliper grease, slide it back in. Stick it back in.
Next, we're going to clean up our hub surface where the rotor will mount. This one's not too bad, but if you have some rust on here you want to use a wire brush. Just trying to get it all cleaned up right around there. That looks pretty good.
All right, we're going to spray our rotor down with brake clean, because from when they're making the rotors they put a protective coating on it, want to get that protective coating off. The protective coating was put on there for rust purposes. Now we're good.
Now we're going to put our rotor up. You're going to line up this hole with the threaded hole, and just snug it up.
All right, put our caliper bracket back on. Slide it onto rotor, like that. We're going to stick our bolts on the back side. We can use our torques M14 and a ratchet. I'm using a universal adapter with my socket so that I can get in there easier. All right, next we're going to torque these bolts. We're torqueing the bolts to 90 newton meters.
Now we're going to grease the pads, we're going to grease the ears and then the surface. Grease the other ear. It's going to go on here. Do the other one. There we go. All right, we're going to attempt to do it with a tool. There's two ears on this tool that are going to line up with the two ears on the pistons, two slots on the pistons. That's good, and then you're going to rotate this adjuster out. Now we're going to use a 1 inch wrench and a 14 millimeter, twist it to the right and as you can see, the caliper is going in.
Now we're going to install our caliper to our caliper bracket. Now we're going to install the caliper to bracket bolts. It is recommended you replace these when doing this job. Now we're going to torque the caliper bolts. The torque for these bolts is 35 newton meters.
Put our tire on. Line the lug holes up, hold the tire, and take our 17 millimeter socket and a lug stud. Then you want to bring it down so the tire's just barely touching the ground. Next, we're going to torque these. We're going to do it in a star pattern. The reason you want to do it in a star pattern is to get the wheel to sit flush to the rotor without it warping. We're torqueing these to 120 newton meters, or about 88 foot pounds.
Be sure that after you do a brake job you make sure that you pump the pedal, because there is going to be an air gap between the caliper and the brake pads. When you first start out, you want to make sure you get that caliper piston to go in.
Thanks for watching. Visit us at 1AAuto.com for quality auto parts, fast and free shipping, and the best customer service in the industry.
Shop Products


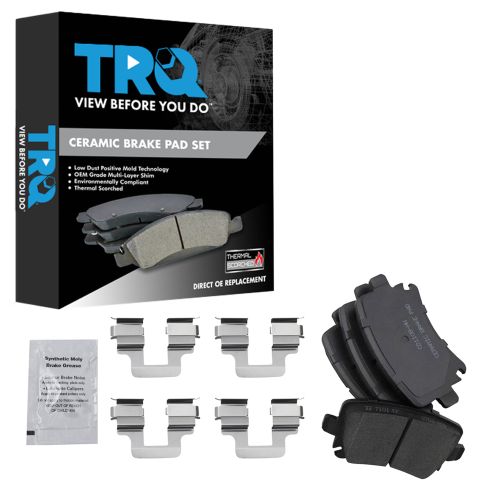
VW Audi Rear Ceramic Brake Pads TRQ BFA73258
Part Details:
- Premium Posi
- Contact Point Grease
- Hardware
- No
- Ceramic
- Black
- Yes
- 0.63 in
- 0.59 in
- Yes
- Yes
- 15 mm
- 0.63 in
- Bonded
- Yes
- No
- Yes
- 4
- No
- Standard Replacement
- 15 mm
- 0.59 in
- No
- Black
- Steel
- 105 mm
- 105 mm
- 16 mm
- 56 mm
- 16 mm
- N
- R-S-R
- No
- 2.20 in
- 4.13 in
- 56 mm
- 2.20 in
- 4.13 in
- No
- Ceramic
- Yes
How to Install Front Brake Pads Rotors 2006-07 Mazda 6
How to repair, install, fix, change or replace your own worn, squeaky, fading old brakes on 06, 07 Mazda 6
