How to Replace Rear Brakes 2005-16 Ford Mustang
Created on: 2020-04-07
Watch this video to learn how to install new rear TRQ brake rotors and pads on your 2005-14 Ford Mustang.
Tools needed
-
13mm Socket
Torque Wrench
15mm Socket
Brake Parts Cleaner
Safety Glasses
21mm Socket
Gloves
Copper Anti-Seize
Wheel Chocks
sanding disc
Brake Grease
Ratchet
Floor Jack
Needle nose pliers
One of the first things we want to do after the vehicle's raised and supported safely, remove your five lug nuts. I'm gonna use you use a 21-millimeter. Remove the wheel off of here. The next thing we're going to do is remove these bolts that hold the caliper to the bracket using a 13-millimeter. Do the same to the top. I'm just gonna start that in there. Use a small pry bar, just kind of work the caliper off there. There it is. We'll carefully set that aside. Before we go too much further, it's important to take a peek at your caliper, right along the piston here and the boot, make sure you don't see any moisture. If you see moisture, more than likely the caliper is no good, in which case, you would replace it. And grab these pads out of here. Next, we're going to move up here and we're gonna remove these bracket bolts, I'm gonna use a 15-millimeter. Get that one loose. There is our bracket. The next thing I'm going to do is take one of my lug nuts. Put it right on here. We'll put this lug nut on here just a couple of threads. You might notice all along this area right here, it looks like it's welded. It's not actually welded. This is just corrosion. A lot of times what happens is moisture comes in between the rotor and the wheel. This is an aluminum wheel. It's going to cause corrosion right along here. And, of course, the rotor is going to be a little bit hard to get off of there. I'm going to leave this lug nut on just a couple of threads, so the rotor can't come off and potentially hurt me. I'm gonna use my hammer, I'm going to give it a bonk. That's gonna break this free and get the rotor off. There we are.
The next thing we're going to do is clean up this surface on the axle. This is the hub surface where the rotor is going to ride. You need to make sure it's a nice, smooth surface. Use a little sanding disc like this or whatever you've got. I'm just gonna take this brush, go right in between these lug studs and the hub there. Get that as cleaned up as possible as well. If you have any crud in here, you can try to get it out as well. So, now, it's going to be time to push back the caliper piston. You're going to notice that the piston has a ridge there and one right here. I'm gonna use some of these or, of course, you can buy the special tool to push these back. You're going to go right inside those grooves with the needle-nose, and then you're going to twist as you push at the same time. Push in, twist, and it's going to turn its way in. If you just push, nothing's going to happen. If you just turn, not much is going to happen. You have to push and turn at the same time. I'm gonna go right up against this because that's going to hold that ear for me. Now, it's time to clean up the caliper bracket. You're going to notice you have these little tins on here. There should be one on both sides. This one already fell off, but whatever, it's the same as this. Take a peek underneath it. You're going to see that this is all rusted. You're going to need to clean that up the best you can. You can use some sandpaper. You can use a small pocket screwdriver. You can use a little brush like this. If you have air, you can use a tool that looks like this and just kinda clean it up the best you can with a sanding disc. Clean this up so there's no raised areas. Do the same on all four corners. So, this looks really good. And I'll be honest with you, I went ahead and I use this. It's the best way to do it.
The next thing I'm going to do is grab these boots and you can pull out the slider. After that, push down, remove the slider from the boot itself. And then, of course, check the boot and make sure it's not torn, really rough, or damaged in any way. If it's ripped, you need to replace it. The last thing you want is moisture getting inside here where the slider is supposed to move freely. Of course, it'll rust up and it'll cause major breaking issues. Do the same to both sides. You'll notice both caliper slider pins are the exact same. You don't have to worry about mixing them up. That's nice. If you look inside the caliper bracket here, you're going to see some lubricant. It's probably going to be pretty dirty. So, we're going to clean it up. Grab a nice collection receptacle. Of course, we have our safety gear on, eye protection and hand protection. Oops, let me put some of this in there and all over the place. Extreme pressure seems necessary. Little bore brush. It's gonna clean up any of the crud that's stuck inside there.
Teeny bit more parts cleaner, and clean this out the best I can. So, we're going to let that completely dry before we continue on with anything with the bracket while that's drying, we're going to move on to cleaning up these caliper sliders. You want to use a rag and get off as much debris as you can. You want these to be smooth so they can slide in and out. You're going to notice along this edge right here, there's a little groove. That's super important to make sure that's clean and smooth as much as possible. Use a little piece of sandpaper, a pick, a screwdriver, whatever you need, and get all the rust and crud out of there. The reason for that is because that's where this boot is going to ride. If you have raised areas, moisture can get in. And like I said, it's going to cause major issues. Okay. I have both those sliders cleaned up. The next thing I want to do is use that same rag, come right through this caliper slider boot, just like that. Spread the boot and roll the rag around or roll it around the rag, I guess. And try to get off any of the crud that's on the inside there. No, yeah. That was nasty. Do the same for this one. Moving along, we've got our old tin here. Our new TRQ kit came with brand new tins. You just want to match them up, make sure they're the same. This looks perfect. We'll set that aside so we can recycle it. At this point, you're going to apply a little bit of moly grease on the contact points where these tins are going to ride. That's important. It's going to help with moisture, and it's also going to help with vibration dampening.
Let's move along to these slider pins and use a little bit more of that moly grease or caliper grease. I'm going to go right along the shaft area here. And then it's also super important to make sure you get up into this little ridged area that I told you about. You don't have to get too much up in there, but at least enough so it's going to coat it, just like that. I'm gonna take one of my boots, slide it on, give it a bunch of twists. That's going to work all the grease right along that whole ridge, lubricate the rest of this slider, and then carefully slide it in. One thing that you want to pay attention to is to make sure you have some of the grease along that edge of the boot, or if you were too worried about it and you didn't think it was going to happen, you can go along the ridge of the caliper right there where that boot's going to ride, give it a nice twist and a tug, make sure it's completely situated. This looks perfect. We're going to do the same over here. We're going to take some parts cleaner, clean up the rotor here, right along the braking surface there. Turn it over, same thing. Tiny bit of copper never-seize right along the mating surface. It's time to install the rotor. When you install the rotors, you want to make sure that the drilled and slotted areas are going in this direction. That looks pretty great.
Next, I'm gonna grab one of my lug nuts. Next, we're going to just take a big old nut. We're going to take our lock nut. Just kind of screw it on like that just to hold the rotor from moving around. Last thing we want is any rust getting in between the mating surface of the rotor and the axle. One thing I like to note is if your bolts look like this and they have some thread locker on them, I would make sure I clean all that off and then reapply new thread locker. It's time to install the caliper bracket. We've got our nice clean bolts, a little bit of thread locker. Start in both these bolts. Now, I'm going to bottom them out real quick. Torque these to 76 foot-pounds. Time to get the brake pads on here. There's nothing really you have to pay attention to on these in exception of this area right here. That's going to go up facing towards the top of the caliper. Just like that. Next, we're going to take the caliper and we're going to apply a little bit of that moly grease right along the piston and along these ears right where they mate onto the pads. Some people skip this point. I definitely emphasize on doing it. It's going to help with noise reduction, vibration dampening, and, of course, keeping moisture out of there. If you look under here at the caliper piston, you see those grooves that we use to turn back the piston. Well, when you're done, you need to have those grooves facing straight up and down on the caliper. So, basically, that hole is going to be facing like it's going to be going up through the hole, and then one right here is going to be facing down in a way. If it's crooked a little bit, it's not going to go on the pad right. It slides right down over, my two caliper bolts here, brand new thread locker, turn the slider.
Now, we're going to bottom out these bolts. Those are snug. Let's torque them to manufacturer specifications. Torque these to 24 foot-pounds. All right. So, at this point, you would just do the same to the other side of the vehicle obviously, let's get the wheel back up on here. I'm gonna start on all the lug nuts, we'll bottom them out, and then we'll torque them to manufacturer specifications. Let's torque these lug nuts to 100 foot-pounds in a star pattern. Torqued. We're just going to pump up the brake pedal until it's nice and firm. Do that nice and slow. It's getting close. Oh yeah. There it is right there. I've got a nice firm brake pedal. It's not sinking any further into the floor. Let's go check that brake fluid. So, right under the hood is where you're gonna check your brake fluid. You have your master cylinder, you can see a maximum line. And, of course, there's a minimum line. Just wipe off this area along the lid, make sure there's no dirt or debris, turn this counter-clockwise and lift it up. You take a peek inside and make sure that it's full. If it's not at the maximum, you're going to add some. If it's above the maximum, take a little bit out. This little piece right here, you're just kind of push that in like that. If you need to know what kind of brake fluid to use, generally speaking, it'll be located right on the top of the cap. This one says use only Dot 3 brake fluid. It's very important to use only Dot 3 brake fluid. Once you know it's full, make sure you reinstall the cap, wipe down the area, close the hood, take it for a road test.
Shop Products


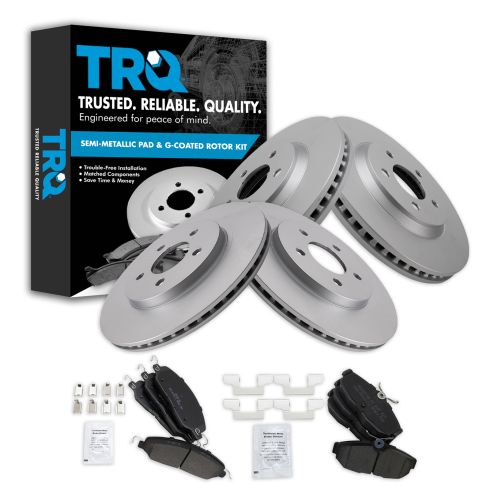
Ford Mustang Front & Rear Semi-Metallic Premium G-Coated Brake Pad & Rotor Kit TRQ BKA23299
Part Details:
- 12.44 in. (316mm)
- Solid
- Premium G-Coated
- Semi-Metallic
- Vented
- Premium Posi
- 11.85 in. (301mm)
- 5 Lug
- (1) Rear Semi-Metallic Brake Pad Set
- (1) Front Semi-Metallic Brake Pad Set
- (2) Rear Premium G-Coated Brake Rotors
- (2) Front Premium G-Coated Brake Rotors
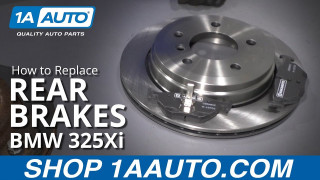
How to Replace Rear Brakes 2001-05 BMW 325Xi
Learn what steps are needed to remove the old rear brakes and prepare and install new ones with this how-to video
