How to Replace Rear Brakes 2001-07 Volvo V70
Created on: 2019-02-20
How to repair, install, fix, change or replace your own worn, squeaky, fading old brakes on 01, 02, 03, 04, 05, 06, 07 Volvo V70
Tools needed
-
Large C-Clamp
Hammer
Socket Extensions
Pry Bar
Small Hook
Trim Tool Set
7mm Allen Wrench
Brake Fluid
Anti-Seize Grease
Drain Pan
Painter's Tape
Ratchet
Needle nose pliers
T25 Torx Driver
11mm Socket
13mm Socket
Torque Wrench
Rust Penetrant
19mm Socket
Block of Wood
Flat Blade Screwdriver
Paper Towels
Copper Anti-Seize
Center Punch
10mm Socket
Wire Brush
Cloth Rags
1/2 Inch Breaker Bar
Hi, I'm Mike from 1A Auto. We've been selling auto parts for over 30 years.
Hey, everyone. Sue here from 1A Auto. Today on our '03 Volvo V70, I'm going to show you how to do a rear brake job. If you need this part or any other part for your car, click on the link below and head on over to 1aauto.com. 19 millimeter socket and a breaker bar, and I'm going to break the lug nuts free. Okay. Now the car was in the air, we can remove the lug studs.
Remove the bleeder screw boot cover and it's just sometimes I have to use a flat blade to pop it up here. Put that aside. The bleeder screw is an 11 mm, so want to make sure these break open. I just loosened it up and then I just slightly bottom it out because I'm going to have to release that with the caliper off.
Now we're going to remove the anti-rattle clip. To do that, I'm just going to take a pry bar, pry over the edge like that, and then undo the hooks. Just gets a lot of the brake dust and road debris in there. They're pretty hardy. They won't break. I'm just going to work it. There you go. So I'm going to end up putting that in the vice and bending it back just at that angle right there. It's not not a big deal. Now we're going to just remove the covers on the slider, caliper sliders. They are just little dust cover to protect them from the weather, make it easier so that they don't seize up. And this was an Allen head, and it's an Allen seven, number seven, metric seven. We're going to release the caliper slide pins.
Undo the ABS clips here where it attaches to the flex hose, just to give me a little bit more flex on the caliper, because we're going to move that aside. I'm just going to pull those sliders right out. You've got a top one and a bottom one. I'm just going to grab a little pry bar. Just going to pry the caliper off the bracket. The rear shoe, I'm sorry, the rear pad should come out with it just like this. And as you can see it's attached by the spring clips that pop in the piston. Snap those out. You can just let this hang. There's not much weight to it. If there was a lot of weight to it, I would choose to use my caliper bracket arm, but there's no weight to it. There's no stress on that flex hose.
Slide the outer pad out. See how it slides on that bracket. You have two mounting bolts for the caliper bracket to knuckle. There's one here and one there. It's a 13 mm socket. Just going to break that free. I'm going to break the top free before I pulled that one all the way out. Something tells me someone last this brake job, put a lot of a thread locker on here. Oh look at that. Look how much they loaded that up. It doesn't need to be that much. Remove that bolt and you can slide that bracket right out.
Now all I will have to do is take off this mounting bolt on the hub. It's a 10 mm socket and I'm just going to try to break it quickly and hold on to the rotor or at the same time. There's your rotor.
Here we have our new brakes for our '03 Volvo V70 from 1A Auto. Nice thick pads. Comes with the silencer is on the back. The shim's all ready. Nice riveted clip. The rotor has nice cross cut. Nice machine drum for the e-breaks. Comes with the specs mounted on it. Here's the one that we took off, pretty much an aftermarket set up. Pads are worn halfway through. If you need this part or any other part for your car, click on the link below and head on over to 1aauto.com.
Now before we install our rotor, I like to clean this hub up. So I'm just going to take a wire brush to it. Just take any rust peaks off because that will cause the rotor to, it can cause a pulsation and it's just going to not seek correctly. So it'll go down the road and have a little pulse. Just spray it down, get all that rust off. Put a little copper high temp anti-seize the points so it doesn't rust. Now this Volvo comes with one mounting bolt and there's multiple holes to place that in there. There we go. That was that little 6 mm bolt with a 10 mm socket head. 10 mm socket, let's just bottom it out.
Now before we install the caliper bracket, I'm going to use my brush and I'm going to clean the spot where the actual pads ride because you want those to have a smooth gliding mechanism. They have to move back and forth or they'll actually wear out unevenly. Perhaps you've had brake pads that do that. All the key was is that they didn't slide the bracket. You didn't have a caliper problem, they weren't sliding properly. Now this was the mounting bolt for the caliper bracket to knuckle. Remember when I took this apart, it was a lot of force, so I'm going to clean all the old thread lock out of there and add just a dab of new stuff. Before I remount this.
Here's the slider for the caliber and this is what it looks like prior to cleaning it and it's just all full of the gunk. That will not slide nice even stroke through that caliper bushing. I took a wire wheel brush to it and I cleaned up all that gunk. We'll just apply some brand new caliper grease so it slides properly. So I'm just going to take a pair of welders clamps and I'm going to push my piston back. This has ABS, so we can't just push the piston back without opening that bleeder screw. So I broke it free to make sure it breaks free prior to doing any repairs on this. I'm just bottoming it out. I'm not actually a person that piston back yet. It's 11 mm socket. So I'm going to break open that bleeder screw.
I've already got a catch bucket down below so I'm going to make sure I name for that. Take the pliers and start compressing the piston. I'm going to bottom this piston all the way out. This is a good time also that I can actually look for leaks around the dust boot or I make sure the piston doesn't have any swag to it, like hold up. It doesn't compress all the way.
So it looks good. I don't see any fluid coming out. There's no tears in the dust boot and the pistons flush. So now with that clamped tight holding that piston in, I can close up my bleeder screw. Just snug it because we're going to open it up again to gravity bleed it once the shoes are on. So I can disconnect my clamp. The inner pad, line up those three springs. I like to do it in one even push. The outer pad, I can set it right in here, right in the groove.
Here's the caliper grease that I'm going to put inside that slider boot on both caliper sliders. Just going to coat that rubber piece. Now I can mount that right up and get my new like sliders that I cleaned. So here's my new sliders. I'm just going to add a little grease to them and line them right up and slide them into that boot. Make sure I don't leave any of those bristles behind. So the slider pins are an Allen head number seven. Just in case you put it back in the pile and didn't know what number it was. I'll be torquing this down also. The torque spec is 22 ft lbs. So I'm just going to bottom these out. I like to get them both started in the thread before I actually tighten them.
Now, I can reassemble my ABS wire to the flex hose. I'm going to install our dust cover boots on the slider pins. Now I'm going to install the anti-rattle clip. I like to put the piece in here first. If you need to use a little hammer, feel free, to tap it in. I'm going to install the ... Like that. See if I can get it to go line up and then I'll just tap it in. Make sure they're flush, so the bar goes behind the ears of the caliper and hit both parts of the bracket. That's called an anti-rattle clip. It stops at caliper from flexing. Now I'm gonna open the bleeder screw and I'm going to let this gravity bleed till all the air comes out.
I've got a steady stream of brake fluid with no air bubbles, so I'm ready to close off this leader screw. Just snug it. Now we clean that up and then put the boot back on. After I've done the breaks, I'm going to check my reservoir and add brake fluid. Now the reservoir is located right here in front of the driver's seat of the engine compartment. You could see the cap clearly says brake fluid. It tells you .4 brake fluid. This is a European car. Take the cover off. I can see the markings on the side. There's a max and a min and I'm right at the minimum line. So now I'm just gonna add some fluid, top it off. Now that the level's at the proper level, I'm going to reinstall my cap. Going to go in, pump my brakes, see how the pedal feels and see if I need to do any additional break bleeding. Brake pedal's nice and firm. It's time to put the tire on and road test it.
Now I'm going to install my tire. Now put all the lug nuts studs, shall I say, in. Just tighten them up by hand. Lower the vehicle, then we'll torque it to specs. Wheel torque for this vehicle is 103 ft lbs. I'm going to torque it in a star pattern.
Thanks for watching. Visit us at 1aauto.com for quality auto parts, fast and free shipping, and the best customer service in the industry.
Shop Products


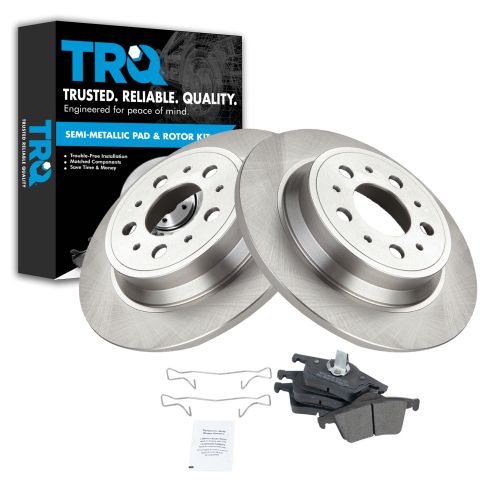
Volvo S60 S80 V70 XC70 Rear Semi-Metallic Brake Pad & Rotor Kit TRQ BKA10576
Part Details:
- Semi-Metallic
- Premium Posi
- (2) Rear Brake Rotors
- (1) Rear Semi-Metallic Brake Pad Set
How to Replace Rear Brakes 1994-2002 Dodge Ram 1500
Watch this video to learn how to replace the rear drum brakes and hardware on your 94-02 Dodge Ram.
