How to Replace Rear Brake Hose 2000-06 GMC Yukon
Created on: 2020-04-14
This video shows you how to install a new rear brake hose on your 2000-06 GMC Yukon.
Tools needed
-
12mm Socket
Torque Wrench
16mm Wrench
Socket Extensions
Pry Bar
Jack Stands
Liquid Thread Locker
Brake Parts Cleaner
Flat Blade Screwdriver
Brake Caliper Hanger
Socket Driver
Paper Towels
Copper Anti-Seize
Wheel Chocks
Brake Grease
Floor Jack
1/2 Inch Impact Gun
22mm Socket
You can take the center cap off, use a straight blade screwdriver. Take that off. Use a 22-millimeter socket to take off the lug nuts. Take the wheel off. Take these two caliper bolts out. I'm going to use a 12-millimeter socket, and then a 16-millimeter wrench just to hold the slide from spinning. Loosen these up. Now, I'll just use a screwdriver to pry the caliper off. Pull that out. And you can use a caliper hanger and just support it from the upper control arm right there, just to make sure there's no tension on the hose. Slide it over here. Take the brake pads off, just use the same straight blade screwdriver. And take an 18-millimeter socket, take these two caliper bracket bolts out. Take these bolts out and slide the bracket right off. I want to separate the bracket from the caliper. I'm going to use a 12-millimeter socket to take these two bolts out.
Now, before we put these anti-rattle clips or brake pad clips on, just use a little brake grease. Just put it right there. It's just going to prevent some corrosion on the caliper bracket. And you can put the clip down and give it a nice thin coat right on top. Do the same for the other side. And take the caliper bracket, slide it in position. Take the caliper bolts get those started. You can put some thread locking compound on them. Now, I'm going to torque these bolts to 122-foot-pounds. Now, take the brake pads with the wear indicator facing to the top. Slide those in position. Now, we're going to install this clip on the caliper itself. Just line it up. This piece goes towards the inside and just slips in like that. That looks good. Now, take the caliper and line the caliper up. Get the bolt started. Now, I'm going to use a 16-millimeter wrench to prevent the caliper slide from spinning, and then tighten this bolt to 31-foot-pounds. Do the same on the top one.
Now, we want to top off the brake fluid before we attach the lines, or even disconnect the lines, because we don't want this brake fluid to go too low, or then it's going to be harder to bleed the system. And take the cap off, wipe it off first with a rag. Make sure you use the appropriate brake fluid. I'm just going to top it off all the way to the top. Looks good. I'll just put the cap back on. Now, I'm going to use a nine-sixteenths line wrench and slide it over the fitting over the line. Just try to loosen it up. Just pay attention to the line, make sure the line isn't twisting. If it's twisting a little bit, you can just give it a couple taps with a hammer. It's looking good. So that's pretty loose, so that's good. And then I'm going to...before I take this off, I want to take the clip off that holds the hose on to the bracket right there. You can try to use a pick. Just slide it in here and then just try to slide it out. If it's pretty rusty, it's probably not going to come out that easy. Just work it back and forth. And sometimes you can get a straight blade screwdriver in between here just try to pry it out. Here we go. You can just pry that off, right? Now, I'll take this fitting off. It's a little bit tedious, but...
Now, you kind of have to work fast a little bit, but don't stress out. You don't have to work too fast. You can always put more brake fluid. Add more brake fluid to the master reservoir if you have been doing this for too long. All right. So with that out of the way, I will take the hose off. I'm just going to use a pry bar and a hammer. Just give it a tap on the top. There we go. And slide that out. Now, before I put the new hose in, I just want to clean this hole out. Now, you want to take the new hose, and it is indexed. There is a smoother part on the bottom, so line that up with the bracket and that's good. And then put that clip on. We can get a new clip to replace the clip. Slide that in position, use a hammer, give it a tap. It's good. And just take the fitting, line the fitting up. You want to make sure it's lined up real good, and then you should start it by hand, but this fitting's rusted on there pretty good on the line, so I'm going to have to start it with a wrench, right. And then tighten this up. Sometimes it helps to use the next size wrench just for getting this started. Makes it a little easier. And then when you go to tighten it up, use the correct size and go back for the nine-sixteenths wrench and snug this up.
Now, take this cap off of here. Take your banjo bolt, put some new washers on them, or gaskets, copper gaskets. We'll line this up, and then we're going to torque this banjo bolt to 30-foot-pounds. Now, I'm going to take the cap off the bleeder right here. Just use a pick or something, or even a little screwdriver. And make sure you have a drain bucket underneath, or something to catch the fluid, and loosen up this bleeder screw. I'm just going to let it gravity bleed first, right? Now, take your cap off, double check your fluid level. Before you bleed it, top it off.
Now, we had the brake line off for about 10 minutes. I only lost about that much fluid, which isn't too bad. So it only went down a little bit. So, if you had to go about 10 minutes, it's probably acceptable. Put the cap back on. Now the fluid started coming out of the bleeder, so it's gravity bled. I'm going to use a 10-millimeter wrench snug this up, and then if you have any other calipers or brake hoses to replace, now you can move on to the next one. Do all those before you perform a complete brake system bleed.
Now pump up the brake pedal, just go slow. So the pedal's still very spongy. Now what we're going to do is hold the brake pedal down and open the bleeder up. So with someone else pushing down on the brake pedal, go ahead push it down. When it's holding, I'm going to open up the bleeder slowly. You can see some air bubbles come out, then I'll close it. Then I'll say, "Okay, you can let up, and then push it down again." And have them hold it, open it up. More air bubbles came out. "Let up, and hold it." Some more air bubbles came out. And it doesn't look like there's anymore air, so I can close this one up, tighten that, put the cap back on. Just spray this area down with some brake parts cleaner and move on to the next wheel. Now, you want to double-check your brake fluid level. Just use a rag, wipe it down, give it a shake. And there's a max line and min line. Double-check it. It looks good. Adjust accordingly.
If for any reason, before you were bleeding the brake fluid, or before you were replacing the calipers, if the fluid level got below the master cylinder, you're going to need to do an automated bleed. Afterwards, you're going to need a scan tool and a pressure bleeder. But if you had the fluid up to par, you should be all set. And reinstall the wheel. Put the lug nuts on. Now, I'm going to torque these lug nuts to 140-foot-pounds in a star pattern to tighten the wheel down evenly. And just go around again, double-check. And reinstall the center cap.
Shop Products


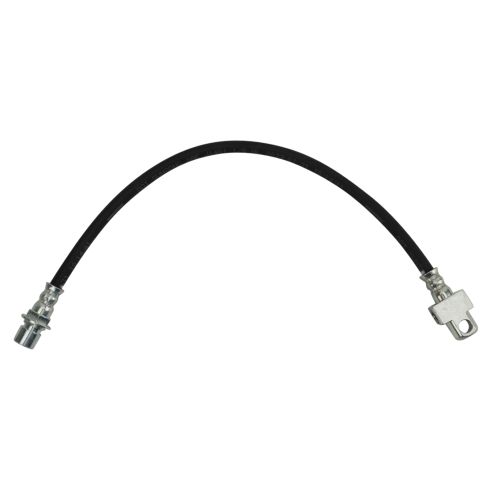
Chevrolet GMC Cadillac Rear Center Replacement Brake Hose TRQ BLA62183
Part Details:
- 0.44 in
- 16.92 in
- PET Reinforced EPDM Rubber
- No
- 430 mm
- 0.38 in
- Replacement
- Female
- Female
- Yes
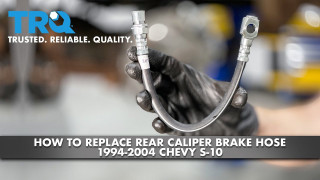
How to Replace Rear Caliper Brake Hose 1994-2004 Chevy S-10
This video shows you how to install a new TRQ brake line engineered to fit your 1994-2004 Chevy S-10.
