How to Replace Rear Brake Caliper 2004-12 Chevy Malibu
Created on: 2020-08-21
This video shows you how to a rear brake caliper on your 2008-2012 Chevy Malibu.
Tools needed
-
Torque Wrench
19mm Socket
Brake Parts Cleaner
Safety Glasses
Pliers
Pick
Gloves
Hose Pinch-Off Pliers
Wheel Chocks
Brake Grease
Ratchet
Floor Jack
Needle nose pliers
Okay, friends. The first thing you need to talk about anytime you're working on your vehicle is safety. You want hand and eye protection. With that said, safely raise and support your vehicle so the wheels are off the ground. Once you've done that, we're going to remove all five of our 19-millimeter lug nuts. Remove your wheel. Now that the wheel's off, we have a nice, clear view of our caliper. The first thing I always like to do is pinch off the flex hose so there won't be any fluid coming out of it. You will still have fluid coming out of the caliper though, so make sure you have a nice collection bucket for recycling the fluid. Now, we're going to break free our banjo bolt here, and then we're just going to tighten it back up a tiny bit. There we are. The reason why we did that is because it's going to be much easier to do it while the caliper is still mounted, but we want to make sure it's closed so no fluid comes out and potentially gets in our eyes or face.
The next thing we need to do is get our emergency brake cable out of its little bracket area here. To do that, you're going to want to grab onto this little nub right here and just move it around. Make sure it's broken free. Next, I'm going to go ahead and grab on between this lever here and up here. Try to squeeze these together and get my line out of the area it's in. There we are. The cable's free. The next thing we need to do is grab onto our cable and spin it until you can see the little push tab come around. There's going to be one on this side, and then there'll be one on the forward side as well. Take a pick or a screwdriver or whatever you might happen to have, press on that tab, wiggle the cable around a little bit until it comes a little free. Do the same on the other side, and then draw it up and out of your caliper. There we are.
We're going to remove our caliper mounting bolts. There's one here and there's one located up top. There's one bolt. I'm gonna leave this one in a little bit and we're going to fully remove our banjo bolt. Just be careful because brake fluid will come out. Let's go ahead and remove that last bolt. Make sure that you don't have any gaskets left over on your flex hose.
Before you go ahead and install your brand new caliper. It's important to make sure that you lubricate everything and double-check everything. Go ahead and take off these caliper slider bolts right here, and then separate the two pieces. At this point, what we would want to do is take off our tins. And then I also like to take off the sliders. I'll just grab onto this and I'll pull it right out. The reason for that is because I want to make sure that there's a sufficient amount of lubricant inside here. If there isn't enough, there's a possibility that water could get in and, of course, cause damage. Open this up, put on a whole bunch of lubricant, and slide it right on back in there. Do the same to both. Now that we finished up with the sliders, we're going to go right along this area here, where the tins are gonna go. Do this on both sides of the caliper bracket. Now, let's go ahead and put our tins on there. Now, for the muscle part of the caliper, we're going to go ahead and lubricate on the piston right here, where it's going to be pressing directly against the pad. And then, of course, both of these ears.
Time to make our way back over to the vehicle and we're gonna stick this bracket. We'll take the two mounting bolts and I always like to use a little bit of red threadlocker. Go ahead and line it up with the knuckle back here, start in both of your bolts. We'll snug them up and then torque them to manufacturer specifications. Torque these to 96 foot-pounds.
It's gonna be time to install our brake pads. It's important to remember the one with the brake squealer is going to go on the inside portion of the rotor. Take your brake caliper, slide it right over those pads and sliders, and, of course, insert your bolts. We'll snug them up and we'll torque those to specs as well. Now, we're gonna torque this to 26 foot-pounds. Go ahead and hold onto your slider so it can't spin. There it is. Now it's gonna be time to get our e-brake cable back onto the caliper. Just gonna put it right along here, start it in there, just like that. I'll come along the backside here, lift up on this, and then slide it in. And now, I'm just gonna make sure that I lock it in. Give it a nice tug, make sure it's secure. Let's get this little cover out of here. Set it aside because we're going to use it in our old caliper. Now, we're going to need our banjo bolt, double-check it to make sure there's no gasket. Your gasket should look a little bit like this. Once, you're sure that it's clean and does not have a original gasket, put on a brand new gasket. Put it through your line, put on your other gasket. Now, when you put your hose on, you want to put it so it's aiming off towards the inner portion of the vehicle. You definitely don't want to put it so it's facing up because then it will be hitting up against the wheel. Let's go ahead and snug this up and then we'll torque it to 37 foot-pounds. Torqued.
Let's get this off of here. Now, it's gonna be time to bleed the brakes. Next, you want to check your brake fluid level. Make sure you have plenty of brake fluid. If you don't and you need to top it off, you need to use DOT 3 brake fluid. Okay. So, our next step is to bleed the brakes. We want to make sure there's no air in the system. You can either do that by yourself with a special tool or, of course, you can do it with a second person. I have a second person, so that's the way I'm going to do it. I have them inside the vehicle, they're going to pump up the brake three to five times and then hold it. Once they're holding, we're going to open this up and we're going to wait for air/brake fluid to come out. We're going to repeat the process several times until we see no more air coming out of this bleeder screw. Go ahead and pump up the brakes, please. Okay. I heard a lot of air come out of that one, but no fluid. Close it up. Here we go again. Go ahead and pump. So, there's the fluid and air that I was talking about. You saw those little air bubbles. We want to make sure that there's no air inside of your brake system. We need to continue.
So, on that last time around, I didn't see any air come out of the system, but it's always good habit to just go ahead and do it at least one more time just to be sure. Go ahead and pump. All right. So, see, there you go. A little bit more air. Here we go again. So, as you saw, I had two times of bleeding the caliper with no air coming out of it. That should be good enough. If you want to continue, that's completely up to you, we'll call it your prerogative. The next thing we need to do is pump up the brake and hold it one more time. Go ahead. Now, I'm going to try to spin this wheel. We want to make sure that the wheel does not turn at all. That means that the brake's working as it should. Go ahead and let off the brake, please. Give it a little spin, that spins perfectly. That means that everything's functioning as it should that way as well. We also have the e-brake cable here. So, we want to make sure that that's working as it should. Can you please push on the e-brake? Give the wheel a turn. Nothing's happening. The e-brake works perfectly. Go ahead and remove it. Okay. He released it and it spins. This is great.
Now that we tested the emergency e-brake this way, we want to make sure once we get the wheel back on here and it's on the ground, you test the emergency brake with the force of the vehicle. We want to make sure that it works 100%. Let's clean this down. Forget to put it on your bleeder screw cover. Wheel up on here. We'll start on the lug nuts, and then we'll torque them down to 100 foot-pounds. Let's torque these to 100 foot-pounds and a criss-cross manner. Torqued. Let's go ahead and check and top off our brake fluid.
Shop Products

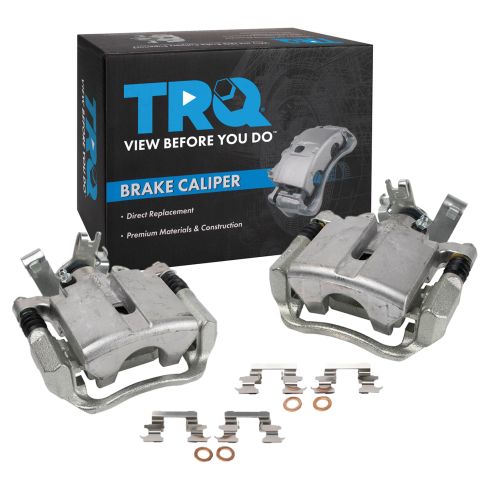
Chevrolet Pontiac Saturn Rear Driver & Passenger Side 2 Piece Brake Caliper Set TRQ CLA35392
Part Details:
- Bracket
- 2 Piece
- Hardware
- (1) Rear Passenger Side Brake Caliper
- (1) Rear Driver Side Brake Caliper
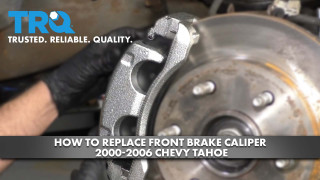
How to Replace Front Brake Caliper 2000-06 Chevy Tahoe
This video shows you how to a (front/rear)brake caliper on your 2000-2006 Chevy Tahoe.
