How to Replace Rear Backing Plate 1999-2006 Chevy Silverado
Created on: 2014-05-30
Learn how to install a new rear brake backing plate on your 99-06 Chevy Silverado. 1A Auto will show you how to do it in this video
-
step 1 :Removing the Wheel
- Loosen the lug nut covers with a 22mm socket
- Pull off the center cap
- Loosen the lug nuts with the vehicle on the ground
- Raise the vehicle with a floor jack
- Secure the vehicle on jack stands
- Remove the lug nuts
- Pull off the wheel
-
step 2 :Inspecting the Brakes
- Check for gouges on both sides of the rotor
- Check the thickness of the brake pads
-
step 3 :Removing the Brake Pads
- Remove the two 12mm bolts from the brake caliper
- Attach a large C-clamp to the brake pads
- Turn the C-clamp to push in the brake caliper pistons
- Alternatively pry the pads into the caliper with a flat blade screwdriver
- Pull the caliper aside
- Pry the brake pads off with a flat blade screwdriver
-
step 4 :Removing the Brake Rotor
- Remove the two 18mm bolts from the brake caliper bracket
- Pull off the brake caliper bracket
- Pull the rotor off
-
step 5 :Disconnecting the Emergency Brake
- Remove the 8mm bolt from the emergency brake bracket
- Pull off the emergency brake bracket
- Pull off the emergency brake shoe
- Pull the emergency brake cable out of its bracket
- Pull the emergency brake cable off its clip
-
step 6 :Removing the Backing Plate
- Remove the four 18mm bolts from the backing plate
- Strike the back of the backing plate with a hammer
- Pull the emergency brake assembly forward
- Break the backing plate apart with a hammer and screwdriver or wire cutters
-
step 7 :Installing the New Backing Plate
- Push the lower part of the backing plate onto the emergency brake assembly
- Push the upper part of the backing plate onto the emergency brake assembly
- Connect the two parts of the backing plate with their tabs
- Slide the backing plate back
- Push the rubber pad into place between the backing plate and the emergency brake
- Insert the four 18mm bolts into the backing plate
-
step 8 :Reconnecting the Emergency Brake
- Pull the cap out of the emergency brake adjuster
- Push the emergency brake rod in through the backing plate
- Push the cap back into the emergency brake adjuster
- Clip the emergency brake cable into the rod
- Grip the emergency brake spring with vise-grip pliers
- Pull the spring up
- Have an assistant pull the emergency brake cable into the bracket
- Put the emergency brake bracket into place
- Insert the 8mm bolt into the bracket
- Push the emergency brake shoe into place
- Line up one brake shoe tab onto the adjuster
- Pry the other tab onto the adjuster with a flat blade screwdriver
- Turn the adjuster wheel with a flat blade screwdriver
- The adjuster should be set so that the brake rotor slides on with some resistance
-
step 9 :Installing the New Brake Rotor
- Slide the rotor on
- Thread on one lug nut to hold the rotor in place
- Put the bracket back into place
- Start the 18mm bolts by hand
- Tighten the bolts to 85 foot-pounds of torque
- Remove the placeholder lug nut
-
step 10 :Installing the New Brake Pads
- Install the new brake pads into the bracket
- Put the caliper on
- Thread the two 12mm bolts by hand
- Tighten bolts to 30 foot-pounds
-
step 11 :Reattaching the Wheel
- Slide the wheel into place
- Start the lug nuts by hand
- Tighten the lug nuts preliminarily
- Lower the vehicle to the ground
- Tighten the lug nuts to 100 foot-pounds in a crossing or star pattern
- Reattach the center cap
- Tighten the lug nut covers with a 22mm socket
-
step 12 :Testing the Brakes
- Pump your brakes repeatedly until they feel firm
- Test your brakes at 5 miles per hour and then 10 miles per hour
- Road test the vehicle
Tools needed
-
12mm Socket
Large C-Clamp
Hammer
Flat Blade Screwdriver
Torque Wrench
Jack Stands
18mm Socket
8mm Socket
Ratchet
Floor Jack
Wire Cutters
22mm Socket
Brought to you by 1AAuto.com, your source for quality replacement parts and the best service on the Internet.
Hi, I'm Don from 1A Auto. I hope this how-to video helps you out, and next time you need parts for your vehicle, think of 1AAuto.com. Thanks.
In this video, we're going to show you how to replace the rear wheel backing plate on this 2002 Chevy Suburban. We show you on the passenger side, but it's the same procedure on the driver's side. The items you'll need is new rear wheel backing plate from 1AAuto.com; an 8mm, 12mm, 18mm and 22mm socket and ratchet with a piece of pipe for leverage; an 18mm wrench; hammer; a flat blade screwdriver; large C-clamp; torque wrench; jack and jack stands; and locking pliers.
Start off by loosening up these lug nut covers, and we'll fast forward as Don does this. Once those are all loosened up, you can pull the hub cap free. You want to loosen the lug nuts preliminarily, raise the vehicle and remove them the rest of the way. Unless you have air-powered tools. Then, you can do while it's up in the air.
Then, to inspect your brakes, just run your finger along the rotor, check for any deep grooves, look in here for the life of this brake pad and then through here for the life of the other brake pad.
Remove these two 12mm bolts, and we'll fast forward as Don does that. In order to get the caliper off, you can either use a C-clamp like this and press in on the caliper and loosen it, or you can also use a screwdriver and pry out between the caliper and the brake disk to reset the piston, make it easier to get it off. Pull the caliper free and set it aside.
Pry out the brake pads. Remove these two 18mm bolts, and just use a piece of pipe to help break it free and we'll just fast forward as Don removes those two bolts. Pull your caliper bracket off, and pull the rotor off.
There should be a bracket underneath here, held in with an 8mm bolt. So, you'd want to remove that next. Ours is missing. After that, you can pull your e-brake shoes forward and then hit them down. You just want to pull it over the hub. Pull out on your emergency brake cable and just pull it from the bracket and then unhook it.
You want to remove these four 18mm bolts and you can only really use a wrench back here. Just use an 18mm wrench and then another wrench just for some extra leverage to help break them free. We'll just forward as Don removes those four bolts. Hit the back of your backing plate with a hammer and this will help you pull this first front apart for your e-brake forward. Depending on the condition of your backing plate, you can either chisel it off with a screwdriver and a hammer and just break it into pieces and pull it off or you can use wire cutters and just snip at it until you can pull it off. As long as it's rusted like this, it shouldn't be too hard to get it off. We'll fast forward as Don just breaks that apart and do as we say, not as we do: make sure you're wearing gloves, so you don't end up cutting your hands on the rusty metal.
On the right, used to be our old backing plate. On the left, is the new one from 1A Auto and you can see, it's a two-piece one that will make it easier and quicker to install. Take your backing plate and you want to clip the slot on the side over your e-brake assembly and slide the whole backing plate up and push it back. Take the top part and just slide it on to those tabs. Slide the whole assembly back. Then, take this rubber cap and feed it up in between the e-brake assembly and your backing plate. Just push it into place and then replace those four 18mm bolts. Again, we'll just fast forward as Don does this.
Pull out this cap on your e-brake adjuster and push this rod back in behind the backing plate and then push the cap back into place. Clip in your emergency brake cable into that rod and then, we recommend two people for this part. What you want to do is lock on to the spring with locking pliers and pull it forward and have another person pull the e-brake cable back into that bracket. Now, just replace that bracket in the 8mm bolt. Then, we'll fast forward as Don does this. Now, take your e-brake shoes and put them back over the hub, and then, line up the e-brake shoe tabs into the adjuster. Once you get one of them, just use a screwdriver to pry the other end in. Use a flat blade screwdriver and a hammer if you need it, to just turn the adjuster, so that when you go to put the rotor on, there's just a little bit of resistance.
Slide your new rotor into place and then twist on the lug nut to just hold the rotor in place while you put the caliper bracket back on. Put your caliper bracket back into place and replace those two 18mm bolts. We'll fast forward as Don tightens those up. You want to torque these to about 85 foot-pounds.
Push your brake pads back into place and then put your caliper back down into place and replace those two 12mm bolts. We'll just fast forward as Don does this and tightens them up and you want to tighten this to about 30 foot-pounds.
Put your wheel back into place and then replace your lug nuts and tighten them preliminarily and we'll fast forward as Don does this. Lower the vehicle and torque the lug nuts to a hundred foot pounds in a crossing pattern. Replace that hub cap and tighten up each of your lug nut covers. Before taking the vehicle out on the road, you want to just pump the brake pedal until it firms up and then to a stopping test from five miles per hour then ten miles per hour then you're all set.
We hope this video helps you out. Brought to you by www.1AAuto.com, your source for quality replacement parts and the best service on the Internet. Please feel free to call us toll-free, 888-844-3393. We're the company that's here for you on the Internet and in person.
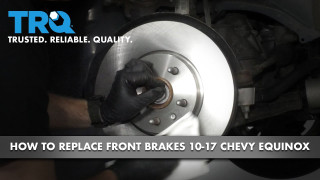
How to Replace Front Brakes 2010-17 Chevy Equinox
How replace the old brakes on your 10-17 Chevy Equinox with new, quality TRQ parts.
