How to Replace Rear Auxiliary Outlet 2004-14 Ford F 150
Created on: 2019-06-05
If the rear auxiliary outlet needs replacing in your 09-14 Ford F150, check out this video and learn how to do it yourself. 1A Auto will show you how!
-
step 1 :Removing the Rear Auxiliary Outlet
- Open the rear center console pocket door
- Remove the two Phillips screws
- Remove the rear center console
- Disconnect the auxiliary outlet electrical connector
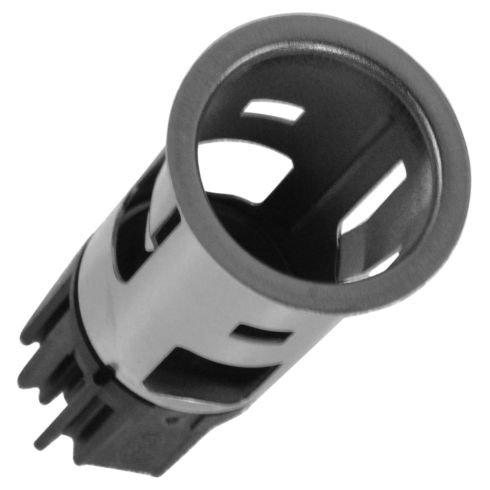
- Pry the locking tabs to remove the auxiliary outlet
- On the inside of the outlet, press in the locking tabs with picks to remove the plastic bezel
-
step 2 :Installing the Rear Auxiliary Outlet
- Insert the outlet bezel into the rear center console
- Insert the auxiliary outlet into the outlet bezel
- Connect the auxiliary outlet electrical connector
- Set the rear center console in place
- Replace the two Phillips screws
Tools needed
-
Phillips Head Screwdriver
Pocket Screwdriver
Pick
Hey, friends. It's Len here at 1A Auto. Today, I'm working on a 2011 Ford F-150. I'm going to be replacing the rear power outlet. It's going to be fairly easy. I want to be the guy that shows you how to do it. If you need any parts, you can always check us out at 1aauto.com. Thanks.
Here's the socket we're going to be replacing, the outlet. I'm going to remove these two screws. There's one right here, one right there. I'm just going to use a Phillips Head screwdriver. Turn them to the left, obviously.
There's my two screws, both the same. I can pull this out a little bit. See if I can see behind it. Let's see. Whoop, sorry. That's what it looks like. I'm just going to take a peek. Grab one at the top up here. Should just pull down. There we are, so there's the back side. Here's the wiring harness. We're just going to make sure there isn't any funny colors in there. Looks pretty great, no rust or anything. We've got our unit. There's the front side. Just make sure everything looks about the same. The black thing around it is just... the insert is going to go right through that, so that's no big deal. We'll check the connector side. Looks about the same. Now, we should be clear to remove this.
What I'm going to do, there's a little push tab right here. I'm going to try to push that in and that should give me the availability to push this whole unit right out in one second here. Or at least that's what I plan. See if I can get it to push down and then I'll grab the other side, hopefully.
There's one side. See if I can get this last prong right here. There's just two prongs, one there, one over there. Now, I'll move along. We'll try to get this out of the plastic bezel. Now, I'm going to take two picks and I'm going to try to press. There's a little black thing right here, a walking pin, and then there's one on the other side exactly opposite. I'm just going to try to press those out and away from the center and then I'm going to try push this plastic bezel down. I want to press that one out. See if I can get this one.
There we are. You can just slide this down. Now, we'll replace this piece and we'll reinstall it. Here we go, friends. A quick product comparison for you. We have our old power socket out of the rear of a 2011 Ford F-150, we just removed it, then, we have our quality, new 1A Auto part right here. As you can tell, the connectors are the same. Different color, but it's going to be behind the scenes. It doesn't really matter. Same bevel, so this looks like it should be a quality part to install. We're going to go ahead and install it and we'll show you how. If you need this or any other part, you can always check us out at 1aauto.com.
As you saw, I had a little bit of an issue trying to uninstall this. There is a tool that you can buy that when this is actually physically installed... We've got our little clip holes there, you can see it down through here where my finger is. There's one on the outside there. That's where these little clips go through. There's one there, there's one there, but essentially you'll be pushing through from the inside. You can put the tool in and separate those two clips from the inside there, and then you should be able to slide this out a little bit. Once it's slid out, them you'll be able to squeeze in these clips a little easier. I didn't have the option of using that tool at this particular moment, so I had to do a little bit of finagling, but we got it done. With that said, now we're going to go ahead and install this.
What I'm going to do first, I'm going to put it in my unit. There's a couple of little slots here, one there and one there, one here, one here. I'm just going to line those up, slide them in. There we are. Now, I'm going to use this. I'll find my slots. This side right here has two little ears, this side has one, so we're just going to line up the ears just like that and this should just slide right in. Locks in nice and firm. Goes in, closes up. Here we are, fully installed. Now, we're just going to go back over to the vehicle. We're going to put in our two Phillips Head screws and plug it in, or plug it in, then the screws I guess, and then we'll be all set.
We've got our electrical connector, we've got our socket. We're just going to line up the T with the T in there. Should be pretty easy. Bring this over. See if I can get it lined up. I have to try to get my hand behind there. We got that clicked in there. I'm just going to bring this up and over. Get it lined up. See if I can see my holes. There we are. Just like that. Find my Phillips Head. See if I can get it screwed in here a little bit. Once I get it started, I'll do the other one.
This one I can just tighten right down. I don't need to go too tight because it's just plastic.
Here we are. All set.
Thanks for watching. Visit 1aauto.com, your place for DIY auto repairs, for great parts, great service, and more content.
Shop Products

How To Remove Interior tailgate Panel 2000-06 Chevy Suburban
This video will show how to properly remove the tailgate panel to access internal components like the tailgate handle
