How to Replace Radiator Fan Assembly 2000-02 Ford Focus
Created on: 2019-07-22
Check out this video to learn how to replace the radiator fan assembly on your 00-02 Ford Focus. 1A Auto shows you how to do it yourself!
-
step 1 :Removing the Radiator Fan Assembly
- Remove the oxygen sensor wiring from the retaining clip on the radiator fan assembly
- Remove the radiator fan wiring harness from the retaining clips
- Remove the wiring harness retainers along the top of the radiator fan assembly
- Disconnect the five radiator fan electrical connectors
- Pry up the air collector push pin retainers to move the air collector aside
- Pry to release the two radiator fan assembly mounting tabs on each side
- Release the wiring from the retaining hook on the fan assembly
- Lower the radiator fan assembly out the bottom to remove it
-
step 2 :Installing the Radiator Fan Assembly
- Raise the radiator fan assembly onto the radiator and seat it on the mounting tabs
- Reconnect the oxygen sensor wiring retaining clip to the fan shroud
- Reconnect the five electrical connectors of the radiator fan harness
- Reconnect the wiring harness retainers along the top of the radiator fan assembly
- Reposition the coolant inlet tube and secure it with the push pin retainers (this was already loose at the beginning on this vehicle)
- Reposition the air collector and secure it with the push pin retainers
Tools needed
-
Flat Blade Screwdriver
Plastic Fastener Remover
Hey friends, it's Len here at 1A Auto. Today, I'm working on a 2001 Ford Focus, and I'm going to show you how to remove the fan assembly. It's going to be a very easy job and I want to be the guy that shows you how to do it. If you need any parts, you can always check us out at 1AAuto.com. Thanks.
I'm just going to go ahead and I'm going to remove this clamp right here, or clip. That's just going to ... This has your O2 sensor wire. That's going to make it so we can lift this up and out of here when we're up at the top. There shouldn't be any ... So while we're under here, we're just taking a peek. Get this off. We can move along. We've got some wiring here, this clip's already apart right there. This one right here. Pop it out of there. Over here, there's another one, just the wiring over there. There we are. Nothing's attached down here. Everything else looks like we can get from up top, so let's go ahead and go back up top. We'll start doing everything we can to get this out of here and we'll move along.
Fan shroud needs to get out of the way, so we're going to have to disconnect everything that's attached to it. You got a little clippy-do there, little clip over here holding this thing in over here. Over here, there's a whole bunch of clips, so I'm going to grab my little fork tool. I love this thing. I'm just going to go right along the fan shroud. Pop that out. That's what it looks like. Nothing special. Over here, same thing. Let's see if I can weasel this in there. Pop it out. There we are. Okay. This one right here. Just trying to twist it, there it is. Okay, plenty of room now.
Now, to get these clips off, all you do is you take a long screwdriver, something with a wide blade, stick it in between, give it a little twist, pull up on your wiring. Anytime you disconnect wiring, just take a peek. It doesn't hurt anybody. Take a look in there. Make sure you don't have any funny colors. That one looks fine. We'll set it aside. Come right across. There's another one down over here, so I'm just going to go about doing it the same way, right down like that and grab the wiring. Pull it up, take a peek. Looks great. Set it aside.
Okay, got a couple more things here. This right here, I'll show you in one second when I get it off. There we go. It's just like those other ones. The clip is underneath it though. All you do is grab it, squeeze it, pull it. Take a peek, no funny colors. Set it aside. This one right here, it's a little push clip right in the center there. Grab that, push it, pull that out. Take a peek. Set it aside. Okay. What else do we have? Got one more. Let's see if I can grab it. Maybe. Okay. This one's the same as this one pretty much, little push clip. I'm going to grab it, squeeze it. See if I can separate these two. Yeah. Take a peek inside, set it aside.
Okay. All that looks pretty great. We can get this thing out of the way because this is going to have to come up. Just kind of come right along the side. There's a inner circle and an outer circle. You want to go between the inner and the outer. Lift up the center, lift the outer. When you go to lock this in, you just push this and it separates those two tabs, locks it in. I'm going to put this aside where I can find it. Grab this. I can move this around if I need to. This should give me a little bit of space to hopefully get my fan shroud out of here. Let's see. Right down along the fan shroud, there's this little area where there's an ear on the fan shroud that slides into the radiator, little radiator clip. You just kind of put your screwdriver, a long screwdriver works great for this, really, in there and you pry the little locking ear away, and then you should be able to lift up on the fan shroud at the same time.
This one's a little harder to see. See if I can get this electrical stuff out of my way. Okay. Slide this out of the way. Okay. I have a clear view, sorry. Had a clear view. Come on, baby. Just grab that little ear, grab my fan shroud. There we are. Okay. Fan shroud, oops, this side went and locked itself back in. Being silly. There we are. Can drop the fan shroud right down and out. Okay, so to get this out of the fan shroud, you just grab it and kind of just lift it right up and out of there. I knew that there shouldn't been much holding it on. Grab that. Now we've removed our fan shroud.
Okay, so now it's time to put in our fan assembly. Okay, goes flat side against the radiator, obviously. I mean, it's basic, but whatever. We've got one hook you do there, one here, one over there in the same area, and one over here in the same area. When we bring this in, we're going to go away from the radiator, bring it up past the hooky-dos, push it up against the radiator, drop it down. The top side is the lock side, they have the little locks. We remember that from when we were taking it out. I'm just going to grab my safety glasses. Put those on. Here we go. I'm just going to bring it up.
Watch for falling coolant. If you push on one of these hoses, they could move around, drop coolant down on your face or in your eyes, in your mouth. Any of that happens, obviously you need to make sure you take care of yourself immediately. There we go. It seems like it's already ... This side is in. There it is. Cool. Okay. Both sides are in. Can do everything you need to do while you're under here, and then go ahead and bring it down or get back up top of it, depending on if you're working on the ground or not.
Let's grab what we can while we're under here. Try to get this hooked in. That'll be a special treat. There it is. You want to make sure you have this clicked in, of course. This is for your O2 sensor. Super important it's not hanging down, couldn't get caught. Okay, so we've got this little wiring harness. It's very easy to figure out how it goes back together. We remember we had these little push clips, right? Those all go in the center area for the fans and whatnot. These clips over here come over here. If you want, you can bring it right under now, or you can do it after, whatever. Just throw it like this. Okay. The short connector goes to the longer wire. The longer connector area goes to the shorter wire. Give them a tug. Those feel great. Slide these down and bring this over. We're going to lift this up. Bring this right down under here.
Everything kind of falls into place. You've got the wiring for the fan over here, the wiring for the fan over here, and then this wiring plugs right into this. We're just going to slide everything in and we're going to listen for clicking noises. There we are. This one, give it a tug. Yeah. See if I can see this one. This one's right in front of the manifold. just going to see if I can get pushed in. Yep. Give that a nice little tug. That feels great. We've got some wiring here. We're just going to slide this underneath that on this one right under there. Just kind of holds everything, so it's not flopping around. Okay.
Okay. When we took all this apart, this wasn't actually clipped in, but we've got a couple extra clips, so I'm just going to go ahead and try to get it mounted in here. Sometimes getting this all lined up, because with these hoses they like to try to twist, so it puts kind of a lot of pressure, so try to push it in the best you can. Push in that center. Come over here and do the same thing to this one. There we are. Put that on there. If you wanted to, you could put a little wire tie there, try to get this to stay a little better. It's completely up to you. Looks like somebody already tried one right there. I'll grab this, bring it over. Got our little push clip. Put the outer ring, inner ring. If you had one here, you'd put that one in.
Thanks for watching. Visit 1AAuto.com, your place for DIY auto repairs, for great parts, great service, and more content.
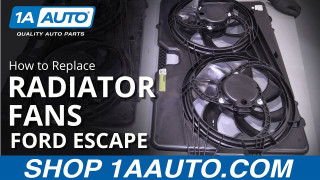
How to Replace Radiator Cooling Fans 2008-12 Ford Escape
How to repair, install, fix, change or replace a broken dual radiator fan. If your air conditioning doesn't work, this may be your solution. This video shows the process for the 08, 09, 10, 11, 12 Ford Escape
