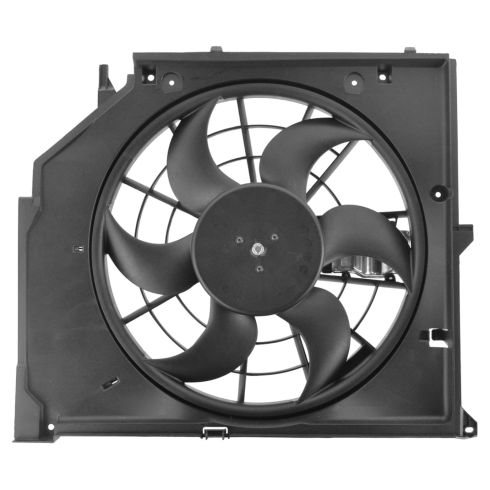
How to Replace Radiator Fan 2001-05 BMW 325Xi
Created on: 2019-07-23
Watch this video and learn the steps for replacing the radiator fan so you can tackle it yourself
-
step 1 :Disconnecting the Battery
- Loosen the 10mm nut on the negative terminal
- Disconnect the negative terminal
-
step 2 :Removing the Air Intake Duct
- Pry up the clips from the air intake
- Remove the air intake duct
-
step 3 :Removing the Radiator Fan and Fan Shroud
- Disconnect the electrical connectors
- Remove the T25 bolt from the fan
- Pry out the push clip from the fan shroud
- With a 32mm fan clutch tool and pneumatic air hammer, loosen the fan clutch from the engine side
- Once loose, spin the fan off without letting it fall
- Remove the fan and fan shroud
-
step 4 :Removing the Radiator Fan
- Remove the bolts from the fan and the fan clutch with a 5mm hex socket
- Remove the fan clutch
-
step 5 :Installing the Radiator Fan
- Connect the fan clutch to the fan
- Tighten the three 5mm hex bolts to the fan
- Torque the bolts to 89 inch-pounds
-
step 6 :Installing the Radiator Fan and Fan Shroud
- Insert the fan and fan shroud simultaneously
- Tighten the fan to the engine side with a 32mm fan clutch tool and pneumatic air hammer
- Torque the fan nut to 22-29 foot-pounds
- Press the push-pin to the fan shroud
- Tighten the T25 Torx bolt to the fan
- Connect the two electrical connectors
-
step 7 :Installing the Air Intake Duct
- Insert the air intake duct into place
- Press in the clips to the air intake duct
-
step 8 :Connecting the Battery
- Connect the negative terminal
- Tighten the 10mm bolt to the negative terminal
Tools needed
-
5mm Hex Wrench
Torque Wrench
Fan Clutch Wrench
10mm Wrench
3/8 Inch Impact Gun
T25 Torx Driver
What's up, guys? I'm Andy from 1A Auto. In this video, I'm going to show you how to replace the radiator fan on this 2001 BMW 325 Xi. If you need this part or other parts for your vehicle, click the link in the description. Head over to 1AAuto.com.
With the trunk open, we're on the right side or the passenger side, there should be a cover that goes right here. This vehicle doesn't have one, but you'd want to remove that cover. The battery is located right here.
First thing I'm going to do is take a 10 millimeter socket and ratchet, loosen up this nut, for the negative terminal. When it's loose, slide off the cable. Slide it out of the way.
I'm going to take these push pins out right here. I'm just going to use some side cutters and get this center pin. Pull that up. We're going to slide it up. Be careful not to cut. Get those out. Grab this piece and slide it out.
We're going to disconnect this connector right here. Just push down on that. Slide that out. It's another connector right here. I'm going to slide the wiring out first, just like that, and the connector will come out. Slide that to the side like that.
I'm going to take a T25 and a ratchet, take this screw out, right here. I'm just going to use this trim tool from 1AAuto.com and take this push clip out. Pull that out. Now that is loose.
What we need to do is we need to take the fan off because the fan has to come out with the shroud as one. What we need to do to take the fan off is we need to disconnect the fan clutch from the engine side. This is attached to one of the pulleys right there.
So, sometimes these are somewhat difficult to get off, so what we're going to do is use this tool. We actually sell this at 1AAuto.com with many different sizes. This happens to be a 32 millimeter. That's going to slide on there.
Then, we slide this on and with a pneumatic air hammer, we're going to give it a couple of bumps and it's going to loosen up that nut and we should be able to get it off. All right, now I'm going to take the tool. This fan clutch happens to be on there reverse thread, so it's going to seem like you're tightening it, but you're actually loosening it.
So, we'll go like that. Put our air hammer on there and make sure you wear hearing protection and eye protection. All right. So that's loose. Took a little bit of effort, but I got it. You can slide the tool off. Just move it a little bit. There you go.
You should be able to spin it off like that. You might need the tool once in a while or you could use a wrench that fits, a 32 millimeter wrench. All right, I'm just going to keep loosening this up. Be careful. You don't want the fan to fall. You don't want it to smash into the radiator, especially if you can reuse the radiator. If you're replacing it, it's not a big deal.
As I get closer to the end, I'll just move the fan and just grab the blade. There we go. I can slide this right up, just like that. I want to separate this fan from the fan clutch. I'm going to use a 5 millimeter hex socket. Line this up.
I'm just going to take a hammer and tap it a little bit. These screws are a little bit rusty. Just use a socket, I mean, a ratchet. Loosen this up. Just like that. Take this last screw out and I'm going to hold the fan up a little bit. Try not to have it hitting on anything and just give it a tap with a hammer and separate.
Take the fan. You want to make sure you install this the correct way. Don't install it backwards. Slide it and position, just like that. Take the bolts. I'll get these all started. Now, I'm going to tighten these down with a 5 millimeter hex bit and a ratchet.
Now, I'm going to tighten these bolts down to 89 inch pounds. Make sure you're on inch pounds and not foot pounds. So, these have to go on together. Just slide this in position. Once you get this close, I'm going to start to tighten up the fan.
Now, these fan blades are- The fan clutch is reverse thread, so it's almost like you're going to be loosening it. It's really no easy way to do this. Do it carefully. Once you get it started, it's a little bit easier. Make sure the fan shroud is in properly. That's good.
If you have the ability to torque this nut for the fan, you're going to torque that between 22 and 29 foot pounds. I don't really have that ability, so I'm just going to put this tool on there and just give it a little tap. That should be good. Right here is a push pin. That's going to go back in here. Slide that in position and lock it down.
On this side, we're going to put this screw right here. I'm going to use a T25 and an electric ratchet to tighten this down. Just snug. Position this wiring harness right here and we'll plug the connector in right here. Lock that in place. Take this piece, slide this into the air box, just like that.
There's retainers right here. Take those push pins. Lock them down. Then, we can take the negative side, connect the negative side. Take the same 10 millimeter socket and ratchet. Tighten it up. That's good. At this point, if you had that cover, you're going to want to put the cover back where it goes.
Thanks for watching. Visit 1AAuto.com for quality auto parts shipped to your door. The place for DIY auto repair. And, if you enjoyed this video, please click the subscribe button.
Shop Products

How to Replace Radiator Fan 2009-17 Chevy Traverse
How to repair, install, fix, change or replace a broken radiator fan. If your car overheats or runs hot and the radiator cooling fan will not turn on then this may be your solution. This video shows the process for the 09, 10, 11, 12, 13, 14, 15, 16, 17 Chevy Traverse, GMC Acadia, Buick Enclave, or Saturn Outlook.
