
How to Replace Radiator Cooling Fan Assembly 1998-2004 Dodge Intrepid
Created on: 2011-03-23
Watch this installation video on how replace a replace a broken radiator fan on your 98-04 Dodge Intrepid.
-
step 1 :Remove the headlights
- Pop the hood and secure it.
- Use a 7 mm socket to remove the bolts on the top of the headlight assembly.
- Pull the headlight up and out.
- Unplug the wiring harness.
-
step 2 :Remove the panel covering the front of the engine bay.
- Remove the push clips and 10 mm and 13 mm bolts securing the radiator mount panel.
- If you’d like, you can disconnect the hood release cable, otherwise just tuck the panel aside out of the way.
- Take care not to crimp the cable.
-
step 3 :Remove the radiator fan
- Pull out the locking tab and unplug the wiring connector from the radiator.
- Remove the four 10 mm bolts anchoring the radiator fan.
- Pull the fan up and out of the vehicle.
-
step 4 :Install the new fan
- Transfer the clip at the bottom of the fan to the new fan.
- Clip the new fan down and into place.
- Secure by bolting it down with your 10 mm socket and ratchet.
-
step 5 :Replace the panel covering the front of the engine bay
- Put the cover back into place.
- Take care with the hood release cable.
- Replace all the 10 and 13 mm bolts and push clips.
-
step 6 :Install the headlights
- Plug in the bulbs and wiring harnesses
- Fit the headlights into place and secure with the two 7 mm bolts on each.
Tools needed
-
13mm Socket
Socket Extensions
Flat Blade Screwdriver
7mm Wrench
7mm Socket
10mm Socket
Ratchet
Needle nose pliers
Brought to you by 1AAuto.com, your source for quality replacement parts and the best service on the internet. Hi, I'm Mike Green. I'm one of the owners of 1A Auto. I want to help you save time and money repairing or maintaining your vehicle. I'm going to use my 20 plus years experience restoring and repairing cars and trucks like this to show you the correct way to install parts from 1AAuto.com. The right parts installed correctly. That's going to save you time and money. Thank you and enjoy the video.
In this video, we're going to show you how to replace the radiator cooling fan on this 2004 Dodge Intrepid. Same as quite a few years of this intrepid and your radiator fan should work when your car is running and your AC is on. Tools you'll need are a 6.5 or 7 mm socket and ratchet or wrench and that's to remove the headlights. 10 and 13 mm socket and ratchet and you'll need a 2 inch extension, a regular screwdriver, and a pair of pliers. You can see I've taken one headlight our and I'm going to remove the other headlight. I'm using a 7 mm socket and I actually think that these bolts are 6 1/2 mm, but if you use a 7 mm you should be able to remove them. There are two, there's one there and there's one right over in the corner here. Remove those bolts, now pull your headlight up and out. Twist his side and pull it out.
Then disconnect your headlights and either pull them out or sometimes you'll pull them down. You may want to use a screwdriver to help you pry the prongs off. Now with the headlights out of the way, you're going to remove a series of pins, 10 mm bolts and 13 mm bolts. There's 4 plastic pins right here along the front. All you do for those is use a screwdriver, pry up on them ... you should be able to kind of work them with your hand, pull that pin up and out, then this clip comes up and out. Okay? Then 13 mm, I'm mean, I'm sorry 10 mm. Then you have to retake off these 2 10 mm and this 10 mm and these kind of push back. You got a 13 mm bolt here, another 13 mm bolt here. Okay. A 10 mm bolt, another 10 mm bolt, 13 mm bolt, and another 13 mm bolt, and a 10 mm bolt. We'll fast-forward through removing all those fasteners. The bolts first and then you'll see me pry out the clips a little bit later on. Everything unbolted, you have a couple of little plastic rivets here that hold some shields on and you kind of just get under here with a screwdriver. Okay and basically just pry those rivets out. Then do the other side as well. Now with those rivets released, just push these back a little bit, pull this panel up, give a good tug on your hose a little bit.
There is your cable that you want to make just sure just kind of comes up and out of here and then you can just gently let your panel hang down if you want. If you like you can disconnect the hood release cable, but it's okay like that as long as you don't knock it or hit it and kink the cable. Okay, so looking from the side here's where your radiator fan plugs in. Take a screwdriver, push on this little red locking tab, a pair of pliers and grab on the other side here. Let's try this ... just push that lock right out. Okay, and then you want to press with your thumb right here, disconnect. Now to remove our radiator fan, there is 4 bolts. One here, one down there further, and then the same thing on the other side, here, and down further. Those are 10 mm bolts. Now I'm just going to fast-forward, use a ratchet extension and 10 mm socket and I remove the two bolts on the driver's side pretty easily. Then I'm able to remove the lower bolt on the passenger side fairly easily. Then I'll slow it back down as I have some problems with the upper bolt. I already tried on this top one. What happened is the bolt in here started moving around so I hit it with a bunch of penetrating oil so what I'm going to do is try and stick my screwdriver in there ...Screwdriver holds the bolt, but it doesn't want to move. Tighten it back up. Okay, tightened it back up a little bit.
Hit it with some more penetrant and let it sit. After letting that sit for a little while, we're ready to try it again. ... Finally came out. On top, there's a little clip right here, screwdriver, just pry that end up and off. I can see that the fan's holding those back. Just going to work the radiator so you can pull it up and out. Okay, so our original fan. New fan from 1AAuto, you can see everything's the same, has all the same connections and everything. It's going to bolt right in. On this vehicle, my original fan's working fine so I'm going to reinstall the original fan. I just wanted to show you that when you order a fan from 1A Auto, it's going to work ... it's going to go in there and work just like it should. If you were to put a new fan in, one thing you would want to do is remove this little clip which you just use a screwdriver or something or a pliers, pull it off and install It on here the exact same way. To reinstall the fan, put it down in like that. Now lift up the radiator on this side and install it way down in. Then basically, I'm just looking right down the middle, I can see my little clip down there, get it lined up and push it on. Get in close. Take my clip, press it right down on, and that really just kind of holds it in place.
Start this bolt over here. Now I'm just going to fast-forward as I start the other 3 bolts. You just kind of lift up and move the fan around a little bit and twist the bolts in and they go in. We'll keep the video sped up here as I use my air ratchet to tighten up those 4 bolts and I do have a little trouble, just kind of reaching the driver's side lower one. It's a little bit of a tight squeeze, but even with my big hands and stuff I am able to get in there. Now here, slowing it back down, I'm putting my 10 mm socket and extension onto just a regular ratchet so I can just check them by hand and make sure they're as tight as I want. I never tighten anything up with my air tools. I always do the final tightening by hand. We'll speed it up again as I finish that up. Now we're going to put everything back together here. You want to bring this piece up first. There's clips here that you bolt into. Make sure they don't get knocked out of the way. Make sure they're clipped on there correctly. Put the ... put this pail down in and pull the nose out. Then make sure it goes down off of the bumper there.
Then there's still little clips that held this in. Those broke when I took it apart, so I'm just going to use wire tires. You don't really have to do anything here, but that'll at least keep it from flapping and making noise. Now we're going to speed it up. Basically all I'm doing right now is threading all those bolts in by hand. The 10 and 13 mm bolts. I thread them all in by hand before I tighten any of them up so just speeding through that right now. Here, just putting in those last 2 pins in the front that hold the nose fascia to the panel. Now I'm using my air wrench to tighten up the 10 mm bolts, not tightening them up all the way, just getting them mostly on there. Switch over to my 13 mm socket, tighten those 4 13 mm sockets or 4 13 mm bolts. Now I've switched back over to my ratchet and I'm just checking each one of those bolts, make sure it's nice and tight but not too tight. Now here, you've put the headlight in, bulb in and twist and connect the low beam and then the high beam. I put the outside in first and then flip it in. Now take your long bolts, feed them down through. Give them a little bit of a shake they go down and in, start them and then use your 7 mm socket, your ratchet and tighten them up. Then obviously repeat that for the other headlight and you should be all set.
We hope this helps you out. Brought to you by www.1AAuto.com, your source for quality replacement parts and the best service on the internet. Please feel free to call us toll free 888-844-3393. We're the company that's here for you on the internet and in person.

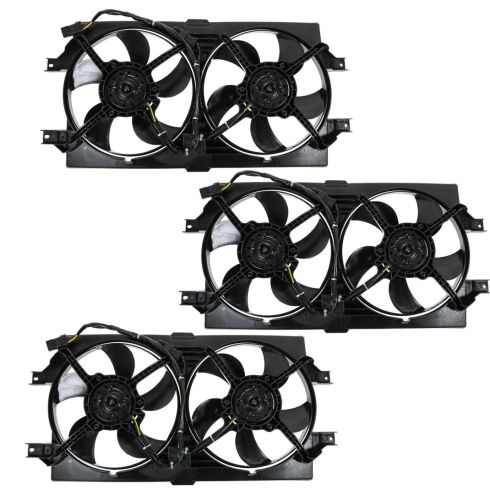
Dodge Chrysler Dual Radiator & Condenser Fan Assembly 3 Piece Set DIY Solutions HVA02512
- 3 Piece Set
- 2

How to Replace Radiator Cooling Fan Assembly 1994-97 Honda Accord
Check out this video to learn how to replace the radiator cooling fan on your 94-97 Honda Accord. Keep your system running cool with this fix.

