How to Replace Radiator Cooling Fan Assembly 2007-09 Toyota Camry L4 2-4L
Created on: 2017-10-04
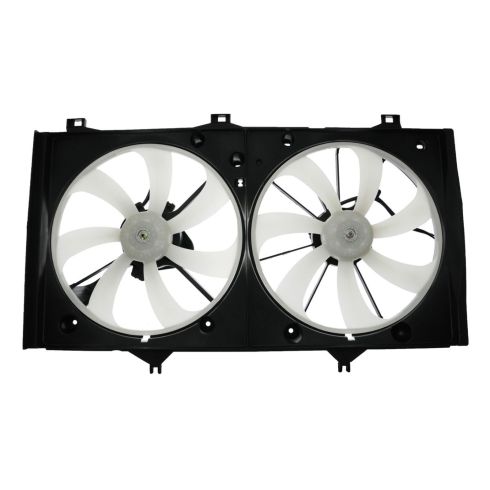
New Radiator Dual Cooling Fan Assembly from 1AAuto.com How to repair, install, fix, change or replace a broken radiator fan blade. If your car overheats or runs hot and the radiator cooling fan will not turn on, then this may be your solution. This video shows the process for the 07, 08, 09 Toyota Camry
-
step 1 :Draining the Coolant
- Remove the 10mm bolts from the bottom of the bumper cover
- Remove the 10mm bolt from the splash shield
- Pull off the splash shield
-
step 2 :Draining the Coolant
- Have a drain pan ready
- Open the drain at the bottom of the radiator
- Twist off the radiator cap
-
step 3 :Removing the Air Intake Tube
- Remove the two 10mm bolts from the intake tube
- Pull the intake tube off the air box
-
step 4 :Removing the Radiator Hose
- Unclip the O2 sensor wire from the upper radiator hose
- Loosen the radiator hose clamps with pliers
- Pull the radiator hose off the radiator
- Pull the radiator hose off the engine head using a pick
-
step 5 :Removing the Radiator Fan
- Disconnect the radiator fan electrical connector with a flat blade screwdriver
- Pry the wiring harness out of the fan with a trim tool
- Push in the three pins at the top of the radiator fan
- Pull the radiator fan up and out of the engine bay
-
step 6 :Installing the Radiator Fan
- Slide the radiator fan into place using the locating tabs
- Push the radiator fan onto the push tabs at the top
- Clip the wiring harness to the radiator fan
- Connect the radiator fan electrical connector
-
step 7 :Installing the Radiator Hose
- Push the radiator hose onto the engine head
- Push the radiator hose onto the radiator
- Tighten the radiator hose clamps with pliers
- Clip the O2 sensor wire onto the upper radiator hose
-
step 8 :Installing the Intake Tube
- Connect the intake tube to the air box
- Line up the intake tube on the radiator support
- Insert the two 10mm bolts that hold the intake tube to the radiator support
-
step 9 :Installing the Splash Shield
- Close the radiator drain plug
- Lift the splash shield into place
- Insert the 10mm bolts into the splash shield
- Insert the 10mm bolts into the bottom of the bumper cover
-
step 10 :Filling the Coolant
- Add coolant to the radiator with a funnel
- Start the engine
- Turn on the heat
- Let the engine reach operating temperature
- Wait until the coolant stops bubbling
- Remove the funnel from the radiator
- Twist on the radiator cap
Tools needed
-
Funnel
Socket Extensions
Flat Blade Screwdriver
1/4 Inch Socket
Drain Pan
10mm Socket
Slip-Joint Pliers
Ratchet
Trim Tool Set
Pick
Hi. I'm Mike from 1AAuto. We've been selling auto parts for over 30 years!
To take the front bumper off you don't have to have the car in the air, but it does make it easier for us to show you what we're doing. You're going to remove this 10 millimeter bolt here. There's one here, follow them right across the front, one here, here, another one here, and this one over here. I’m going to use a 10 millimeter socket. They do have a spot in them for a Phillips head screwdriver, but the socket makes it a little bit easier.
To remove these lower splash shields, remove the other 10 millimeter bolts. One over here. Then remove these bolts here. Somebody probably replaced these with aftermarket ones. They're most likely going to be 10 millimeters like the other ones, but on this car they're 1/4 inch.
Drain the coolant into an appropriate container. Open up the drain that's here. Once that's open, you can actually open the radiator cap. That should come out a lot faster.
Next up, we want to remove this intake tube. It's 10 millimeter bolts that are holding it to the upper radiator support. That'll just lift out like that. Put that aside. I'm going to put our bolts back in there so I know where they go at the end.
Once you've drained the coolant, we want to remove this upper radiator hose. That way you could try to remove this fan assembly without taking the radiator with it. The O2 sensor is clipped to it, so we unclip it here and pull this apart. It just pops out. Squeeze these tabs, pull it apart. Then what I'm going to do is I'm just going to click it over here so it doesn't get lost. Pull that out of the way.
Use our pliers to clamp these open. They do have little locks, but they're kind of tricky to get them locked. So all you need to do is move them out to the middle. Do the same thing for this one. That one actually locked for me, so it actually slid over the little tab there.
I'm going to work this off the plastic of the radiator, then work it off the middle of the head. It kind of gets sealed on there with heat. You can use a pick to try to break the seal. Put this hose aside because we'll reuse it.
I'm going to attempt to remove the fans right now to show you how to do that. I think with this upper radiator hose out of the way, it's pretty easy to do. You might still have this radiator support in the way. We're going to start by unplugging the harness here. Use a flat-bladed screwdriver to push the locks in. Do this connector out here the same way. I'm going to use a clip prying tool to pry these out of the fan. Put this harness aside.
The two fans are connected to the radiator with these push-in clips on the top. There's three sets of them, and then it just slides over some pins at the bottom. We're going to push these in, push it out, same thing over here. Push them in, push it out. Lift it up and off the pins. It's a little tricky because it actually loops around the bottom of the lower radiator hose.
Above the cooling fan shroud there are two tabs. They're going to match up with the two tabs down here in the bottom of the radiator. We also need to slide this hook. It's going to go on the other side of the lower radiator hose. It's pretty soft, so we can slide it in there. You may have to squish the hose a little bit. You can feel them slide right over it, and they should line up with these upper push tabs. Once it's lined up, you just push them in, they'll lock into place.
Reinstall the electrical harness. These push clips will go right back in where they came out. Put this in over here. Clip this back into here and this will go back into here. This will plug into here.
This original radiator hose is actually marked kind of where it was sitting, so I'll put it back on that side. It lines up with the radiator on this side. You can also see the mark where our wire was sitting. This one I actually managed to lock so I can just slide it over without squeezing it together. Sit it in the original spot so we can unlock it without it snapping my fingers. Point it back up where it was. The upper radiator hose is installed.
We're going to put our O2 sensor wire back into place, spin that back. This again, you squeeze it and it pulls apart. It goes underneath the hose.
We install the air intake tube. It just slides over the air box and lines back up on the radiator support. Install and tighten the 10 millimeter bolts.
Reinstall the splash shield, just slide up and into the bumper. Install the other half. This piece went up into here. Just reinstall whatever hardware that's original to the vehicle that you took out here.
Fill and bleed the cooling system. We have a special funnel set up to help us do that. You could do this with a regular funnel. This makes it a little bit easier. It's also easier for you to see it. Fill it with coolant. Let the air bubble out. You can top the radiator off with the correct coolant, then we'll turn the heat on, start the car, let it idle to come up to temperature, and bleed out any air out of the cooling system. Now that it's bled we can take the funnel off. Carefully remove our adapter here. Replace our radiator cap. Dispose of the extra coolant properly.
Thanks for watching. Visit us at 1AAuto.com for quality auto parts, fast and free shipping, and the best customer service in the industry.
Shop Products
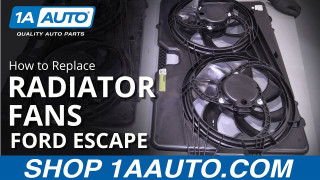
How to Replace Radiator Cooling Fans 2008-12 Ford Escape
How to repair, install, fix, change or replace a broken dual radiator fan. If your air conditioning doesn't work, this may be your solution. This video shows the process for the 08, 09, 10, 11, 12 Ford Escape
