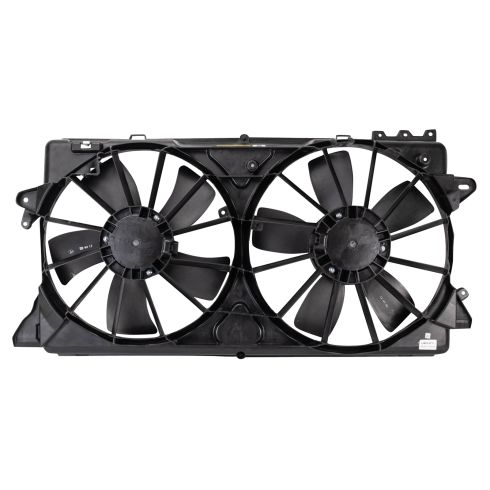
How to Replace Radiator Cooling Fan 2007-17 Ford Expedition
Created on: 2020-11-23
This video shows you how to install a new radiator fan from TRQ that is engineered to fit your 2007-2017 Ford Expedition.
Tools needed
-
Socket Extensions
Socket Driver
Pry Bar
8mm Socket
10mm Socket
Ratchet
Swivel
Trim Tool Set
Pocket Screwdriver
Pick
Go ahead and remove our negative battery terminal from the battery. Now, the next thing that we need to do is get this plastic out of the way. To do that, you would remove your push clips with a little forky tool here. Try to get underneath there and pull out the center. Once you've done that, you can do the same, do the same to all the rest of your push clips and we'll get it up and out of the way. All right, let's get this out of here. The next thing that we're gonna do is we're gonna get this box unattached from the actual bracket here. To do that, you're gonna find that there's two tabs on the front side and just kinda pull on it like this. Then usually you can lift up, and it'll kinda wanna break free. There we are. Sometimes you'll have to actually pull on this one as well, that one just wasn't locked in for some reason, then you're gonna find the ones on the back and do the same exact thing.
There we are. Let's go ahead and relieve this clump right here. Let's come in between. There we are. Let's go ahead and slide this out of the way now and remove our four mounting bolts for this bracket. Let's get this out of here. We need to relieve the anchor point for our wiring. I'm just gonna come right under here with a nice pry bar. There we are. Now let's just go ahead and remove this mounting bolt for our power steering reservoir. Let's go ahead and open up our air filter housing here. Let's go ahead and loosen our clamp. Separate this out of the way. You can move all this away. Go ahead and remove this clamp right here, just use a small pocket screwdriver, come up along the top edge and we're gonna push down on the little piton that's in there. Get this little twist, and then it should wanna separate. Lift up that hose, try and get this clamp off of here. Let's see if I can get in between. There we are, set this aside. Coming down this way, you're gonna see there's another anchor point. Sometimes you can just kinda pull these out, if you can't, you can use a little forky tool or even some cutters. There we are. We'll come up to this one. Okay. So at this point, you wanna analyze the situation and make sure you don't have any more clippy-do's. It looks like I've got another one right down here. So I'm just gonna go ahead and find that and then I'll of course, pop it out the best I can. Okay. So, there's gonna be a couple more clips coming down the center here, you wanna make sure you bring them all the way down and then relieve the actual fans themselves.
To disconnect the fan, just use a small pocket screwdriver, push in on the center tab, give it a nice wiggle and separate it. I always like to check my wiring to make sure I don't see any funny colors. Do the same to both fans. We're gonna remove our fan shroud from our radiator, you're gonna find a mounting point right down here on the driver's side, and then over on the passenger side, you'll see it underneath the upper radiator hose. Go ahead and remove both of those bolts. The next thing we need to do is get our fans right out of here. To do that, you're gonna notice that one of the ears gets caught underneath this hose right here, that's gonna be an issue, but it's not too big of an issue because all we need to do, grab onto this, we're gonna lift it up and pull it towards the actual engine. As we're doing that, we're also gonna go towards the driver's side. That's gonna kinda make it so we can kind of angle this a little bit, and then we're gonna carefully lift up on this so that the ear comes out and around, and then we should be able to just kinda get this right up and out of here. There we are. Okay, let's go ahead and get our cooling fan in here now. I'm gonna come down at an angle pretty much the same way as we took it out, except opposite.
Should just wanna drop in there. Okay, let's go ahead and slide this in. I've got the little hooky-do's coming up along the top, but there's other things that we need to pay attention to. You wanna make sure you're lined up side to side, as you can tell this one isn't, and you also wanna make sure that you're into the hooky-do's that go down along the sides as well. There we are. This looks like it's sitting pretty much in the middle. I'm gonna feel to make sure I'm latched in along the bottom. That feels pretty good. This side's out. There we are. Once you have it lined up, go ahead and re-install your bolts. I'm gonna start in both of them before I snug either of them up. Let's start reconnecting our wiring here. I'm just gonna mount this in right here, and then of course, down the line into all their mounting holes. We've got our connectors, make sure you connect those back into the corresponding fan. Listen for a click, give it a nice tug. Let's start putting in some more of our anchor points here. All right, let's go ahead and get the bracket in here now. That's lined up.
Let's get this latched in where it belongs. Make sure it's completely locked in. Let's get this guy in. There we are. Now don't forget about the two that are down underneath this as well. Let's go ahead and get this reattached. Let's go ahead and put this hose clamp back on here. Just go around there. It's gonna go right into these holes, and of course, latch it in. Let's go ahead and get this reattached with its mounting bolt. Let's get the air filter housing back together. All right, let's go ahead and get this plastic cover back on here. Start in your push clips, go with the outer portion first and then the center. Do the same to all. Next thing you would wanna do is reattach your negative battery terminal and then start and run the vehicle until your fans turn on.
Shop Products
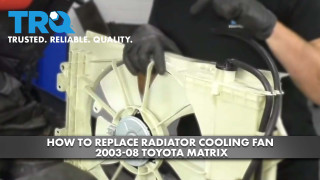
How to Replace Radiator Cooling Fan 2003-08 Toyota Matrix
This video shows you how to install a new radiator fan from TRQ that is engineered to fit your 2003-2013 Toyota Matrix.
