How to Replace Radiator Cooling Fan 2006-11 Honda Civic
Created on: 2017-12-12
How to repair, install, fix, change or replace a broken radiator fan. If your car overheats or runs hot and the radiator cooling fan will not turn on then this may be your solution. This video shows the process for the 06, 07, 08, 09, 10, 11 Honda Civic.
-
step 1 :Removing the Radiator Shield
- Pop and secure the hood
- Pry off the push clips from the shield
- Remove the shield
-
step 2 :Disconnecting the Cooling Fan
- Unplug the A/C and radiator cooling fan's wiring harness
- Press the tabs and release the wire from the fan bracket
- Pop the clip out of the radiator bracket
-
step 3 :Removing the Battery
- Remove the 10mm negative battery terminal
- Remove the 10mm positive battery terminal
- Loosen the 10mm battery hold down bolts
- Lift the battery hold down out without touching the terminals
- Remove the plastic cover from the battery
- Lift the battery up and out
-
step 4 :Removing the Radiator Support
- Disconnect the electrical connector from the fan
- Unclip the connector from the fan
- Pop the radiator hose out of the bracket
- Pry off the overflow hose from the filler neck
- Unbolt the two 10mm bolts from the filler neck
- Remove the two T30 Torx bolts from the grille
- Remove the 10mm bolt from the A/C condenser bracket
- Remove the two 10mm bolts from the A/C top bracket
- Remove the three 10mm bolts on each side of the radiator support ends
- Remove the temp sensor wiring harness clips from the radiator support
- Lift the radiator support out of the way
-
step 5 :Removing the Cooling Fans
- Remove the 10mm bolts from the a/c condenser fan
- Lift the fan up and out of the radiator
- Remove the 10mm bolts from the cooling fan
- Lift the fan up and out of the radiator
-
step 6 :Installing the Cooling Fans
- Insert the fans into place
- Tighten the 10mm bolts to the cooling fans
-
step 7 :Reinstalling the Radiator Support
- Insert the radiator support into place
- Clip in the wiring harness bracket
- Clip in the fan wiring harness
- Connect the coolant overflow hose to the filler neck
- Clip in the hose to the overflow bottle
- Tighten the bolts to the overflow neck
- Connect the wiring harness clips to the fan
- Tighten the 10mm bolts to the upper radiator mounts
- Tighten the 10mm bolts to the bushings
- Tighten the T30 Torx bolts to the grille mount
- Tighten the three 10mm bolts to either end of the radiator support
-
step 8 :Reinstalling the Radiator Shield
- Insert the radiator shield into place
- Press the clips in to the radiator shield
-
step 9 :Reinstalling the Battery
- Place the battery cover on
- Insert the battery into place
- Hook in the battery hold down
- Tighten the 10mm battery hold down bolts
- Connect the positive terminal and tighten the 10mm bolt
- Connect the negative terminal and tighten the 10mm bolt
Tools needed
-
Socket Extensions
Flat Blade Screwdriver
Phillips Head Screwdriver
Rust Penetrant
T30 Driver
17mm Socket
10mm Socket
Ratchet
Needle nose pliers
Hi, I’m Mike from 1A Auto. We’ve been selling auto parts for over 30 years!
Open up the hood. Hold the release. There're two spots you can put the pop rod. There's one here. That's sort of the normal one. You need to work on the engine, and you don't want to be hitting your head. You can actually lift the hood up further. And push the pop rod down into this opening here. It puts the hood almost vertically. Gives a lot more space to work.
We're going to move this from cover. Let's get some clips in here. Use to trim clip tool. Pop that push clip out. Do that the same for the other side. These are little push clips. There's a small flat base screwdriver to open up the middle. Pop it out. That unlocks it and just pull it out. Same with this one. This plastic will come out from behind the grille. Meant to move these over a little bit. Just slides off like that. And the same over here. Once that lip is out of the chrome grille, you can kind of take this and fold it a little bit. Slide it off of the hood latch. And we'll put that aside.
Going to unplug the harness for the cooling fans both AC and radiator. One on this side, pushing the lock tab. Pull that out. To disconnect this connector, the harness is clipped in the top of the fan shroud. It's got a little plastic push clip, kind of hard to see because it's underneath, but you can push the little tabs in with a needle nose pliers. That you can ruse the clip without break it. So push the tables in or screws them in. And then pull this up. So what I'm doing is taking needle nose pliers and I'm squeezing these two tabs together. And that's letting me pull it out of this little mantle hole if that bends, don't worry about it, it's thin, cheap metal. Can bend it right back.
This harness runs along the top of radiator support. And under this plug here. And then unclip it down here by pulling up on this tab and sliding off. This goes to the hood latch. That up over there. Need some trim clip pliers to pop this clip out. It's holding the harness. Pop that one out. Can't get to the backside of them, just squeeze the release tabs.
Remove the battery. These battery hold downs, they're long bolts. I can just slide this harness off of this one. They look pretty rusty. I'm going to spray some rust penetrant on them before I try to move them. I'll let that sit. Now I can start by disconnecting the negative terminal, is 10 millimeter on this one. Just loosen it up. It doesn't take much. Just put that aside.
This terminal here doesn't look factory. It could be a 10 millimeter on your car. This one looks like it's been switched to a 12. Loosen this up. And just wiggle it free. Put the harness aside and work on getting this bracket out. I can use a 10 millimeter deep socket. And a ratchet. And just remove these two. And actually, you don't even have to throw these all the way off. Once you get them loose enough, they are sort of hooked in at the bottom, and you can unhook them. Pick up this hook.
Once you've got one unhooked, you can unhook the other. Be careful, don't touch as you're doing this, don't touch any metal between these two terminals because they are live, you'll short it out. But you don't have to thread the nut all the way off of these because that'll take forever. Just get them loose enough and unhook them. With the battery tie down removed, can take the battery right out of the car. It's got this plastic cover on it. I'm just going to pull it off so it's easier to grab. I can reach with my hands and grab it. This battery's pretty small. Just put that aside. Disconnect this connector here. Pushing in on the lock. Pulling it out. These can kind of get stuck sometimes. So I like to push it in first. And then squeeze it and pull it out.
Just kind of work it back and forth. It's also clipped into the shroud. Need to take a clip tool, clip removal tool. Put it in here and kind of pop it out. Sometimes these break, it's not a big deal. When we're all said and done. We’ll zip tie it back in place if need be. Push that aside. This is all together here.
I'm going to pop this hose out. And you can actually take it off this neck here, with ease, kind of help me pry it off. Put that aside. This is the filler neck for the radiator. It's bolted to the upper radiator support. I need to unbolt it so I can push it aside, and that way when we unbolt the radiator support, can lift it off and this will stay with the radiator. I'm going to spray some rust penetrant in here. Try going underneath. Try to get those bolts.
Use a 10 millimeter socket ratchet. Work those in and out a little bit or the rust penetrant into the threads. Now we'll be able to push this aside. There are two T30 Torx bolts holding on the top of the bumper. They're bolted into the apparatus support. So you need to remove them.
There's also a 10 millimeter bolt behind them I need to get to. So once these are removed, I can kind of flex the bumper and get to the bolts behind it and also let me take this piece off. Using a T30 Torx bolt, T30 Torx socket, and a ratchet. So once those are loose. I have enough space, and I can move that. So that will flop forward for us.
We're going to loosen these bolts that holding on the bracket for the condenser for the AC. Looks like these are slotted, but I think I'm going to have to take the whole bolts out because I don't think there's enough room for this bracket to move. Plus I don't want to damage the AC condenser causing leaks. Going to spray some rust penetrant on the screw. I can feel the backside of the screw here, so I'm going to spray some on the backside.
Using a 10 millimeter ratcheting wrench, and a little of this pull. Let's get it loose enough. I'll take it out with my fingers. I'll repeat that with the other side. You want to remove the two 10 millimeter bolts that are on the radiator top brackets. And I can probably leave these in and just lift this support out, but having these removed will make it a little bit easier.
Spray some rust penetrant in there on both of them. Pull that right out of the way. Peek that the other side. There's three bolts: one here, one here, and one here on both sides of the radiator support. Top one, front one, and then the back one. Those need to come out, and then we can lift this radiator support up and lay it aside. Use a 10 millimeter socket to break these free. Clearance on this one's a little tighter and we use the ratchet wrench. All right. With those bolts removed, just going to lift this up.
So remove these two harness clips. One is on the upper radiator support, one is on the side of the car, and then you can have the harness free. All right. Now I've got this harness free. I'm going to lift this straight up and carefully, because it's still attached to the harness, and we're just going to lay it right here.
To remove the AC condenser fan, there are two 10 millimeter bolts on top. The fan sits on some pins in the bottom of the radiator. So I'm going to spray some rust penetrant on the bolts, on the backside of them. Take a 10 millimeter socket ratchet. Remove these. Get them both loosened up. Bolts removed. And lift it up and off of the pins. Bolts got kind of rusted in there. Lift it straight up and out.
See those pins are kind of rusty because I got stuck in there. If you just need to replace the cooling fan, it will help to move the AC fan out of the way. This way once you you don't have to undo the upper radiator hose, you can undo this and then bring it this way and slide it out. Spray some rust penetrant on these top bolts. There's two 10 millimeter bolts at the top, and then it's sitting in pins in the bottom of the radiator. Remove these bolts. Back part of the bolts. I'm just going to reach down and grab it carefully. Pull up on this to get it off the pins. That came out a lot easier because it's a plastic shroud. Kind of maneuver it out of here. Just kind of have to get it out of there. It gets kind of caught on these lower pins on the lower radiator hose and the upper radiator hose. Kind of move it around, flex it, and get it out. That way you don't have to disconnect these hoses and lose all your coolant.
So here's out new fan. These two mounting tabs need to go down into here in the radiator. So we're going to slide it into place. May have to maneuver it around these hoses. And this way. Make sure that it lands in those marking spots. That's where that needs to go. Push this right up against the radiator. These are just bolts going into metal nuts that are on the backside of the plastic so you don't have to go super tight with these. But once you feeling it tight, you can just stop. Either way, you can either be installing a new cooling fan and reusing your AC condenser fan or installing a new AC condenser fan and you would leave your cooling fan alone.
In our case, we're going to install a new AC condenser fan. Again, it has mounting tabs right here that'll go down into these mounting holes here. It will slide straight down. And it should land in those holes. Just like that. We need to install the bolts. Put the upper radiator support back in place. Have to kind of flip it around.
Like to push this filler neck down. Start on this side. Might get caught on this bracket that's holding the AC units so just pull that aside. It's caught over here. Take that out of the way. It's where it needs to be. Right now, I'm going to catch this bolt here. You can tell the bolts that came out of here because they'll be painted body color. Just catch one on each side for now. I'm going to go and reconnect these harnesses. This little clip broke right here and this one broke here, this one's still good, kind of squeeze it back together. Push that up with the hole underneath. Clip this fan, don't forget to clip these fans back in, because if they don't turn on while the car's running, it could overheat. That harness is fine. It's not going to go anywhere. Don't forget your core overflow hose. That goes on here. And lift this up and over. Put that into place. This clips into there, but firstly I clip it here on the bottle. Put in place. Put this up here. Get these bolts started. And reconnect the condenser fan loader.
Put this connector in. Put the harness back in. Keep that. Okay. Reinstall the upper radiator mounts. Rubber part goes over the pin. And the alignment tab, it goes right there. Reinstall the bolts. Kind of get everything set in position. The same thing on the other side. We'll come back and tighten everything. Got to reattach the condenser bolts so just lift up the bumper. These are the long bolts that go through these rubber. Make sure they're lined up. Okay. Do the same for the other one. Once those are started, take a ratcheting wrench and tighten them down. If you don't get tight, I'll stop. Do the same for the other side. Tighten three of your mount bolts. And the same to the other side.
Got our upper bolts on the radiator support, just in there kind of loose because I want to be able to move this around and adjust it a bit. You kind of see where the paints missing. When these bolts are installed, they're kind of painted in place. So that one looks lined up pretty well. I'll get that one installed. Then install the one on the backside. We do the same over here. Get it lined up well.
Install the bolt. Install it on the back. Just kind of slide it over a little bit. That looks pretty good. You don't have to be super exact, but it helps. Let's get this a little tight, I'll stop. And do the same for all the other bolts. Tighten these bolts that are holding onto radiator filler neck. Went down pretty evenly. Install these Torx head bolts that are holding on the bumper. These don't need to be very tight. You don't want to crack the bumper or strip the bolts. Just going to bring it down, that's just fine.
Install these here. And reinstall the plastic shield that goes on the top. Going to start by going over the hood latch. Kind of flex it, if need be. Pick this up. Pick this one up over here. Slide it underneath. So that also needs to go under the fender. See this is pretty flexible, you can push it around. Same thing on that side. Pop that under. This lip goes under the chrome, so you got to go backwards first. Just kind of push it back and get it underneath the chrome. Let’s bolt both sides. Just like that in place. The same with the other side. And these two push clips will go in here.
Push our plastic battery tray back in place. Reinstall the battery. Make sure the wires are out of the way. Reinstall the plastic cover. This wide opening goes towards the front. Put that in place. Put the battery tie downs. Get them hooked. Tighten those down. Reinstall the positive terminal. So that actually over that. Put that down there. This one is a 12 millimeter. And when you're tightening this one, just make sure you don't touch the end of the wrench to that one. Because this is the live terminal. Couple turns, make sure it's tight. Now reconnect the negative. And this one will use a 10 millimeter. Tighten that up. And there you go.
Thanks for watching. Visit us at 1AAuto.com for quality auto parts, fast and free shipping, and the best customer service in the industry.
Shop Products

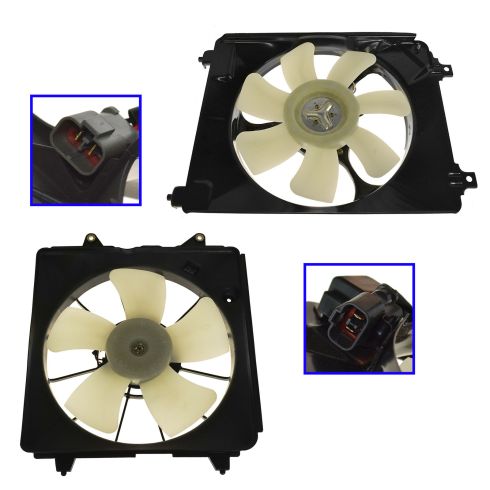
2006-11 Honda Civic L4 1.8L Automatic Transmission Engine Cooling Fan Assembly with A/C Condenser Cooling Fan Assembly 2 Piece Set TRQ RFA81501
Part Details:
- 2 Piece Set
- (1) A/C Condenser Cooling Fan Assembly
- (1) Engine Cooling Fan Assembly

How To Replace Radiator Cooling Fan 2002-06 Nissan Altima
Replacing the radiator cooling fan? This repair is not as complicated as you might think. Learn to do it yourself with this video!
