How to Replace Radiator 2007-10 Hyundai Elantra
Created on: 2019-07-02
Check out this video to learn how to replace the radiator on your 07-10 Hyundai Elantra. 1A Auto helps you out with step by step instructions!
-
step 1 :Removing the Radiator
- Make sure the vehicle is cool
- Remove the radiator cap
- Inspect the radiator cap for damage or wear. Replace it if necessary
- Raise and support the vehicle if necessary
- Place a drain pan under the radiator drain
- Loosen and remove the radiator drain petcock
- Remove the two 10 mm screws to remove the air collector
- Disconnect the radiator overflow hose from the radiator, and set it aside
- Disconnect the radiator fan electrical connector
- Remove the 10 mm screw to remove the hose retaining clip at the top of the radiator fan
- Pry the retaining clip on each side of the radiator to disconnect the radiator fan mounting brackets
- Lift and remove the radiator fan
- Disconnect the smaller hose from the bottom driver side of the radiator
- Loosen the upper radiator hose clamp and slide it back
- Disconnect the upper radiator hose from the radiator
- Remove the two 10 mm bolts securing each upper radiator mounting bracket
- Remove the upper radiator mounting brackets
- Tip the radiator to drain any remaining fluid
- Pry the retaining clip on each side that secures the AC condenser to the radiator
- Disconnect the upper smaller hose on the driver side of the radiator
- Pry the electrical retaining bracket from the radiator
- Loosen the lower radiator hose clamp and slide it away
- Disconnect the lower radiator hose from the radiator
- Lift the radiator to remove it
-
step 2 :Installing the Radiator
- Set the radiator down in the lower anchor points
- Seat the AC condenser into position onto the radiator
- Reconnect the upper radiator hose and reposition the hose clamp or replace it if necessary
- Reconnect the lower radiator hose and reposition the hose clamp or replace it if necessary
- Reconnect the lower small hose on the driver side of the radiator
- Seat the upper small hose into the retaining brackets
- Reconnect the upper small hose on the driver side of the radiator
- Position the upper radiator mounting brackets on the radiator and secure each with the two 10 mm bolts
- Reposition the radiator fan on the radiator
- Reconnect the electrical retaining bracket to the radiator fan
- Reconnect the radiator fan electrical connection
- Reposition the upper radiator hose retaining bracket on the radiator fan and secure it with the 10 mm bolt
- Replace the radiator overflow hose in the retaining clips on the radiator fan
- Reconnect the radiator overflow hose to the reservoir
- Reinstall the air collector and secure it with the two 10 mm bolts
-
step 3 :Filling the Coolant
- Use a coolant refill system to apply vacuum to the cooling system
- Leave the system under vacuum for 5-10 minutes to detect leaks
- Insert the fill hose into the coolant and open the valve to fill the coolant system
- Alternatively, use a coolant funnel set to fill the system with the engine running
- Replace the radiator cap when done
Tools needed
-
Socket Extensions
Pry Bar
Jack Stands
Hose Clamp Pliers
Drain Pan
10mm Socket
Ratchet
Floor Jack
Pocket Screwdriver
Pliers
Hey, friends. It's Lenny here from 1A Auto. Today, I'm working on a 2007 Hyundai Elantra. I'm going to show you something very simple, we're going to replace the radiator. It can be a fun job, I want to be the guy that shows you how to do it. If you need this or any other part, you can always check us out at 1AAuto.com. Thanks.
Okay, so one of the first things you want to make sure you do is you know you're going to want to make sure that your engine's nice and cool. You haven't been driving it, you didn't just come back from the beach, or maybe even the part store grabbing your part. It's nice and cool. We're going to have gloves and eye protection, of course. We're going to press down on this. Give it a little twist to the left counterclockwise. We'll lift up our radiator cap. Under here's coolant. It's a chemical, so you want to make sure you don't get it on your skin or in your mouth or on the ground. Save the penguins and dolphins and Sasquatch and all of them.
Right here is our radiator cap. It's a little seal right here. There's also another seal right down there. You want to check those, make sure they're not swollen or cracked or anything like that. These actually look really good, I'm not too worried about it. If they were cracked or swollen or anything, you'd want to just go ahead and replace it. Okay. Generally speaking, if you're replacing the radiator, it's a good habit to replace the radiator cap. This one's been semi-recently replaced by the look of it, or maybe it hasn't. I don't really know, but it's in good condition, so I'm just going to reuse it.
We'll move along. Now that we've got this open, we're going to get underneath the vehicle. You can either raise and support it and get under there, or you can slide under it, whatever you need to do, but we're going to figure out how to drain the coolant out of it, make sure we put it into a recycling receptacle. The majority of this job can be done from right up top. That white piece right there, you can grab that and you can turn it, and that will release the coolant right down there. That's the petcock. Like I said before, you want to make sure that you have a recycling receptacle under there before you do it. Do not drain it into the ground, it's very poisonous. It's not good for anything, okay? Yeah, you either get under there, you can drain it that way, or you can just grab it from up here. But definitely have a receptacle under there.
Okay. Something that I wanted to mention real quick is before we go ahead and start tearing out our old radiator, we want to just try to do a quick comparison of our new radiator to what the old one looks like, so we want to make sure, basically we're looking at the same length, right? We've got the same fill, it comes out at the same angle, does everything that the old one does. That's nice. These right here, are tranny cooler lines, or you're going to have a lines that go into it, so you want to make sure that you have both of these, because the old one has those as well. Very important. The lower hose is located over on the driver's side of the vehicle. It's on the vehicle as well, or on the new radiator. Top hose comes out at an angle over here, looks good, and of course we've got all our little clips and doodads for our fan shroud. So this looks like it should match up pretty well. I would say let's go ahead and start draining this puppy, and we'll get rolling.
We've got our coolant recycling receptacle. I'm going to reach down and grab that petcock and we turn it counterclockwise, wearing my gloves of course. I don't want any chemicals on my hands. There we are. Try to catch the majority of that. That's what the petcock looks like. Nothing special, just got a little seal right there. Okay. We'll let that drain out. Now it's time to get this out of the way. This is just an air inlet. It goes down to your air filter box. We've got a 10 millimeter here, and there should be a 10 millimeter there, so if you have two, remove two, you have one, remove one. Either way, remove the anchoring bolts with a 10 millimeter. Once you have that out, we'll go ahead and remove the air duct. That's what this one looks like. I'm just going to pull it right off. Let's get this out of the way. Just going to pull it off of here. Here we are. I worked that out of there, that out of there. Cool. We'll set this right aside. Can move along here.
We've got electrical connectors. We take off the bottom side. Just going to put this in here. Give this a little wiggle. We'll take a peak. As you can tell, there's no funny colors. You always want to check your electrical connectors. We'll put this aside. This wire right here goes right to the motor, so we don't have to worry about taking any of this apart. Awesome. Get this off of here. We can take that off. Just get my socket on. Here we are. Put that right there and set it aside where we can find it again, of course. Perfect. We're looking pretty good here.
On the radiator itself, it has a little piton. You just kind of pull it away, and then you can lift up on the fan shroud. Just like that. I'm going to do the same thing on this side. It's just a little piton. Pull it away, lift up, and I'm going to take this. Let me see if I can work it up. Okay. It's pretty much ready to come off. I'm going to leave it just like that. I could do this clamp down here while I'm here, but what I'd actually like to do is go back up top. I'm going to take off the upper hose, and then I'll take out the mounting bolts that hold the radiator secure, and now I'm going to tip the radiator, and I'm going to try to drain the rest of the coolant out through the petcock. That's my plan.
Get a little hose clamp pliers. You can use whatever you've got. Give it a little squeeze, there we are. Slide it down the hose. I can take my pliers off of here now. I'm going to try to move the hose around. As you can tell, it's stuck on the radiator, so I'm just going to work it a little bit. Can use some penetrant, or wherever you want, really, whatever you have to do to get it off. Maybe just try to stick a screwdriver in there a little bit. Give it a little pry. Usually, once it starts moving it frees right up. There we are. Okay, set that aside.
Now we're going to remove the anchor points for the radiator. There should be two 10 millimeter head bolts over here, and there should be two over here. There's one that's already broken on each side, so I took the liberty of spraying down to see if these other ones will come out, hopefully without breaking. That's one. Set that aside where I can find it. Set that aside where I can find it. Anchor number two, exact same as the other one. You don't have to worry too much about mixing them up. You can lift this up now a little bit. I'm just going to try to tip the radiator, see if any more fluid comes out. Doesn't appear to, so that's nice.
Let's take a look in here. We have our AC condenser still attached to the radiator. Just clips in. Let me take a look here. Looks like it's clipped on both sides. Grab my tool here. Right down here there's a little black clip, just going to push that over. Okay. Once I push it over, hopefully, if I can everything to work together with me here, I should be able to, lift that condenser up a little bit and do the same thing to this side. Another little push clip, or whatever, little clip that holds it, so I'm just going to see if I can grab onto it, see if I can't slide it up somehow. Whatever you got to do to get it slid up. But essentially just kind of those pins are what's really holding it.
I'm having a little bit of a hard time getting the AC condenser to lift up out of the radiator. Every time I try to lift the clip itself just kind of goes back over, and it's giving me grief. We're replacing the radiator any way, so I'm just going to do what I do, and I'm going to break it. That's how I roll, because I'm replacing it. It doesn't matter. And make sure I've get my safety glasses on, I'm just going to go ahead and booyah. Now I can move the AC condenser around all willy nilly. That's nice. Let's see if we can get it to lift. Lifts up nice and easy at this point. Perfect.
Let's move on to the next step. We'll remove this hose up here and the lower radiator hose. I'm going to grab this clamp right here. I'm just going to try to give it a little squeeze with my pliers. Hope they don't keep sliding off on me. Slide this right down here. There we go. I'm going to grab the hose. Just give a little tweak, get it moving. Now I'm going to grab the hose with my hand. I'm going to wiggle it, I'm going to see if I can pull it off of the radiator. If it doesn't want to come off like this, we'll just do like what we did before with my handy dandy tool here. Just try to work your way in between, without, of course, tearing your hose. Super important. If you needed to, you could put a little penetrant. I'll just put that there for later. here we are, we got that off of there. This hose will come off to the side, just like this. Okay, we'll get this out of the way.
This right here is attached right down here, so we just need to get that off. It has two little prongs that go like this. All I'm going to do is squeeze these and then draw it out, so I'm going to grab some needle nose pliers. You can see the little prongs. I've got my needle nose pliers. I'm just going to try to get in here. Give them a little pinch. I'm going to try to pull this out. There we are. You can see my little ears. All I did was squeeze them, and then I pulled it through. So here we go, I'm going to try to get my hose clamp pliers on this bottom clamp. I think it's on there. Give it a little squeeze here. Give it a wiggle, pull it up there. Get my pliers out of here. Okay.
Grab our hose. We might get some fluid out of this, so I'm just going to try to tip it a little bit more here. Let's see if I can get any fluid that might be left down to that petcock. Seems pretty decent. Just going to do myself a favor, just in case. There we are. All right. It wasn't so bad. Like it. Cool. All right, so this is moving around nice now. Let's try to get our AC condenser out of the radiator. A little piton thing there. I'm just going to do the same thing like I did earlier. I'm not worried about the radiator. There we are. A little bit of brute force. Get these puppies separated. Let's see if I can get my condenser up. Put my radiator that way. Here we go. We're on our way up here. There we are. We've removed our radiator.
So here we are, friends, a quick product comparison for you. Over here we have our radiator out of our 2007 Hyundai Elantra. We just pulled it out, it's fairly easy. Over here we have our brand new quality 1A Auto auto part. Came shipped direct, came in great quality, great condition. It's got all the same mounts, right? We've got our little mounting things right here, some over here. Same exact thing over here. We've got these for the tranny cooler lines, new one, same thing. Everything matches up, it doesn't matter how you look at it. We've got our necks, we've got our lower hose, got our upper hose, the petcock hole, everything. It's perfect. Just hold it right over each other real quick. As you can tell, they're the same length. They're the same height. I go this way, they're the same width. Everything looks perfect. I don't see any reason why this wouldn't be a quality part to install into our vehicle, so I'm going to go ahead and do it. So if you need this or any other part, you can always check us out at 1AAuto.com. Thanks.
I just wanted to show you, after we pulled the radiator out, this is the rubber mount where the bottom of the radiator sits into. There's another one located on the driver's side of the vehicle. If either of them is missing, well, it probably fell on the ground or it's stuck to your other radiator, but you definitely want to have both of those. Those are the anchor points for the bottom, and the top is anchored in by those bolts that we took up. Now that we know both of those are there, let's grab our radiator and we'll get it back in here.
Here we go. Let's get the radiator in. We're going to try to slide it in nice and easy here, see if we can get it lined up with the holes that it's going to anchor into down there, just to make sure that it will fit and it does. Cool. You don't have to worry too much about having it go in and stay in at this point, because what we're going to have to do now is get the condenser, lift it up into those bottom channels on the radiator, and of course into the top to get locked in.
Now I'm going to grab the condenser. I'm going to try to lift it. I'm going to pull it up against the body of the radiator. Take a peek. It looks like that one's almost ready to go in on the bottom. This one's out. This side right here is the harder side, because of course you've got all your other lines mounted in right here. If you needed to, you can go ahead and take out this bolt, and that'll give you plenty of slack to move this condenser up and down. We might end up doing that, but let's just see, without spending too much time, time's money in the long run, right? Let's just see if we can do it.yeah, that's it. Okay. Let's check this side again. This looks pretty good.
The condenser right here is going to have to come towards the passenger side so we can get into this clip. I've got my 10 millimeter and my extension. Just going to take out this bolt over here. That's what it looks like. At the bottom side, slid in right there. Now it's out. The hard part's getting everything aligned just right. Technically, you've got four points that you need to get slid in almost at the same time here. At least two on each side, so you know it's always just going to be a hassle. It looks like we got these all lined up. Just double check real quick, so it looks like it's good to go. Now all I'm going to do is try to help that condenser down into the radiator, because that's where it wants to be. This side, locked. I'm just going to go ahead and put on a new clamp. Slide this over. This right here. Eight millimeter. Try to make it as straight as I can here. Take a look at it. That looks pretty straight. I'm sure it's nice and snug. Give a tug and a wiggle, feels great.
Anytime you can replace some clamps, couldn't hurt to just do it, so I'm going to do the same thing for that bottom one down there. I'll get that other one clamp off of there with my clamping tool here. Get it on there. Get that right out of here. We've got our new clamp. Just going to slide it on the hose here. Slide the hose with the clamp onto the radiator. Try to get the clamp so it's as straight as possible. Make sure our hose is in as far as it can go. Feels pretty good. I'm going to go ahead and tighten it down. A lot of these clamps have a little area for a flathead screwdriver, can use that. I'm just going to grab a ratchet and I'm going to give it a little bit more. My little tug feels pretty great.
Get this little rubber boot off of this. There we are. Just comes right off. I've got another clamp right here. This one, this just goes inside here. I'm just going to work it in best I can. There we are. Take off our little yellow thing here, these are just protection. Now we get a pair of them, even better. There we are. I'm just going to get this clamp up on there, so I'm just going to use some pliers. See if I can get it on there. Grab it from another angle here. There we are. Nice. It's always a good idea to check your petcock. Yep. Make sure that's tight. Sometimes during shipping or assembly even, maybe they're left a little loose, so now's the time to check it, right? I checked it. It's nice and snug.
We're going to anchor this. All right. We've got our anchors, a little bolt here. Slide it in here. Only need one of those for now. Tighten that up in a minute. I'm going to do this one. Theoretically, there should be two on each side like I told you before. These are 10 millimeter heads. Once you have them both started, go ahead and snug them up, bottom them out, and then just give them a little bit more. This bottom feels good. This one, see if I can get it on there. There we are. My 10 millimeter, see if I can't get it lined up. Looks pretty great. Bottom, this feels great.
All right, let's get a move on. Let's go ahead and get this fan shroud back in, shall we? I'm want to put it in this way. No, we're going to put it in this way, right? We've got our electrical connector over here. I'm going to try to keep it fairly straight. Going to be careful for my O2 sensor, and of course my radiator fins. Let's see if I can get it past all this. There we go. Okay. I see what's holding us up. There it is. Just keep wiggling it. There we go. Okay.
On the backside of the radiator, the engine side, there's little hooks like this along the bottom, and then there's hooks along the top as well. The top ones lock in, so we want to make sure we have it settled in to the bottom ones, of course. Those are the harder ones to see, and then make sure they're lined up with the top ones as well, which it looks like it is. I'm going to give it a little bonk. Bonk, bonk, bonk. There we go. That's my thing. Got our little clippy-do that we took off. Push that in there. We've got our electrical connector with our lock. It's facing towards the engine. Give it a little squeeze, listen for a click, double click, bonk. There we are. Just want to make sure that this is fully locked in. Okay. Right here.
We've got this. Just going to go right like this into there. We're going to tighten this down with a 10 millimeter. There we go. Feels good. Nice. Purpose of this is to keep the upper hose from going near the fan, and/or the heat of the exhaust, so it looks like we're cruising right along. Get this right here. Just getting kind of set where we know it's going to need to go. Just clip it in. That's fairly easy. It's going to go right on here.
This is the overflow hose. As your engine coolant gets warm, fluid expands, so when this is fall, it's going to expand. It has to go somewhere. The radiator cap's going to do its job. A little plunger is going to go up. It's going to let coolant come through here, and then fill up your overflow. We've got our air intake. I'm going to start it into the air filter housing first. I'm going to set it down onto this right here. I'm going to bring it down right to there. I'm going to put this bolt back in. Get it lined up. Should be two, there's only one. Broken bolts. Feels pretty great. All right, let's get to filling her up.
Okay, so now it's time to go ahead and fill our cooling system. You can use something as simple as a funnel, or even just pouring it in with a jug. I prefer to use something like this, it's an air lift system. What it does is it creates vacuum inside your cooling system. It'll suck down all your hoses nice and tight, take out as much air as it can from in there, and it'll hold pressure. Once you get the vacuum down below the 25, close to the 30, anywhere in between the 25 and the 30, honestly, you have it holding there, you turn off the air, pinch off this line right here, so it'll sit there and hold vacuum, then you walk away. You want to let that sit for between five and 15, even half an hour if you want, if you've got the time, but at least five minutes. Make sure that that gauge doesn't go ahead and drop, drop, drop, drop, into the yellow, into the red. If it does any of that, you have a coolant leak.
If you have a coolant leak, now's the time to fix it before you go ahead and fill it up. So here we go. Okay. Seems as though it's pretty, it's holding pretty constant right there. It hasn't gone up any more than that. I would say that's about the max we're going to get. I'm going to turn that. I'm going to turn off our air. Now I'm just going to let it hang out, between five and half an hour. Maybe I'll take a lunch. I don't know. I'm probably going to shoot for five minutes though. I'm going to go ahead and open this up. This has been holding pressure for quite a while now. I would say a little over five minutes really. I'm just going to let the vacuum do its job. Now it's time to get our tool off of here. We'll have our rag ready. Hand protection, of course. Don't want to get any chemicals on our hands. Here we are. Lift this up, let gravity bring the rest of the coolant that might be in the lines back into our bucket. Make sure we rinse this. Okay.
The next thing that I'd like to talk to you about is a product that we sell here at 1AAuto.com. It's a Lisle multipurpose kit right here. It's got pretty much every adapter known to man for filling these, so it's going to be wonderful. All you're going to want to do is grab the adapter that you need, put it on here, get your funnel on there, put it maybe about this much coolant, and then we're just going to run this puppy. All it's going to do at that point is it's going to burp out the system. Any air bubble that might be stuck in there at that point is going to come to the top, come gurgling out, and whatever fluid's in here is going to work its way down. Easy peasy. I would highly recommend this for you.
Okay. Our systems full just from running our vacuum system that I just showed you, so that makes it a short work. Now I'm just going to use the radiator cap, and get it lined up. Turn it so it's locked in. Easy peasy. Of course, we had the tranny lines off the tranny cooler on this when we did the radiator job, so you want to make sure any tranny fluids you lost, you're going to add some. The way to check this transmission fluid is, with the transmission hot, you just went for a ride, you come back, if you're on a flat level surface, you ran it through all the gears, all the way down from park, all the way down to whatever it is, second or first on the transmission shifter.
Okay, bring it back to park and either have it in neutral or park, and then what you're going to do is you're to come out here, you're going to pull your tranny dipstick, with the vehicle still running, clean it off, put it back in, pull it back out, and check the level. If the level's low, you're going to add a little bit. If the level's high, well, I don't know how you did that, but I guess you'd have to take a little bit out somehow, okay? But anyway, we're going to assume that the level's perfect and you're good to go.
Thanks for watching. Visit 1AAuto.com for quality auto parts shipped to your door, the place for DIY auto repair. And if you enjoyed this video, please click the subscribe button.
Shop Products
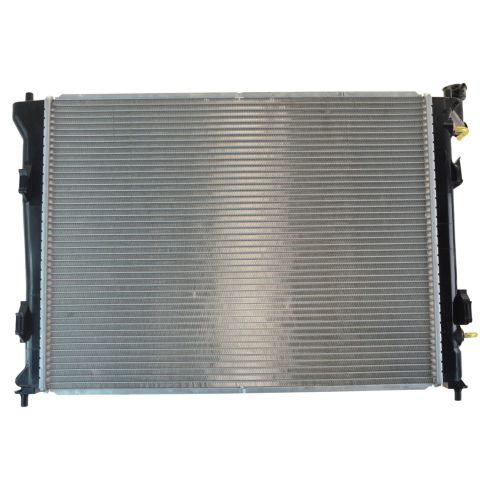
Hyundai Elantra Radiator TRQ RDA83013
Part Details:
- Left & Right
- Top Right
- Plastic
- Yes
- Bottom Left
- Aluminum
- Concentric
- 0.63 in
- No
- Cross Flow
- 1
- No
- Yes
- No
- 23.5 in
- 18 in
- 1.25 in
- 1.25 in

How to Replace Radiator Cap 2007-11 Honda CR-V
How to repair, install, fix, change or replace a broken, damaged, or leaking radiator cap on 09 Honda CR-V.
