How to Replace Radiator 2005-10 Chrysler 300
Created on: 2017-01-04
Watch the steps involved in replacing the radiator in a 05-10 Chrysler 300.
-
step 1 :Draining the Radiator
- Raise and support the vehicle on jack stands
- Have a drain bucket ready
- Open the petcock at the bottom passenger side of the radiator
- Let the coolant drain
- Close the petcock
-
step 2 :Removing the Radiator Fan Assembly
- Remove the clips on the upper radiator hose with needle nose pliers
- Slide the hose off of both sides
- Remove the hose
- Disconnect the fan wiring harness
- Remove the harness from the fan
- Remove the 10mm bolts above the radiator hose fitting
- Remove the 10mm bolt on the opposite end
- List the fans up and out
-
step 3 :Removing the Radiator
- Pop up the radiator protectors
- Remove the two 10mm bolts from the radiator bracket
- Pry out the pins from the radiator covers with a pair of pliers
- Remove the radiator brackets
- Have a drain pan ready
- Remove the clamp from the lower radiator hose
- Pry out the push pin on the bottom of the insulator panel
- Remove the 10mm bolt on the lower condenser brackets
- Move the radiator back
- Remove the 10mm bolts on both side
- Remove the radiator
-
step 4 :Installing the Radiator
- Remove the covers on the radiator
- Insert the radiator into place
- Tighten the 10mm bolts on either side
- Insert the condenser brackets into place
- Reinstall the 10mm bolts on the bottom of the condenser
- Insert the radiator into the radiator support
- Insert the drain tube through the port
- Reinstall the lower radiator hose and clamp
- Reinstall the brackets on the top of the radiator
- Tighten the 10mm bolts to the brackets
- Reinstall the pins into the radiator guard
- Reinstall the passenger side and then the driver side radiator covers
- Reinstall the pin on the bottom of the radiator
-
step 5 :Installing the Radiator Fan Assembly
- Remove the wiring harness from the old fan
- Hook the wire into the new assembly and connect the harness
- Insert the assembly into place
- Tighten the 10mm bolts to the radiator fan
- Connect the fan wiring harness
- Install the upper radiator hose
-
step 6 :Filling and Bleeding the Radiator
- Push down and rotate the cap counterclockwise
- Insert a funnel
- Fill the vehicle with the 50/50 mix of appropriate coolant and water
- Start the vehicle
- Set the fan to the lowest setting
- Set the heat to the highest setting
- Keep the coolant level up and monitor the temp on the gauge and out of the vents
- Wait for a steady flow of heat, bubbles to stop, and steady coolant level
- Remove the funnel
- Reinstall the cap
Tools needed
-
Side Cutters
Gloves
Flat Blade Screwdriver
Channel-Lock Pliers
Jack Stands
Drain Pan
Floor Jack
Needle nose pliers
Anti-Freeze
Hi, I'm Mike from 1AAuto. We've been selling auto parts for over 30 years! We're dedicated to delivering quality auto parts, expert customer service, and fast and free shipping, all backed by our 100% satisfaction guarantee. So visit us at 1AAuto.com, your trusted source for quality auto parts.
In this video, we're going to be working with our 2006 Chrysler 300, 3.5-litre V6. We're going to show you how to remove and replace your radiator as well as how to properly drain, refill and bleed your cooling system.
If you like this video, please click subscribe. We have a ton more information on this car, as well as many other makes and models. If you need this part for your vehicle, you can follow the link down in the description over to 1AAuto.com.
Here are the items you'll need for this repair: drain pan, antifreeze, side cutters, needle nose pliers, groove jaw pliers, flat head screwdriver, gloves, jack and jack stands
Raise and support your vehicle. We are using a lift to make it easier to show you what's going on, but this job can easily be done at home on a jack and jack stand. Open the petcock at the bottom passenger side of the radiator. Allow the coolant to drain into a proper receptacle. Once the coolant has finished draining, go ahead and close the petcock. You may still want to keep the drain bucket underneath there, just in case there are any little drips.
After draining the cooling system, remove the clips on your upper radiator hose. We'll do this using a pair of needle nose pliers. Simply compress this. Slide it out of the way. Wiggle the hose to release it and then move on to the clip on the radiator side. Once you've slid the clip back, remove the hose; place it off to the side. Push down on the tab and disconnect the fan clip. It helps to use a pair of side cutters underneath this tab to help lift it up evenly on both sides and pop it out.Remove the 10 millimeter bolts here just below the upper radiator hose fitting and one in the same place on the opposite side. We'll do this using a 10 millimeter socket and ratchet. Remove the cooling fans by leaning them back, lifting up and pulling them out of the vehicle.
Remove the covers over top of the radiator, simply by popping them up. Remove the two 10 millimeter bolts for the radiator bracket on the front side of the core support here. We'll do this with a 10 millimeter socket and ratchet. Remove the radiator insulator covers. Use a pair of side cutters to pop these pins out. Move those out of the way, there's one on each side. Remove the radiator brackets on each side by pulling back on this cover. Remove the clamp on the lower radiator hose and, while we have already drained our coolant, I've placed a drain bucket underneath just because sometimes these don't drain out quite as well as you'd hope—it's better to have it there and not have it spill than have it spill and not have a bucket to catch it.
We're going to use a pair groove-jaw pliers on this clamp just because it seems a little easier to get to. Collapse the clamp, wiggle it back, make sure you leave it somewhere you can get at it again easily, and then remove the hose from the fitting. Remove the push pin on the bottom of this insulator panel. We're going to use one of our 1A Auto trim tools. It's a great way to pry these out. You only need to pull that pin out about half way. If it comes out, no big deal. Pull the bottom section out and now we can pry away this cover to make it easier to get at our lower condenser bolts. We'll repeat the step on the opposite side. Remove the 10 millimeter bolt on the lower condenser bracket. This one is on the driver side. You can reach up where we just removed the insulator panel from. Repeat this process with the condenser bolt on the opposite side. Lift up and move the radiator backwards as far as you can. Once you have it laid back, you should be able to remove the 10 millimeter bolts, one on each side, securing the A/C condenser to the front of the radiator. Repeat this step on the opposite side. Remove the radiator from the vehicle.
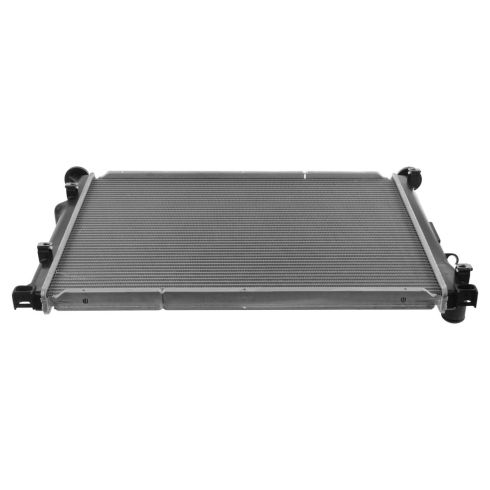
Here we have our old radiator that we removed from our vehicle and our new part from 1AAuto.com. As you can see, these parts are exactly the same. We have the same rubber bushings to mount into the bottom radiator support, we have the same hooks that will hold the bottom half of our cooling fans, the same pet cock, even comes with a new drain on it. The same two pins, the same two speed nuts for us to screw in the tops of our radiator fan as well as the same bottom and upper radiator hose. These tabs here are where the brackets for our upper radiator support will lock in. The radiator is the same shape and size meaning that we'll get the same cooling efficiency that our old radiator had. If your old radiator is leaking, cracked, broken or not flowing properly, this new part from 1A Auto is going to go in direct fit just like our original equipment, and fix you up right.
Reinstall the radiator. Be sure not to catch any wires or hoses while installing it. Once the radiator is in, lay back the A/C condenser and reinstall the 10 millimeter bolts. Tighten down the bolt with a 10 millimeter socket and ratchet. Repeat this step on the opposite side. Reinstall the two 10 millimeter bolts at the bottom of the A/C condenser as well. Reinstall the radiator into the holes in the lower radiator support. Make sure that your drain tube goes through its opening in the lower radiator support as well. Reinstall the lower radiator hose. Collapse the radiator hose clamp and slide it back into place.
Reinstall the brackets onto the top of the radiator. Reinstall the bolts in each of the upper radiator support brackets. Reinstall the pins into the upper portion of the radiator shroud, one on each side. Do this using your fingers. Reinstall the passenger side cover first. Hook the driver side loop over the passenger side cover. Reinstall the pin in the bottom valances as well, again one on each side. Make sure your pet cock is closed and reinstall your lower wind dam if you have one.
Install your fans hooking these latches into the hooks on the bottom of the radiator and lining up the top for the bolt holes. Reinstall the 10 millimeter bolts at each side. We'll start them by hand to ensure that they're aligned properly and then tighten them down with a 10 millimeter socket and ratchet. Reinstall the connector. Install your upper radiator hose. Once you have the radiator side installed, you can install the end on the lower intake manifold. Sometimes when the clamps are spread wide like this, it's easiest to do with a pair of groove job pliers.
Open the cap by pushing down and rotating it counterclockwise. Place a funnel in your reservoir and fill the vehicle with as much 50/50 mix of the appropriate coolant and water as the system will take.
Start the vehicle. Set the fan to the lowest setting and the heat to the highest setting. I like to set it to vent so it's easiest to feel through an open window. Make sure you have some extra coolant ready to go, next to the car, while it's running.
Continue to keep the coolant level up and monitor the temperature coming out of the vents as well as the one on the gauge. Once the vehicle has a steady flow of heat and has maintained it's normal operating temperature, the bubbles have stopped and it's stopped bringing down the coolant level, you can shut the vehicle off. Remove your funnel and reinstall your cap by pushing down and moving it two clicks. You're good to go.
Thanks for watching. Visit us at 1AAuto.com for quality auto parts, fast and free shipping, and the best customer service in the industry.
Shop Products
Dodge Chrysler Radiator TRQ RDA82685
Part Details:
- Left & Right
- No
- No
- Plastic
- No
- Aluminum
- Cross Flow
- 1
- No
- Top Right
- Bottom Left
- No
- 18.38 in
- 24.31 in
- 1.5 in
- 1.25 in
- 1.5 in

How to Replace Radiator Cap 1994-2002 Dodge Ram 1500
Check out this video to learn how to replace the radiator cap on your 94-02 Dodge Ram!
