How To Replace Power Window Regulator 2005-09 Chevy Equinox
Created on: 2012-02-03
Learn how to remove the door panel and replace a damaged or bad window regulator motor with the help of the 1A mechanics in this video.
-
step 1 :Removing the Door Panel
- Remove the Phillips head screw inside the door handle
- Remove the door handle bezel with a flat blade screwdriver
- Remove the trim from the pull handle with a flat blade screwdriver
- Remove the 10mm bolts from inside the pull handle
- Pry off the trim piece at the front top corner of the door panel with a flat blade screwdriver
- Disconnect the speaker wiring lead
- Pry out the door panel with a door panel clip tool or putty knife around the edges
- Lift the door panel up and off
- Carefully peel off the water shield
-
step 2 :Removing the Window Regulator
- Push on the tab that holds the window to the regulator while pulling up on the window
- Raise the window by hand
- Hold the window in place with painter's tape
- Punch the upper rivet with a punch and hammer
- Drill the rivet with a 1/4 bit
- Shave the rivets with a 1/2 bit
- Remove the three T30 Torx screws from the window motor
- Disconnect the window motor lead
- Remove the 10mm bolts that holds the window to the regulator
- Pull the window regulator out through the door
-
step 3 :Installing the New Window Regulator
- Remove the 10mm bolt and nut from the new regulator
- Remove the pin from the regulator wheel
- Push the regulator into the door and align it
- Reattach and tighten the 10mm nut and the 10mm bolt on the regulator
- Put the motor onto the bracket
- Pull the balancing spring into place
- Insert and tighten the three T30 bolts into the motor
- Reconnect the window motor lead
- Remove the painter's tape from the window
- Lower the window onto the regulator
- Test the window
-
step 4 :Reinstalling the Door Panel
- Put the water shield into place
- Lift the door panel into place
- Push in the door panel clips
- Tighten the 10mm bolts from inside the pull handle
- Re-clip the door handle bezel
- Tighten the Phillips head screw inside the door handle
- Re-clip the trim onto the pull handle
- Reconnect the speaker wiring lead
- Re-clip the trim piece at the front top corner of the door panel
Tools needed
-
Phillips Head Screwdriver
Putty Knife
Hammer
Center Punch
T30 Driver
10mm Socket
Socket Extensions
Drill
1/4 Inch Drill Bit
1/2 Inch Drill Bit
Flat Blade Screwdriver
Ratchet
Brought to you by 1AAuto.com, your source for quality replacement parts and the best service on the Internet.
Hi, I'm Mike from 1A Auto. I hope this how-to video helps you out, and next time you need parts for your vehicle, think of 1AAuto.com. Thanks.
In this video, we're going to show you how to replace a window regulator on this 2008 Chevy Equinox. We're going to show you the driver's front door, which is basically the same as the passenger's front, as well as a similar process for the rears. This also works for 2005 to 2009 Pontiac Torrent. When your window regulator goes bad, usually you hear a popping and then a grinding noise, and when you press a switch you can still hear the window motor trying to do something but your window, obviously, doesn't move. Usually, when your window regulator is broken, you can grab a hold of your window and move it up and down. Obviously, the window motor does not control that. The tools you'll need include a flat blade screwdriver, Phillips screwdriver, 10mm socket and ratchet with extension, a door panel clip tool or a putty knife, a hammer and punch, a drill with 1/4 and 1/2 inch drill bits you do have to drill out a couple of rivets to get the old one out and then a T30 Torx driver.
If you look in behind your door handle, there's a Phillips screw. Start by removing that. Then the front, you just pry a little bit with a screwdriver, it unclips, and then pull it off. Then, carefully, with screwdriver, start in the back on this piece of trim here and pull out. You just work your way, eventually pop the clips loose and one last one right up closer to the front here. Then that comes out. Right inside here, there's two 10mm bolts. Remove those. Right up here, if you get your finger underneath or use a screwdriver, pull out on this panel, and then it connects to a little speaker, just pull that connection apart. Put that down.
Now, the panel is in by a series of clips. The door panel clip tool is the right tool. If you only have a putty knife, you can actually see the first one, pull the panel out a little bit, get right down next to that clip you can see right down in there, pull with the knife and the panel at the same time. I popped two out there on that one. Keep going down so you feel the next clip, same thing, and go all the way around. Just speed it up here as I work my way around with all the clips. Once you released the panel around the edges, just grab the top firm, pull, and it comes out. Next, you're going to remove your sound and water shield. This is in fast motion. I actually take about five or six minutes to get this off. You want to pull it off carefully, you don't want to ripe it because you do want to be able to put it back on and have it do its job of keeping water out of the vehicle as well as reducing noise.
These regulators are actuated by a cable, and what happens a lot is the cable breaks, and you know if the cable is broken because you'll hear probably you'll hear a popping sound and then some grinding. Then you can still hear the motor running but it's not moving the window. Generally, when that happens, you'll be able to grab your window and move it up and down. What you want to do is the window is held on by a little tab here, so you're going to use a screwdriver and push on this little tab right here. While I'm pushing my screwdriver on this tab, you put some pretty decent force, and then I'm going to pull up on my window. Just look down here and actually the window is unlocked, and now I can pull my window right up and it's separate from the regulator.
I secured the window up with some painter's tape. I just don't want it to fall down in there while I'm working. My regulator for the original car is somewhat a part of this whole panel. It's actually attached here with a small rivet and then this goes right through. My new regulator from 1A Auto comes with a mounting bolt for that lower position, and then the upper wheel goes right through with a nut on it. This will be easy to drill out. I'm going to punch it with a punch first and then drill it. I want to put my punch right in the center where I've got a good divot to work with.
Now, I'm going to use a drill and drill those rivets out. Now, I've gone to my largest and this is a half inch bit, this is just going to shave the things right off. Just be careful of my motor here. My window motor is held on by three T30 Torx screws, I'll remove those. Now my motor comes out and disconnects right there. I got most of the rivet here, I just got a little bit of the side left over. I see it moving pretty well at least. I use a 10mm socket and remove this bolt down here. That comes off there and then you push. You grab on my transmission here, push it through there, and you bring your old regulator out, and obviously this one's fine, yours isn't going to look quite like this. It's going to be a little mass full of wires.
This is the new one from 1A Auto. Open it up. When you open it up, you want to have two things ready: a 10mm socket and ratchet to take this bolt out here, easy enough. Put this aside and the nut off here, carefully. Put that right there. Now, I'm going to clip this, but I'm going to hold my wheel in position here. Put this in, and I'm going to put this right into place, and I need to be able to line everything up here. What I'm doing here is lining that transmission up with the plate, and then pushing it onto the plate. That attaches in and now up here, I have to push this in because the window's right there, get that stud through there, and put that on. I'm also going to put the bottom bolt in here. It looks like this one is right here.
As you tighten those up, make sure you tighten them up nice and firm, but you don't have to over tighten them. Now, you may have to turn your window motor a little bit just to get it to go in. Speed it up here again as I thread those in and then use the T30 Torx driver to tighten them up. Connect that. Now take the tape off of your window, slide your window down into place, and it clips right in. Run a quick test. It works great. Now, we're just going to speed through putting the water shield back on and the door panel back on. If you need to this in regular speed, just check out our other videos for the Equinox door panel.
We hope this video helps you out. Brought to you by www.1AAuto.com, your source for quality replacement parts and the best service on the Internet. Please feel free to call us toll-free, 888-844-3393. We're the company that's here for you on the Internet and in person.
Shop Products


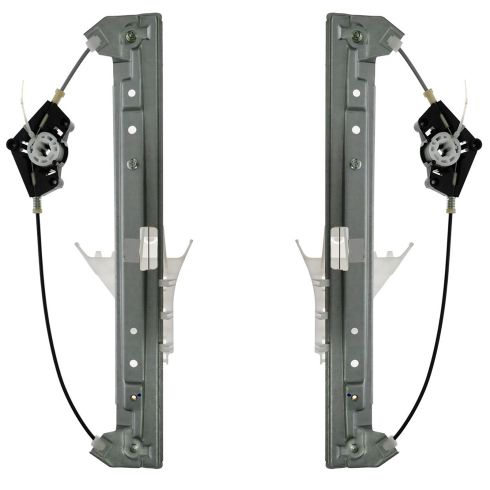
Chevrolet Equinox Pontiac Torrent Front Driver & Passenger Side Power 2 Piece Window Regulator Set TRQ WRA50748
Part Details:
- Power
- without Motor
- 2 Piece
- (1) Front Passenger Side Window Regulator
- (1) Front Driver Side Window Regulator

How to Replace Window Motor Regulator 1996-2000 Nissan Pathfinder
New Window Regulator from 1AAuto.com How to repair, install, fix, change or replace a weak, noisy, damaged or defective power window motor on 00 Nissan Pathfinder
