How to Replace Power Steering Pump Pulley 4-0L 1998-2012 Ford Ranger
Created on: 2016-11-02
How to install, fix, change, replace a power steering pump pulley for the 01 Ford Ranger
-
step 1 :Removing the Intake Tube
- Remove the Phillips head screws from the throttle body cover
- Remove the 7mm bolt from the throttle body cover
- Remove the intake tube from the throttle body, MAF, and breather hose
-
step 2 :Removing the Serpentine Belt
- Familiarize yourself with the route of the serpentine belt
- Insert the 3/8 inch drive ratchet into the tensioner
- Turn the tensioner clockwise to loosen the belt
- Pull the belt off the alternator
- Release the tensioner
-
step 3 :Removing the Power Steering Pump Pulley
- Remove the 10mm bolts from the pulley
- Tap the pulley off with a hammer
-
step 4 :Installing the Power Steering Pump Pulley
- Insert the power steering pulley onto the pump
- Tighten the 10mm bolts
-
step 5 :Reinstalling the Serpentine Belt
- Loop the belt around the crank pulley
- Bring it over the water pump
- Bring it under the A/C Pulley
- Bring it over the power steering pulley
- Try to bring it under the idler pulley
- Bring it around the belt tensioner
- Pull the tensioner clockwise with the 3/8 inch ratchet
- Pull the belt over the idler pulley
- Inspect that the belt is fully on the pulleys
- Release the tensioner
- Tighten down the 10mm power steering bolts
-
step 6 :Reinstalling the Intake Tube
- Insert the intake tube and air box cover into place
- Tighten the hose clamps with a flat blade screwdriver
- Reconnect the breather hose
- Reinstall the throttle body cover
- Tighten the Phillips head screws to the throttle body cover
- Insert the bottom cover into place
- Tighten the four 10mm bolts to the cover
Tools needed
-
Hammer
Flat Blade Screwdriver
Phillips Head Screwdriver
Complete Metric Wrench Set
Complete Metric Socket Set
Hi, I'm Mike from 1AAuto. We've been selling auto parts for over 30 years! We're dedicated to delivering quality auto parts, expert customer service, and fast and free shipping, all backed by our 100% satisfaction guarantee. We've created thousands of videos to help you install our parts with confidence. That saves you time and money, so visit us at 1AAuto.com, your trusted source for quality auto parts.
In this video, we're going to be working with our 2001 Ford Ranger 4.0-liter V6. We're going to show you how to remove and replace your power steering pump pulley. This is the bolt on style, not the press-on.
If you like this video, please click subscribe. We have a ton more information on this truck, as well as many other makes and models. If you ever need parts for your vehicle, you can follow the link down in the description over to 1AAuto.com.
Here are the items you'll need for this repair: Phillips screwdriver, 7-10mm sockets, 3/8 drive ratchet, socket extensions, flat blade screwdriver, hammer
We're going to remove this cover over the throttle body. Use a small Phillips head screwdriver to remove these two screws and a 7mm socket and ratchet for the bolt in the back. Remove the cover from the intake.
We use a flat blade screwdriver to loosen these two screw type clamps on our intake tube. We'll then wiggle the tube off of the math sensor on the throttle body and remove it from the vehicle. You also have to remove this breather line from the back, so we remove the intake tube from the throttle body and the math, and pull it straight from the breather and remove it from the vehicle.
Your serpentine belt tensioner is located on the passenger side of the engine, just below the alternator. At the bottom there is a 3/8 square drive, which we'll use the end of a 3/8 drive ratchet for. Install it into the drive the same way you would install a socket onto a ratchet. We're going to pull that clockwise to put some tension onto the belt and keep our pulley from rotating. We use a 10mm socket and ratchet to crack the bolts on the pulley loose.
There's three of the 10mm bolts on here. You don't want to remove them fully, you just want to break that initial torque off of them. So when we remove our ratchet and take the tension off of the belt, we can finish removing them. Once you've got them correct and loose, go ahead and switch your ratchet around so you can rotate counterclockwise and take the tension off of the belt and remove it from the pulleys.
Make sure your vehicle has either a belt path diagram somewhere in the engine bay, and if it doesn't, you can draw one up yourself. Remove your ratchet from the tensioner, and you don't have to fully remove the belt here, so I'm just going to let it hang. Remove those bolts from the pulley. Once the bolts are out, there is a little bit of a tension fit here on the pulley, so you may have to tap it off. If you rotate it back and forth a little, it will actually walk the pulley off nice and easy. You can remove it from the vehicle.
Reinstall your power steering pulley onto the pump. You want to try to line this up as best you can, because it's a little difficult to move once you get it worked on there. Then reinstall your three 10mm bolts by hand. Make sure you get them down as tight as you can. We're going to loop our belt here, feed it down, and hook it around the crank shaft to start. We're coming in from the passenger side here because that's how it's going to be easiest to route our belt.
Once we're hooked around the crank, we'll run the smooth part of our belt over the water pump to the driver side. We'll go under our A/C compressor at the far end. Be sure that that's seated in fully. We'll go over our power steering pump at the top here. We'll run the other side of the belt coming off of our crank around the tensioner. That's from underneath, so the ribbed part will also be touching the tensioner the same way it comes out from under the crank, and the ribbed portion will go again over the top of our alternator. Now when we release tension, we can push down in the middle and go underneath our smooth idler pulley.
Reinstall our ratchet into the tensioner. Turn it counterclockwise again. Try to get as much swing here so we can pull it over pretty far. Go underneath the smooth pulley, inspect one more time for proper belt path and that you are not hooked on the edge of any pulleys. With your ratchet still on the tensioner, turn it clockwise as hard as you can to put some extra tension on the belt, and then tighten down your 10mm power steering pulley bolts. Remove your ratchet from the tensioner.
Reinstall your intake components so you can run the vehicle. Reinstall the breather line in both ends of the intake tube to the throttle body and the air box. Tighten down the clamps with a flat blade screwdriver. Reinstall the engine cover. We'll tighten down the front two screws with a Phillips head screwdriver and the rear with a 7mm socket.
Thanks for watching. Visit us at 1AAuto.com for quality auto parts, fast and free shipping, and the best customer service in the industry.
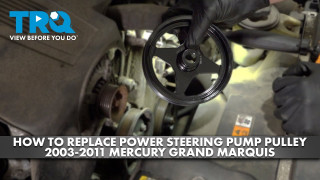
How to Replace Power Steering Pump Pulley 2003-2011 Mercury Grand Marquis
This video shows you how to install a power steering pump pulley on your 2003-2011 Mercury Grand Marquis.
