How to Replace Power Steering Pressure Hose Line 2007-16 GMC Acadia
Created on: 2018-05-25
How to replace a leaking power steering hose on 07, 08, 09, 10, 11, 12, 13, 14, 15, 16 GMC Acadia.
Tools needed
-
Socket Extensions
Torque Wrench
17mm Wrench
Channel-Lock Pliers
Jack Stands
10mm Wrench
Brake Parts Cleaner
Pick
Flat Blade Screwdriver
Paper Towels
Drain Pan
Transmission Fluid
Ratchet
Floor Jack
Cloth Rags
Needle nose pliers
1/2 Inch Breaker Bar
Wire Cutters
Marker / Writing Utensil
Complete Metric Socket Set
Hi. I'm Mike from 1A Auto. We've been selling auto parts for over 30 years.
In this video we're going to be removing and replacing the power steering pressure hose in a 2010 GMC Acadia. This is a very common problem for these vehicles. If you need any parts for your vehicle, click the link in the description and head over to 1AAuto.com.
We're checking for a leak because we know our power steering system has a lack of fluid. We notice some staining here and over in this area it's wet. But before we say it's a power steering rack we've got to look higher and see and as you can see up here, our power steering line is actually the culprit. It's leaking right in this area right here. Actually you can see the fluid coming out when I push on that grommet right there so we're going to go ahead and replace that.
Pop the hood and grab this lever. Pull up. To open the hood the safety's right here. Pull it to the right. Remove this cover. We need to pull the oil fill off and grab the cover. Pull up on the front. Grab it back here. Pull up on the back. There's a bunch of retainers that pull it down. Put the cap back on so no debris goes into the oil. Check the power steering fluid. Wipe it off first. Put it back in. As you can see, there's no power steering fluid on the dipstick and the power steering fluid should be in between those two marks.
To start pulling this line off we're going to start with a 10 millimeter ratchet wrench. You can use a regular wrench but it would be a little more tricky. There's a bracket that holds these two lines on and it goes into the front of the motor. And what we need to do is take that 10 millimeter bolt out. Once you get it loose a little bit, you should be able to do it with your fingers. There's that bolt. We're going to remove this tie wrap that's locked into the bracket. I can never get it to come free without breaking, so we're just going to cut it and then we're going to rewire tie afterwards. We're going to use some diagonal cutters and just cut.
Pull the tire off. We're going to use a 22 millimeter socket. Could also use a 7/8 and a breaker bar. Just break the lug nuts free. This is the passenger side front tire. Make sure these are all loose. Just take the socket and pull off the lug nuts one at a time. Pull the last lug nut off. Pull the tire down. We're going to take this 10 millimeter bolt out. That goes to the intake tube for the power steering pump. We're going to use a 10 millimeter socket and a ratchet. The reason we are removing this line is so that we can get a wrench on this nut to be able to remove the pressure hose.
I can just pull it off by hand. Shouldn't be too tight once you crack it free. Some of the fluid is going to come out. I want to keep from getting the fluid into the frame area so I made a little shield and cut a little plastic out of a bottle. What I'm going to do is stick this under here and hold that down and I'm going to pull off this hose and some fluid's going to come out. I'm going to have it go into a drain bucket. Let that drain out for a little bit. Take that. I'm going to pull this drain away because it's just dripping. I'm going to put a rag underneath it, a paper towel, because it's just dripping. Pull that out. Put that aside. On this line there's an O-ring. I'm going to take a 90 degree pick and take that O-ring off so it doesn't get lost because we're going to reuse it. Just go under without stabbing it. We'll pull it off and we'll set it aside.
We're going to take and use a 16 millimeter wrench on this flair nut that goes into the power steering pump. This is the pressure line that we're replacing. We're going to loosen it up. It is tight to get in here but with a little bit of patience you can do it. Once I get it loose I'm actually taking a stubby 17 millimeter wrench and loosening it up with that because it makes it easier to get on and it's loose enough that it's not going to strip it or anything.
All right. That's out. You want to make sure when you pulled that off that the O-ring came with it and it's not stuck in the pump. All right. We're going to take this 10 millimeter bolt off this bracket right here. Use a 10 millimeter socket and a ratchet. It's just loose. Pull it off by hand. I'm going to take this bracket. I'm going to bend up the top half just a little bit just to open it up. We're going to take this bolt out up top here. I'm going to use a deeper 10 millimeter socket and the ratchet so that we can get in there.
This is a caged bolt so when you take the bolt out it's going to stay with the bracket. Make sure we have a drain bucket on this side as well because some fluid's going to come out once we pull it out. Pull that out. Pull that out of the bracket. Then we're going to pull it back here to let it drain. Just like that. Leave that for a little bit.
Next we're going to take this bracket off. We need to take that nut out right there so we're going to use a 10 millimeter socket and a long extension and a ratchet. Get the nut. Pull the bracket off the stud. Like that. Now we're going to take the hose, we're going to move the feed hose to the side a little bit and grab the bracket and then we're going to pull it up from this side. Now our new hose doesn't come with this bracket so we're going to have to transfer it over.
Here's our new hose. I'm just going to mark with a felt tip pen where that bracket's going to go and put that aside. I'm going to take this bracket off. This is that wire tie I was telling you about earlier. Just going to take this off here. Throw that away. There's two tabs right here. I'm going to take some diagonal cutters and bend them out. Try not to cut the little tabs, just bend them. Use a straight tip screwdriver. Pry up on the bracket. Take that off. Install it on the new one.
Make sure you're holding the line in the same direction you pulled it off. You don't want to put it on backwards. Pinch it closed. Use some channel lock pliers to squeeze it in as I'm using the needle nose to hold it tight. We're going to take our old line and we're going to fish it straight down where the other side is. Push it down there. We'll grab it from underneath.
I'm going to pull this line down now, straight through. And there we go. We're going to have to transfer this bracket over as well so we're going to align the old line up with the new one. Looks like it's right about there. We'll just mark that with a felt tip marker. We're going to use some needle nose and a straight screwdriver. We're going to pull this out. Pry it up a little bit. Pull this off of here. Pull this off. We're going to wipe it down with a rag first. Put it on right here. Use our needle nose pliers. Squeeze this. Bend that down a little bit so it lines up with the hole. Once I'm through the hole I can bend it up. Take another pair of needle nose pliers and bend it back and there we go. And it's on.
These seals come with the kit for this line so we are going to take these seals off and install them just like the old ones. Like that. This one's going to go over here first. Now these seals, the new seal, the new green seal is actually a smaller seal so that's going to go on the other end. The black seal is going to go on this end with this. Just like that. The old one was green. The new one's black.
Then the other O-ring's going to go on this end. Just like that. We're going to have to transfer over the bolts so I'm to take this cage off of here. Try to pry it up with the needle nose. There we go. We broke it. Pull aside. We're not going to reuse it. But we are going to reuse the bolt. Now that our line is all set we're going feed this through. We'll take this part, feed this through the backside first where the old one went. Straight through there. And then the front is going to go over here. Go this way. I'm going to take the bracket. I'm going to feed the bracket underneath this intake hose for the power steering and then underneath that wiring harness over here.
I'm going to pull this line down here to get it lined up. Not going to install it yet, just want it close to the where it's supposed to go. I'm going to start threading in this bottom flair nut for the pressure line. It's going to be kind of hard to get it in. It has to be lined up with the pump perfect. Once you feel some threads, don't put a wrench on it right away. Just make sure you can do it by hand. If you can't do it by hand and you put a wrench on it you may strip the threads.
We're going to install this 10 millimeter bolt back in the bracket now that the flair nut is at least threaded into the pump. You want to do this before you tighten it up. Once you tighten up the line down below it's going to be harder to move it if you have to adjust whee the bracket's going to line up. Install this now into the bracket. It's hard to see. You have to do this by feel pretty much. You can tighten this down with a ratchet wrench. Here we go. Then we can snug that down.
Now we're going to install this cable tie to attach this hose to the other hose. Wrap it around. And we're going to take some diagonal cutters and just cut the rest of the cable tie off. Just like that. We're going to start snugging this up with my 17 millimeter stubby. Remember it's not really a 17 but it's just easier to get it to 17 just 'til you get it snug and then you go back to the 16 millimeter wrench. It's starting to get snug. I'm going to grab my 16 millimeter wrench. Tighten it up. There's no way you're going to get a torque wrench in here so just do the best you can.
Next we'll take the O-ring that we took off earlier. I'm going to reinstall it on this 90 degree bend. Get that installed. Be careful and make sure you get it lined up in the hole. Push that down on the bracket. And then we're going to take our 10 millimeter bolt and we're going to put it in to that 90 degree. Now use our 10 millimeter socket and our ratchet and snug it up. That's good.
Next we'll align this bracket up top here. Just put that on the stud. Take our 10 millimeter nut, stick that on the stud. Then take our 10 millimeter socket and extension and tighten that down. I'm just going to install this for a second here right here. Put that in, get it close. Just make sure that's on there because we're going to put fluid in up top before we completely install that.
We're going to take a transmission funnel. We're going to stick it in the reservoir for the power steering and we're going to push it down. You're going to want the tranny funnel to stick straight up and down just like that. Put a couple rags around here in case fluid leaks out. For this vehicle General Motors actually recommends that you use transmission fluid instead of power steering fluid. This system takes Dex XI transmission fluid. I'm going to fill this up not quite to the tippy top but pretty high. Right to about there.
I'm going to put the vehicle back up in the air and bleed some of the air out. Okay, so while the fluid's in the funnel up top we're going to pull this line off of here. I'm going to keep my finger on the steering rack and I'm going to let the fluid drain out of this line here. Now that's sending fluid down from the reservoir through the pump and then pushing the air out of this line. We'll sit right here. See, it's starting to run out. We'll let it go for another minute.
I still have my finger on the hole. Where this line would go in on the steering rack just plugging it off so the fluid is just coming out through the power steering pump and through this line right now. Okay, that's pretty good. What I'm going to do now is I'm going to put my finger on this end of the line then I'm going to pull my finger off the rack and now the rack is going to bleed. Fluid's coming out of the rack right now. On that side. And that's bleeding the air out of that side. That's pretty good. Now I'm going to put them together.
And that's all set. Make sure this bracket is lined up up here. Take our 10 millimeter bolt, this bolt is going to be the longer bolt, and then stick that in. Now bend this bracket back down. Make sure before we tighten this bolt up here to make sure we can get this bolt in. We can tighten this down and tighten this bolt down.
Now we're going to use some brake parts cleaner and clean this area up over here. From over here. And then clean this area up over here. Now we're going to reinstall our tire. Install the lug nuts. I'm going to use a torque wrench and 22 millimeter socket. Going to torque these to 140 foot-pounds. We're going to torque this down in a star pattern so that the wheel gets tightened down properly so it's not warped or out of alignment.
There's still fluid in here so I'm going to pop this out quickly and put my hand on the bottom to catch the fluid. Twist a little bit. There we go. The fluid's up to the top. I am going to have to suck some of that out. I'm going to suck some of the fluid out with this pump. Stick this in here. Okay, the level's a little on the high side which is good. I'm going to leave the cap off. I'm going to start the car a couple of times and then recheck it.
Okay, so I'm going to start the car a couple times, not touching the steering wheel. This steering system's a little bit different than most conventional steering systems so if I just start it and then shut it off. I'm going to do that three times. I'm going to recheck the fluid. It went down a little bit so we're going to top it off before we start it and let it run. Okay, it's right up at the top and that's where we want it right now for when we're going to let it run for a little bit.
I'm going to leave the cap off for now while we let it run. I'm going to start it up. I'm going to let it run for about five minutes like that. After the engine's been running for about five minutes then we're going to get in it with the wheels off the ground a little bit and turn the wheels back and forth, not staying on the stop for too long. Just hitting the end and then coming back. We'll do that a couple times. Maybe about five to ten times total. Then we're going to leave the steering wheel straight. And then we'll shut it off.
At this point we're going to check our fluid level. I'm just going to top it off just a little bit. I just want it closer to the max line. At this point you would take the car for a ride, drive it for about five to ten minutes, come back, and you would check the fluid level again and adjust accordingly. We'll pull the oil cap off. Put the engine cover back on. Push it down. Put the fill cap back on.
The next step we're going to need to take this line off but when we take this line off we're going to need to put a plug right there so I'm going to show you a little plug, a little trick I did. Take a little piece of hose and then take a bolt and you put the bolt in the other end. Then when I slip that line off, I can stick this right on the end and that'll keep the fluid in. I'm going to put some rags underneath here because some fluid's going to come out. I'm going to take some pliers. Take this lock ring off.
When I get close to the end, grab my plug in my other hand so that I can do this quickly so I don't lose too much fluid. There we go. Just like that. Just a little bit. It's just got to keep the fluid in there. I used some locking needle nose pliers to open up that clamp and then I'm going to use some hose and I'm going to go from the inside here. That's going to take a little bit of effort but it will go in there. We're going to try to get a good amount in because we don't want this hose popping off when the engine's running.
That seems good. I'm going to pull the locking pliers off which will secure it a little better. Next we're going to install a transmission style funnel and just lock it in there. Nice skinny funnel. We're going to use a bottle and we're going to put the hose into the bottle. That's where the old fluid's going to go. We're going to put new ATF in. This vehicle for power steering takes Dex VI.
What we're going to do next is I'm going to have a partner start the vehicle for me and I'm going to monitor the fluid. I'm going to be adding fluid while he's doing that and the fluid's going to be coming out there and at one point I'll have him turn the steering wheel back and forth and then we will shut the car off before all the fluid comes up.
Okay, start it up and turn the wheel back and forth. All right, shut it off. It's that quick. All right, when we're pouring the fluid in here it's getting sucked into the power steering pump and then it's going through the steering rack, going through all the lines and then coming up here and going into our bucket. And that's how you get a lot of the air out and a lot of the dirty fluid.
Take that out. You can pop this off down here. Some of the fluid's going to come out. Now with my finger on the cap of this I'm going to pop my plug off real quick and then push this on real quick. Just like that. Slide it over. Pull my rag out. There's still fluid in my funnel. I'm going to have our helper start the car and we'll just run the steering wheel back and forth. All right, go ahead. Start it up. Okay, there is still fluid in my funnel. I'm going to pull it up quick and put my finger over the end. Hopefully not lose too much fluid. Let's see.
Fluid's up to the top. I am going to have to suck some of that out. I'm going to suck some of the fluid out with this pump. Stuff this in here. Okay, it's right up at the top and that's where we want it right now for when we're going to let it run for a little bit. I'm going to leave the cap off for now while we let it run. I'm going to start it up. We're going to let it run for about five minutes like that.
After the engine's been running for about five minutes then we're going to get in it with the wheels off the ground a little bit and turn the wheels back and forth. Not staying on the stop for too long, just hitting the end and then coming back. We'll do that a couple times. Maybe about five to ten times total. And then we're going to leave the steering wheel straight. And then we'll shut it off.
At this point we're going to check our fluid level. Just going to top it off just a little bit. I just want it closer to the max line. At this point you would take the car for a ride, drive it for about five to ten minutes, come back and you would check the fluid level again and adjust accordingly. All right, I'll put the oil cap off. Put the engine cover back on. Push it down. Put the fill cap back on.
Thanks for watching. Visit us at 1AAuto.com for quality auto parts, fast and free shipping and the best customer service in the industry.
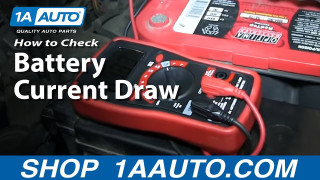
How To Perform a Battery Current Draw And Locate Problems
Watch this video to learn how to detect if accessories are drawing too much power from your battery, and how to locate them if they are.
