How to Replace Power Steering Bellows Boot 2006-11 Nissan Altima
Created on: 2019-09-12
Check out this video to learn how to replace the steering boot on your 07-13 Nissan Altima.
-
step 1 :Removing the Wheel
- Raise the vehicle with minimal weight on the wheel
- Loosen the five 21 mm lug nuts
- Raise and support the vehicle
- Remove the lug nuts
- Remove the hub cap if equipped
- Remove the wheel
-
step 2 :Removing the Outer Tie Rod
- Apply rust penetrant to the tie rod jam nut
- Loosen the tie rod jam nut with large pliers, or a 22 mm wrench
- Remove the tie rod end cotter pin
- Remove the 19 mm tie rod end nut
- Hammer on the side of the knuckle to knock the tie rod end loose, and remove it
- Unscrew the outer tie rod end from the inner tie rod, while counting the number of turns it takes to remove it
- Remove the 22 mm jam nut, holding the inner tie rod shaft with locking pliers, if necessary
-
step 3 :Removing the Power Steering Bellows Boot
- Remove the small spring clamp from the bellows boot
- Pry or break off the large clamp from the bellows boot
- Remove the bellows boot
-
step 4 :Installing the Power Steering Bellows Boot
- Loosely install a wire tie around the large end of the tie rod boot
- Install the tie rod boot
- Tighten and trim the wire tie
- Install the small spring clamp on the outer end of the boot
- Apply copper anti-seize to the outer threads of the tie rod
- Install the jam nut
-
step 5 :Installing the Outer Tie Rod
- Starting with the end pointing down, thread the outer tie rod onto the inner tie rod, completing the same number of turns counted when taking it off
- Install the tie rod end into the knuckle
- Install the tie rod end nut
- Torque the 19 mm tie rod end nut to 25 ft-lb
- Tighten the jam nut onto the outer tie rod
- Have a wheel alignment performed on the vehicle
-
step 6 :Installing the Wheel
- Install the wheel onto the wheel studs
- Install the hub cap if equipped
- Install the lug nuts by hand
- Tighten the lug nuts by hand in a star pattern
- Lower the vehicle with minimal weight on the wheel
- Torque the 21 mm lug nuts to 83 ft-lb in a star pattern
- Lower the vehicle completely
Tools needed
-
14mm Wrench
21mm Socket
Side Cutters
Hammer
Socket Extensions
Torque Wrench
Locking Pliers
19mm Socket
22mm Wrench
Ratchet
1/2 Inch Breaker Bar
Hey friends, it's Len here at 1AAuto. Today we're working on our 2010 Nissan Altima and I want to show you something very basic. We're going to be removing the power steering rack bellows boot. Super easy. I can do it you can do it too. If you need any parts you can always check us out at 1AAuto.com. Thanks.
Okay friends, so one of our first steps is to make sure that we have the vehicle's weight partially supported off the ground but the wheel is still touching and we're going to break free all the lug nuts. If you're going to be using an air gun you don't have to worry about pretty much any of this except for getting the vehicle off the ground and then taking off the lug nuts. I'm just going to show you using the ratchet for now 21 millimeter. We're just going to break all the lug nuts free. The reason for doing this while the wheel is still in the ground is just so the wheel can't spin while we try to break these free. There we are all five are broken free. Let's move on to the next step.
So I'm just going to switch over to the air gun now, 21 millimeter, but you can continue with a ratchet if you want. Just take off all five of these lug nuts. First, what we're going to do, we'll spray this down which I just did. I'm going to use some nice long pliers. Grab onto this jam nut right there. I'm just going to break it free. There we are. See if it slid or if it broke free. It did break free. Cool. Now that we know we've got that broken free we can move ahead to the next step.
We're going to take off this cotter pin, it just basically locks this nut in place so it can't come off. If you don't have access to a new one try to save it. If you do have access to new ones like I do it is what it is. You can cut it, you can do whatever you need to do. Essentially get it out of there. There we go, cut that off there currently. Get that out of there. Now we're going to remove that nut. All right, so I'm going to remove this nut. We'll use my 19 millimeter socket. I have a 1AAuto air gun here. There we are. Got a washer and a nut, we'll set those aside. I'm going to grab our hammer and we're going to give the knuckle right across here a couple of loving bonks and see if we can get this to come up.
There we are. We'll take off this outer tie rod end. It's a good idea to count how many times it comes around. So it started facing down, one, two and so on. There we are, 17 turns so we'll take mental note of that or you can write it down if you don't have a very good memory, 17. So now what we need to do is get our jam nut off of there which is this right here. The reason why we need to do that is because the inner tie rod end right here has a boot around it. This boot does not come with your new inner tie rod end and it never will so if you needed to you could buy something like that. It comes separate from anywhere you were to try to purchase an inner tie rod end.
To continue though, we're going to use some locking pliers. We're going to get them on here as tight as we can. There we are. Cool. Tilt that down like that so it's hitting up against here. And I'm going to grab my half inch gun, my 22 millimeter socket. We'll come right over here. 22 millimeter socket, slide it on there. Hold our pliers. There we are our jam nut came off. See if we can get it out of the socket. Typical. There it is. Cool. We'll set this aside.
All right. So we've got the jam nut off. We'll get our locking pliers out of the way. The boot has a clamp right here. It's a three pronged clip. It's very easy to get off. I'm just going to use some long nose pliers or needle nose pliers all in what you want. Take that clamp off of there. Set it aside. On the inside of this boot all the way down at the power steering rack there's a metal clamp. That clamp is not reusable. You're going to need access to something as basic as a wire tie and I'll show you why. You can use a little long pry bar here. You can also use a screwdriver if that's what you have access to.
And there is a little metal tab pretty much right where my pry bar ends down there. I'm hitting up against it. What we're going to do at this point, we're going to put our pry bar/screwdriver, whatever you're using up against it and I'm going to use a hammer and give it a loving bonk. Hopefully drive that clamp off of there and then we'll be able to get our boot off. What you need to be careful when you're doing this is that you don't pinch your boot. There we are here. Get my arms in here and just get that clamp out. That's what the clamp looks like pretty much just went around like this. Like I said it's not reusable once it gets crimped right here that's how it gets tightened on and then that's it. One time use only. We'll grab our boot, give it a couple of little twists as we pull and it should draw right off the rack. It came off the rack on the inside there. Here's our pro power steering bellows boot. Easy peasy.
We're just going to take our power steering bellows boot. We're going to go just like this. Bring this so it's almost all the way down but still plenty loose. We'll cut off a little bit extra here because we don't need a whole bunch of flapping off. There it is. Now I'm going to slide this onto the power steering rack. Once we know it's all the way on we'll grab this, pull our wire tie nice and tight, and then we'll trim off the excess. After that we'll continue on to the outer clamp. Slide it in. There we are. The outer part just fell into its nice little groove there that we lubricated right here. Just double check and make sure that boots on all the way around. I just spin it like this. It's definitely on. Perfect. I can see where my wire tire is in there.
At this point I would use my long nose pliers again, just put them in there, find my tie. We want to make sure that the wire tie stays in the channel that it's supposed to be in which is all the way down at the end there. All I'm doing is grabbing it and twisting. Once it feels like it gets to the point that it's not doing any more clicking that's pretty much it. I'm just going to go the other way real quick. All right. That's as tight as that's going to get. To be as professional as we can we'll cut off the excess here. Get that out of there. We'll recycle that. All right. We've got our other clamp. Just going to grab it like this. Slide it right on over and release it. Give our boot a nice little tug. That's going nowhere. Let's move along.
It's always a good idea to put on a little bit of copper never seize here. If you don't have access to the copper never seize you could use a little bit of that grease that you used up here. Generally speaking, the copper never seize would be what most people would use though. Any type of lubricant that'll get in between the threads of the inner tire rod end and the jam nut will be helpful for you down the line so hopefully you won't have to worry about that jam nut getting frozen onto the inner tire rod end. So there's that.
Now we're going to grab our outer tie rod end and install that. When we removed our outer tire rod end we remember it was facing straight down. When I was turning it and taking it off I counted 17 turns from down till when I took it off. So, I'm just going to start by going reverse here until I feel like it wants to grab. That's the beginning. One, two, three and so on. We'll just get this locking nut out of the way for now. We're going to bring this over. Get it into the knuckle. We're going to put it on our self locking nut. We're going to torque that down. I'm just going to bottom it out for now. That's bottomed out. Let's grab the torque specification and we'll torque it down. All right. So let's go ahead and torque this down. We're going to use our 19 millimeter socket and torque it to 25 foot pounds. There we are. Let's just check it one more time real quick. That's tight. Let's move along to the jam nut.
So here is our jam nut. We're just going to take it, turn it, turn it, turn it to the left until it's bottomed out against the outer tie rod end. To continue jamming it in or locking it I'm just going to go this way. There we are. Now just take your pliers and your tie rod. Just a little wiggle like this. You can see it moving down here. You want to try to get it as level as possible to the knuckle. It's going to be able to move around. That's what it's supposed to do. But I like to have it just about as level as possible to start. After that it can do whatever it wants to do. So there we are. To finish up all you would do is just put the wheel on, torque it up, and drive it down the road. Oh, and in alignment.
All right. So we're going to take our wheel, roll it right over to our leg, lift with our abs, and put it up on here. We have our lug nuts ready. Grab my hubcap here so I can grab it nice and easy. Here we go. Right up our leg, lift with our leg muscle/abs. Put that up there. Hub cap. Grab ourselves a few lug nuts here. All right. So we've got them all started we're just going to bottom out and then we'll go ahead and torque them down. To bottom them out we're going to go in a star pattern and we'll do the same procedure for torquing them down.
Okay friends, here we go. Let's get ready with our 21 millimeter socket. We're going to torque down these lug nuts 83 foot pounds in a star pattern. Now for safety sake let's just go around one more time. It doesn't cost us anything, it doesn't hurt, and it's a small price to pay for a good amount of safety. There we are all torqued up. Just make sure your breaks pumped up. I'm sure it is. Make sure you get an alignment and go ahead down the road. Easy peasy.
Thanks for watching. Visit 1AAuto.com your place for DIY auto repairs for great parts, great service, and more content.
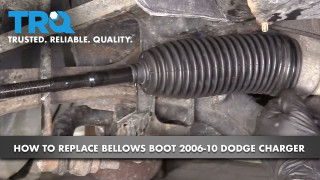
How to Replace Tie Rod Bellows Boot 2006-10 Dodge Charger
This video shows you how to install a new tie rod bellows boot on your 2006-10 Dodge Charger.
