How to Replace Passenger Side Door Lock Actuator 2000-06 GMC Yukon
Created on: 2020-03-31
Watch this video to learn how to install a new power door lock actuator in your 2000-06 GMC Yukon.
Tools needed
-
T10 Torx Driver
Socket Extensions
Flat Blade Screwdriver
Socket Driver
T20 Driver
T30 Bit
Needle Nose Locking Pliers
10mm Socket
Ratchet
Trim Tool Set
Pocket Screwdriver
Pick
With this little cap off, I'm just going to use a straight blade screwdriver to get underneath there. Take this lock trim piece off. Just get underneath here. There's two little tabs there and then one on the front underneath here, you could use a trim tool or a straight blade screwdriver. Just be careful not to scratch the door panel. Pop that off and it slides right out like that. There's two clips and then this just slides off. There's a push pin right here, just use a trim tool. Slide the push pin out and take this trim piece off, just use some trim tools. Just pop it out first and then slide it up, it's clipped in like that. Use a T-20 driver, remove this screw right here. Take the screw out here and right here. We're going to use a seven-millimeter socket. Move the lock rod over as well. Now just grab the door panel. Just slide up and out. Grab the light socket and just try to take that out. It slides out like that. Disconnect the wires right here. It's kind of hard to see, you just need to push down on the buttons, slide them out. This one has a latch on it so you push down on this little button right there, underneath there, and then like ratchet it down. Slide the latch down. Then the last one just has a push button. Slide those off. I'm gonna use a 10-millimeter socket to take this bolt out here. I'm gonna disconnect this lock rod from the latch. You can use a straight blade screwdriver and a pick. Just get underneath there. There we go. With this set off, slide the lock rod up and this whole handle just slides forward.
Now I'll take this vapor barrier off. Be careful not to rip it, pull that out of the way. I reconnected the window switch and I turned the key on. I have to put the window up to complete this job. I'll just disconnect it again. There's two connectors I need to take out, one right here. Just slide it off like this, a little tab underneath and the top one is kind of hard to see, just get a feel for it. Same thing, just has a lock on it. Just grab it and slide it back. Now I just want to get this wiring harness out of the way. Just take some needle-nose pliers, squeeze this retainer right here and just slide it out of the way where this door handle rod is from the outside, I have to take that clip off. So you just grab underneath. It's like a door, opens up just like that, and then you can slide the rod out.
Just move that out of the way. Now this rod we have to remove from these holders, just use a trim tool or a screwdriver. Just pop it up just like that. And I'm going to use a T-30 socket and remove these bolts. I'm going to go to take the last one out. I'll just grab the latch so it doesn't fall and it slides right out. We want to take these two small screws out. I'm going to use a T-10 to loosen these up and then take that off. You can slide this out. You need to pop it off down here first. Pop that off and they'll slide right out just like that. I'm gonna make sure this gear looks like it's time the same way as this one. I'm gonna have to move it a little bit and just make sure that lines up right there, looks good, and then line this up down here and that looks good. It's all lined up. Put the screws back in, then snug it up and that's good. It's good. Double-check this and it looks like that's working properly. Good to go.
Now I'll take the latch and slide it back in position. Get the bolts started, then tighten these up. This rod for the outside handle needs to get into position, push it in there and then latch that door closed. Just check it and make sure it seems good. It looks good. Take this rod, slide this back in the retainers. That's good. Now take the connectors, slide them back same way they were. This retainer, push that through there and the black connector goes on the bottom and the purple one goes up top. Those are good. Take the vapor barrier and slide the lock rod through and just reposition that. If you need a little bit of butyl tape to hold it down, you can do that or some other type of adhesive and take the handle, slide it in position and just push it back. Take the rod and lock it down, there we go. And put the bolt in, and snug it down.
Take the door panel, reconnect the connectors, and connect the light. Now all these clips are going to slide in so just have the door panel up a little bit, make sure it's in all the way around and push it down. Double-check. It looks good. Take this screw, get that started and tighten it up. Take these two screws. The shorter one is going to go right here where the lock is. Get that one started and the longer one is going to go near the handle. Start the pushpin, put this trim piece back on, put this trim over, go over the handle. You want to put the front part in first and then latch the backside and take this cover, just slide this side in first and then you want to align up the lock rod with the lever. Make sure that works. Put this little cap on, and good to go.
Shop Products


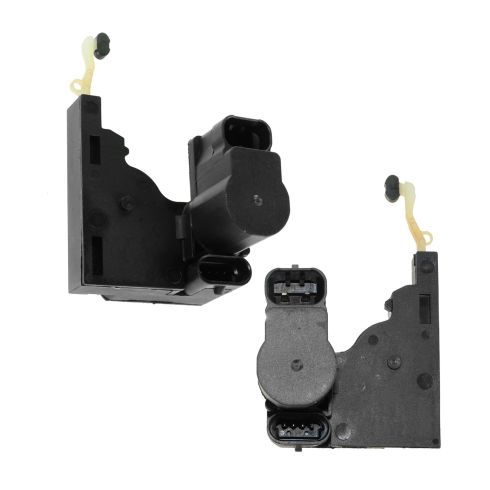
Power Door Lock Actuator 2 Piece Set TRQ BDA02086
Part Details:
- Highest Quality Materials
- Direct Fit Replacement - Guaranteed to fit and function for your specific application
- Power
- Quality Tested - built to a strict level of product standards.
- 2 Piece Set
- (1) Passenger Side Door Lock Actuator
- (1) Driver Side Door Lock Actuator

How to Replace Door Latch 1994-2002 Dodge Ram 1500
Check out this video to learn how to replace the door latch assembly on your 94-02 Dodge Ram. 1A Auto shows you how to do it yourself
