
How to Replace Parking Brake Shoes 2003-11 Honda Element
Created on: 2019-02-15
How to replace parking brake shoes on 03, 04, 05, 06, 07, 08, 09, 10, 11 Honda Element
Tools needed
-
Large C-Clamp
Socket Extensions
Torque Wrench
14mm Socket
Hammer
Rust Penetrant
Jack Stands
19mm Socket
Brake Parts Cleaner
Impact Screwdriver
Flat Blade Screwdriver
Anti-Seize Grease
Chisel
Ratchet
Wire Brush
Floor Jack
Needle nose pliers
1/2 Inch Breaker Bar
Hi, I'm Mike from 1A Auto. We've been selling auto parts for over 30 years.
Hey, everyone. Sue here from 1A Auto. Today on our '06 Honda element I'm going to show you how to replace the ebrake shoes. If you need any parts for your car, click on the link below and head on over to 1aauto.com.
19 millimeter socket and we're going to break free the lug nuts. You got the pressure of the vehicle on the tire still, so it doesn't turn. I use the two posts lift. At home, you can use jack and jack stands. I'm going to take all the lug nuts off and remove the tire.
The caliper slider pins bolts are 14 millimeter sockets or a wrench. Now with a little pry bar I'm going to pry this right off. There you go. Now I've got to push the piston back. I'm just going to set that aside, make sure it's out of my way.
Let's take that bottom bolt out. Now we can pull the caliper bracket off. Wow. Now it's time to take the rotor off. These rotors have mounting little screws on them, so we're going to use the pneumatic screwdriver. It acts like a pump puncture, so you hold it, taut, you hit it with a hammer. If you get one where the Phillips head is all worn out, I'm going to use a chisel and literally try to turn it with the chisel. There we go.
You don't need these. They're just there to help keep the rotor flush while you're adjusting the e-brakes. I'm just going to give it a quick little spray down on the hub area. Pray this comes right off with a quick hit of the hammer. Okay, let's get it off the rest of the way. Wow. Obviously we can tell that the backing plate has seen better days. It's pretty gone right there. As long as where the e-brake springs mount, that metal seems to be in good shape. So I'm going to give it a cleanup and see what we're working with.
I'm going to start by taking the e-brake mounting springs out. These are pins that slide in the back, and you can just turn them into the slotted position of where they mount on the spring. That's considered a spring and here is the actual pin. It's offset because it's such a funky setup. That's not bent. That's offset. That's the way it goes.
I've got new hardware. I recommend if you ever do a brake job to always replace the hardware unless you know you just did it within a year ago. It loses its spring tension on it, and then it won't do its job. Come over here and undo the same bolt pin on this side. Let's see what we get.
There's the adjuster and the bottom spring. There's the adjuster. Several people--some people like to take the e-brake cable right out of this arm. I personally don't like to because sometimes it's harder to fight with this. You still have to take this off. So I leave it in when I do this. I take a flat head screwdriver and go right into this horseshoe clip, and I try to spread the ears on it and work it back and forth. Sometimes you can go right up against that shoe like that. Use the shoe as leverage and pry that. There we go.
I just had to get in there--enough now with that exposed like that I can take my screwdriver. Bring it in there, and just pull this clip out. That was an effort. Now if you've never done one of these before, pay attention. The other side's still together. I always like to leave one side together while I do the opposites, but so it goes. This is like a spring washer. It's just a 10 washer, but it's oval-shaped, so put pressure on that. That's the way the arm's going to go. The e-brake shoe is going to go with the pin, flat face out in the clip on the inside.
Now I'm going to get a new e-brake shoe and new hardware and assemble it. I like to clean the surface of rust and the points, the hit points, pressure points for the C-brake shoes, are these little divots that stick out, and put a little caliper grease on there. That keeps them from when they slide back and forth when the e-brake's released and applied. Make sure I get my bucket down there. I'll clean this up a little bit.
Now that's all dried, so I'm going to apply a little caliper grease to those high spots. There's six of them total. Now we got the new e-brake shoe here. So you're going to line up the way it looks. We got the big cutout down here, and the half-moon up here. So that's the top and that's the bottom. That's where the adjuster is going to sit. We're going to take our new, it's brass pin because I got new hardware for the e-brake. I like to put a little bit of caliper grease there. You're going to get dirty. So now I can slide that through, and now that's nice and stays. It doesn't freeze up. That's what I'm looking for. I don't want it to freeze up.
So I've applied some caliper grease here. I'm going to take that spring washer, and I'm going to put it in between the shoe and the arm. Some people put it on the outside here. I like to put it in between because then it holds those two pieces of metal separate, puts pressure on them, so there's enough gap so that that can move back and forth. Now I could take a pair of locking pliers, make sure they're out of your way. I'm going to on that side so lock it down.
I put a pair of needle nose lock pliers on there, and I've barely get them on the ear of the brass punch. Now with all this whole rig up here, I just got to get the ear to start. That's all I got to do. Then I could take a pair of pliers or something, slide it on, just like that. Wonderful. Let's undo these, get those out of the way, and finish up with these clamps, these pliers. There we go.
So it is definitely a combination of pliers and angles. Let's see if I can close the ears on that horseshoe. There we go. Here we go. Let's do it. Wonderful. Now you can see it moves nice and freely. It's not frozen up anyway. I'm going to bring that up and line that up. We've got the crossover bar, and that seats right in that little cutout. That goes right like this. That's how it's going to sit inside there.
The first thing I'm going to do is install the clip so I can get this clip in there. And if you notice how this has that cutout, see it's got ... I showed you on the old one. That's going to go in that manner. This one wants to go around this, the e-brake adjuster rod. Okay. You have to hold that with one hand in the back. Put a new spring on. See if you can move these things around.
I like to try to put it on in that manner because it helps being able to turn this clip. Okay, now you can take a pair of needle nose and hold the wings. At the same time get a pair of pliers that are wide enough, and you're going to push down, push on that spring and turn it. There we go.
So now I have my new adjuster, and I'm going to just load the threads up with a little bit of anti-seize, so the adjuster will hopefully always move on the e-brakes. Guide the adjuster. You're going to bring this all the way down to the bottom because we don't want any adjustment on it yet. Bottom that right out. Nice. On this side, I'm going to do the same. Take just a little bit, dab it inside there. Put that cover on. Perfect.
Make sure you have that cutout ear up on the top and the half-moon on the top and you put the spring up in the guided hole. There we go. Okay, let's get this. There We go. So that should be in that angle. I cannot use my hand. It's not big enough to hold the back of that pin and utilize my thumb. So I'm going to get a pair of C-clamp pliers and hold the e-brake shoe in place.
Now let's take this lovely spring. Now the object of the game is to get that slotted piece over the metal piece. Yeah, that's good.
Now I'm going to put the adjuster in. I'm going to set it up inside first. Then I'll guide one side in and then guide the other in like that. Might have to adjust some of it out. Perfect.
Now let's install the spring. These two little ear tabs, one here and one there, that's where the spring goes. You just connect it in there like that, bring it on over to the other side. Connect it in like that. On the hardware there is one spring per side that looks like this. They are two springs per side that looks like this. You can't get them confused. One has a hook and one has an l-shaped slot. The l-shaped one is going to go in here, and it's going to go on to that cross lever rod right like that. Just like that.
The top springs are going to go in these half-moon slots in the shoe, see right there. I hope you can see that. Then up onto the ear tab. There we go. Then grab that ear, bring it up to that tab. I'm going to put some anti-seize around the hub here on the surface. I already took a wire brush to it. So you're going to line up the adjuster hole and the mounting bolt holes. With that we have, it's going to go like this.
Now we need to undo the adjuster a little bit. The e-brake shoes will not fit inside the rotor housing. It's the hat of the rotor. I'm backing off on the adjustment. There we go. Perfect.
At this point, I want to adjust the e-brake, and by doing that, the rotor has to be flush on the hat ... the hub. So where we had this screw hole hasn't been used for a while. It's all rusty. And this one was stripped. So I'm going to use two lug nuts. If you have the two mounting screws and they work, you don't have to use the lug nuts. You can use those. You just want to make sure it's tight to the hub. If you have to bang on it, if you want to be able to spin this and adjust the ebrakes and turn it.
Okay. Now I'm going to take that adjuster cover off. It might back off a little bit on that. You're going to use the window. Line up where these star adjuster is, and this way you can adjust it. I have a high spot right there. You don't want the e-brakes to be snug because if they're too snug, when it goes down the road, the brakes expand, the wheels start to smoke obviously because it will be almost as if you have the e-brake on. There we go. Its backing plate is pretty bad. That's where I'm going to leave it. Now we're going to install the boot.
I'm going to start the bolts by hand and then I'm just going to snug them down and then get the manufacturer specs and torque them down. Let's get the caliper itself out of the way. It's a size 14 socket. Snug those up. Get our torque wrench. The manufacturer's specs on this is 41 foot-pounds.
Now we can install our pads. The one with the indicator goes on the inside and the one without goes on the out. You just basically sit right in, like that, and then we're just going to slide the caliper on. Get our two slider bolts. It's a 14 millimeter socket. The torque on that is 16 foot-pounds.
Let's put the lug nuts back on. It's a 19 millimeter socket. Just going to tighten them all down and then I can lower it down and torque it. I'm going to torque the wheels to manufacturer spec which is 80 foot-pounds, and always do it in a star pattern. Double check.
Thanks for watching. Visit us at 1aauto.com for quality auto parts, fast and free shipping, and the best customer service in the industry.

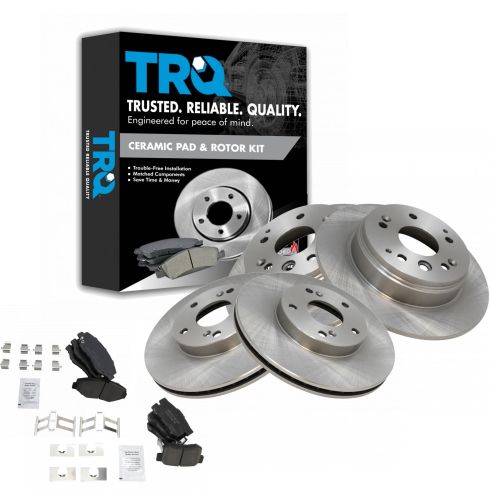
2003-11 Honda Element Front & Rear Ceramic Brake Pad & Rotor Kit TRQ BKA11398
- Ceramic
- Premium Posi
- Solid
- 11.10 in. (282mm)
- 5 Lug
- (1) Front Ceramic Brake Pad Set with Contact Point Grease & Hardware
- (2) Front Brake Rotors
- (2) Rear Brake Rotors
- (1) Rear Ceramic Brake Pad Set with Contact Point Grease & Hardware

How to Replace Rear Parking Brake Shoes and Hardware 2010-14 GMC Terrain
How to repair, install, fix, change or replace your own worn, squeaky, fading old brakes on 10, 11, 12, 13, 14 GMC Terrain.

