How To Replace Outer Tie Rod 2002-05 Jeep Liberty
Created on: 2014-04-20
If the outer tie rod is broken or bad, this video will show the steps for replacing it
-
step 1 :Removing the Wheel
- Loosen the lug nuts with the vehicle on the ground
- Raise the vehicle with a floor jack
- Secure the vehicle on jack stands
- Remove the lug nuts
- Pull off the wheel
-
step 2 :Removing the Outer Tie Rod
- Mark the center of the tie rod end
- Measure the distance from the end of the boot to the center of the tie rod end
- Note that measurement
- Remove the 21mm nut from the tie rod end
- Loosen the 15/16 inch nut that connects the outer to the inner tie rod
- Strike the wheel knuckle with a hammer to loosen the tie rod end
- Lift the tie rod out of the wheel knuckle
- Hold the inner tie rod with vise grip pliers
- Twist off the outer tie rod
-
step 3 :Installing the New Outer Tie Rod
- Twist the new outer tie rod onto the inner tie rod
- Start the 21mm nut onto the tie rod end
- Hold the tie rod stud with a 10mm socket and ratchet
- Tighten the nut with a 21mm wrench
- Measure the distance from the end of the boot to the center of the tie rod end
- This should be the same as the measurement from Step 2
- Tighten the 15/16 inch nut
-
step 4 :Reattaching the Wheel
- Slide the wheel into place
- Start the lug nuts by hand
- Tighten the lug nuts preliminarily
- Lower the vehicle to the ground
- Tighten the lug nuts to 100 foot-pounds of torque in a crossing or star pattern
- Have your vehicle professionally aligned
Tools needed
-
21mm Socket
Measuring Tape
15/16 Inch Wrench
21mm wrench
A Piece of Pipe (for leverage)
Hammer
Torque Wrench
Jack Stands
19mm Socket
10mm Socket
Ratchet
Floor Jack
Brought to you by 1AAuto.com, your source for quality replacement parts and the best service on the Internet.
Hi, I'm Don from 1A Auto. I hope this how-to video helps you out, and next time you need parts for your vehicle, think of 1AAuto.com. Thanks.
In this video, we're going to show you how to replace an outer tie rod on this 2004 Jeep Liberty. We show you on the passenger side, but the driver's side is a similar procedure. It's the same part and process on these Liberties from 2002 to 2005. The items you'll need for this are a new outer tie rod from 1AAuto.com; a 10mm, 19mm and 21mm socket and ratchet; a piece of pipe for extra leverage; 15/16 inch wrench; 21mm wrench; hammer; locking pliers; tape measure; a torque wrench; and jack and jack stands.
Start off by removing your 19mm lug nuts and pulling your wheel off. If you don't have air-powered tools, you want to loosen these preliminarily while it's on the ground. Jack the vehicle up, and remove these lug nuts the rest of the way, and your wheel pulls off.
Now, we're just scoring the center of our tie rod as a marking point. You want to go from the edge of the boot to the center of your outer tie rod and just remember that distance. Then you want to remove this 21mm nut. We'll just fast forward as Don does that. Now, using your 15/16 inch wrench, just loosen up this nut right here. Then, hit your wheel knuckle with the hammer. That will break the tie rod free and lift it up and out. Now, we lock onto our inner tie rod with some locking pliers and then pull the outer tie rod off by twisting it. I'm having a little difficulty. It's on there pretty good, so we just use a wrench; it gives us a little more leverage, and then, we can twist it off that inner tie rod.
Now, take your new outer tie rod and just twist it onto the inner tie rod. We'll fast forward as Don does this. Now replace that 21mm nut. To keep everything in place, we use a 10mm socket on the stud and then we just twist the 21mm nut out using a wrench. Now, you want to measure from the boot to the center of your tie rod and make sure it's the same distance and then just tighten up this nut right here.
With that, you've gotten the tie rod on there and tightened up. You will probably want to go in and get yourself an alignment after you replace the tie rods because it can bring your car out of line and then your tires can get worn out prematurely. Once you've done that, put the wheel back on, tighten the lug nuts preliminarily and then torque them to 100 foot-pounds using a crossing pattern.
We hope this video helps you out. Brought to you by www.1AAuto.com, your source for quality replacement parts and the best service on the Internet. Please feel free to call us toll-free, 888-844-3393. We're the company that's here for you on the Internet and in person.
Shop Products


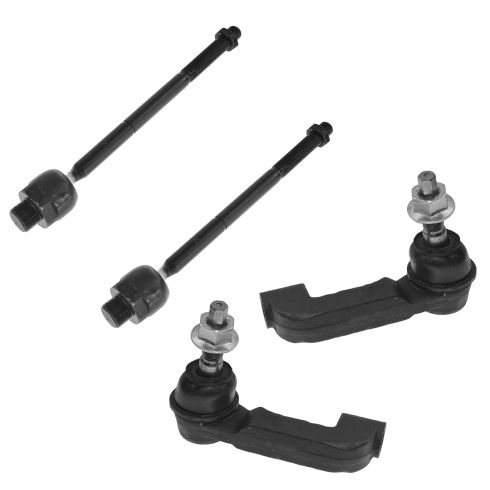
2002-04 Jeep Liberty Front Driver & Passenger Side Inner & Outer 4 Piece Tie Rod Set TRQ PSA55193
Part Details:
- 4 Piece
- (2) Front Outer Tie Rods
- (2) Front Inner Tie Rods

How to Replace Outer Tie Rods 2007-17 Ford Expedition
This video shows you how to install new TRQ outer tie rods on your 2007-2017 Ford Expedition.
