How to Replace Outer Tail Light 1997-99 Toyota Camry
Created on: 2016-06-30
New Tail Light from 1AAuto.com How to install, repair, fix, change or replace a broken, damaged, burned out, cracked, faded, cloudy or chipped tail light / brake light on 97, 98, 99 Toyota Camry
-
step 1 :Removing the Tail Light Cover
- Remove the three Phillips connectors
- Remove the inner tail light cover
-
step 2 :Removing the Tail Light
- Disconnect the white connector
- To remove the tail light, loosen the three 10mm nuts on the inside of the housing
- Remove the tail light
-
step 3 :Reinstalling the Tail Light
- Insert the tail light into place
- Tighten the three 10mm nuts to the inside of the housing
- Connect the electrical connector
-
step 4 :Reinstalling the Tail Light Cover
- Install the plastic cover
- Turn the three Phillips connectors
-
step 5 :Reinstalling the Tail Light
- Insert the tail light into place
- Tighten the three 10mm nuts to the inside of the housing
- Connect the electrical connector
-
step 6 :Reinstalling the Tail Light Cover
- Install the plastic cover
- Turn the three Phillips connectors
Tools needed
-
10mm Socket
Ratchet
Brought to you by 1AAuto.com, your source for quality replacement parts and the best service on the Internet.
Hi, I'm Mike from 1A Auto. I hope this how-to video helps you out, and next time you need parts for your vehicle, think of 1AAuto.com. Thanks.
In this video, we're going to show you how to replace the outer tail light. This is a 1998 Toyota Camry, and this is exactly the same for ’97-‘99, and the procedure is the same, although the tail lights are a little different for 2000 and 2001. You'll need a new tail light or tail lights from 1AAuto.com, 10mm socket and ratchet.
Your vehicle should have three of these plastic Phillips head trim screws. We only have one, so we'll remove that. We'll remove the other two the same way. Loosen it up and remove it from the panel, and lift up, and then pull your panel out of the vehicle.
Remove the electrical connector from the back of the tail light housing. Remove the three 10mm nuts. Going to use the 10mm socket and ratchet. Work the tail light housing out of the rear of the car.
Here we have our old parts of the vehicle and our new part from 1aauto.com. As you can see, the parts are nearly identical. Obviously, this one's a lot cleaner being that it's right outside of the box. See we have the same size, and these actually have a little bit of tint from the factory that matches nicely on our replacement part. We have the same tab, the same three studs to connect into our car, while we have the same bulbs and the same five pin connector to the vehicle. The bulb sockets on our new part are actually a little bit longer and a lot easier to twist and remove while still in the vehicle, rather than removing the whole tail light assembly from the car in order to change the bulb. If your old tail light housing has become cracked, cloudy, or the seal's leaking or damaged in any other way, this new part from 1A Auto is going to go in direct fit just like your original equipment and fix you up right.
Align the three new studs with the three holes in the back of the vehicle. It may not seat all the way in until you bolt it down because the new gasket is thicker than the one that's been on there for almost 200 miles now, so when we bolt it down, it will line up nicely.
Start the 10mm nuts onto the studs by hand. Tighten down the nuts with the 10mm socket and ratchet. There is no torque spec for these, but you don't want to go really tight, because the studs will crack out of the plastic housings. Reinstall the electrical connector.
Reinstall the plastic panel. You may have to lift up the bottom of the carpet a little bit to help it slide into place. Push the carpet back down. Line up whatever plastic connectors you have and snap them back into place. Again, there are two that belong here and here. Ours are just missing. Check for proper operation of the parking lights, brake lights, and the turn signal on the appropriate side.
Thanks for tuning in. We hope this video helped you out. Next time you need parts for your car, please visit 1AAuto.com. Also check out our other helpful how-to and diagnosis videos.
Shop Products
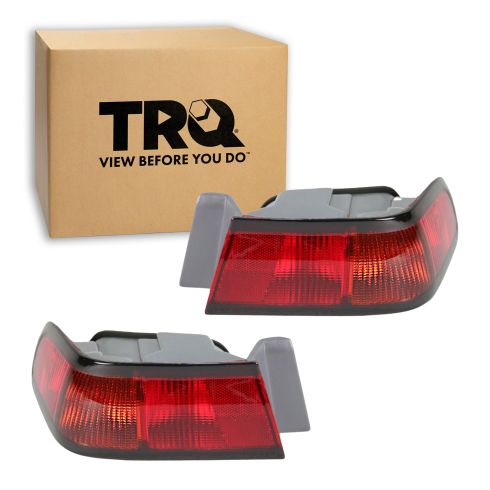
1997-99 Toyota Camry Driver & Passenger Side Outer 2 Piece Tail Light Set TRQ LTA79930
Part Details:
- (1) Passenger Side Outer Tail Light
- (1) Driver Side Outer Tail Light
- 2 Piece
How to Replace Tail Light and Bulb 1994-99 Cadillac Deville
How to install, repair, fix, change or replace a broken, damaged, burned out, cracked, faded, cloudy or chipped taillight on Cadillac DeVille, years 94, 95, 96, 97, 98, or 99.
