How to Replace O2 Oxygen Sensor 2002-13 Toyota Camry
Created on: 2019-04-11
How to remove, install, change or replace an oxygen O2 sensor on 02, 03, 04, 05, 06, 07, 08, 09, 10, 11, 12, 13 Toyota Camry
-
step 1 :Removing the Splash Shield
- Raise and support the vehicle with a jack and jack stands
- Remove the 10mm bolts from the splash shield
- Remove the four body clips from the splash shields with a trim tool
- Remove the splash shields
-
step 2 :Removing the Downstream Oxygen (O2) Sensor (Bank 1 Sensor 2)
- Disconnect the O2 sensor's gray electrical connector with a pair of pliers
- Remove the sensor wire from the bracket
- Loosen the downstream O2 sensor with a 22mm or oxygen sensor socket and ratchet
- Twist off and remove the downstream oxygen sensor
-
step 3 :Installing the Downstream Oxygen (O2) Sensor (Bank 1 Sensor 2)
- Inspect the threads in the exhaust pipe for stripping
- Feel the threads grab and turn the oxygen sensor into the exhaust by hand
- Tighten the O2 sensor with a 22mm or oxygen sensor socket and ratchet
- Thread the sensor wire through the bracket
- Connect the sensor connector
- Reroute the excess wire by looping in the bracket it without pinching it
-
step 4 :Installing the Splash Shield
- Insert the splash shield into place (R for passenger side and L for driver side)
- Tighten the 10mm bolts to the splash shield
- Press in the four body clips
Tools needed
-
O2 Sensor Socket
Jack Stands
Ratchet
Floor Jack
Hey, everyone. Sue here from 1A Auto. Today we have our 2013 Camry in the shop. It's got the V6 3.5 liter in it. I'm going to show you how to remove and replace the downstream O2 sensor. That would be bank one, sensor two. If you need that part or any other part for your car, click on the link below and head on over to 1AAuto.com.
To take the undercarriage shield down, we're going to need a 10-millimeter socket and a body clip tool. This car has had the shield down, somebody replaced. For the most part, it should be a 10-millimeter socket, but this one someone put in, they are actually standard 13 or 1/2 sockets. I'm just going to take them down. Switch over to the 10. You're going to do the same per side. There's three bolts with that little rubber vent. It just directs the airflow. You can take those down, and then you're going to have one, two, three, four across the front, and then one body clip.
Now I'm going to do the body clip. There's the R for right side/passenger side and the L for left side/driver side. Now we're going to replace the downstream O2 sensor on our '13 Camry with the 3.5 liter--that's the V6. We're doing the downstream bank one. If you were to look it up, someone could call it bank one downstream or B1S2. S2 means sensor two. The downstreams are always considered the sensor two, not as in also, but as in the number two. You have your one bank, and you have bank two--bank one and bank two. We're going to be working on bank one downstream O2 sensor. This one is nice and easy--it's out in the open.
What I do is you get a black clip and a gray clip. Once I identified which one I'm going to be replacing, that's going to be the gray clip on this bracket. I'm going to push down on this tab here. I like to use a pair of pliers. Sometimes I just can't get it to pull, so I just grab it lightly and pull that out. Toyota. This Toyota has an actual middle bracket. It holds the wires in place, so that way it stops it from hitting the exhaust while you get on the road. Now I just have to fish that out of that bracket. Bring that sensor and bring the wire down. Then there is the sensor itself in the exhaust pipe. That's going to be a 22-millimeter or a oxygen sensor socket.
I'm going to use an oxygen sensor socket, and that's a specialty socket that is opened up almost like a crow's foot or a tubing wrench crow's foot. You slide that down over the harness. Settle down on that right where the octagon, hectagon is, and then you're just going to give it a quick tug and break it free. If yours is really in there, it's hard to get, you can use a little MAPP gas and heat it up. That's it, you're at home. If you're a home owner. You should have a little can of MAPP gas for if you do soldering or a little plumbing. If not, you can get one at a hardware store pretty cheap. You just want to heat up this section of it and then break it free.
Here we have our new O2 sensor from 1A Auto. Here we have the factory O2 sensor on our '13 Camry 3.5-liter of the new one. We'll have a little bit longer length to it. That's very common with aftermarket O2 sensors. They just want to give you a little bit more just to make sure. It's better to have more than less because if it's not going to reach, it's not going to work. O2 sensor, the new one comes with this protective cover because it has a little thread lock or NECs on the actual threads, so you don't want to get that everywhere. You can look real quick and see that they're the same depth. They have the same cutout. They have cutouts. That's where the oxygen sensors show. You say it takes a sniff and does the reading. The most important part is down here. You'll see that the connectors match. That's what you're looking for. You want to make sure those connectors match and will work. You don't want to get through this job and find out that the connector doesn't fit in there.
Before you always start an O2 sensor, I strongly recommend matching up this end connector before you take it out. If you need this part or any other part for your car, click on the link below and head on over to 1AAuto.com. Before I put my O2 sensor in the new one, our new one came out pretty smooth. If you have one that's really rough coming out, take a good look at the threads here. Make sure there's threads still in the exhaust pipe because I've seen them stripped out completely, just in case you weren't the last one in there. These look pretty good, and you'll be able to feel it as you start this new one. You want to feel the threads grab. Fall right into place, basically. You should have no problem doing that by hand. If it gets really rough, they do make a tap for oxygen sensors, a specific one, size and everything. Hopefully, you don't need to purchase that for a one-time deal, but you want those threads to be cleaned up. Make sure that those goes in there nice and tight.
I'm just going to get my socket and reverse the direction. It has a crush washer on it, so even though you think it's tight, it just keeps going. Just like a spark plug, so you want to bottom it out. Once it bottoms out on that crush washer, you're going to give it another little quarter of a turn to an eighth of a turn. That's the washer is now crushed. Perfect. I'm going to take my wire, and I'm going to feed it up through here. I'm going to put it in that bracket. Make sure it pinches in that connector because I don't want it resting against my exhaust. I'm going to look at my connector and see that's the way the tab is, the lock tab. Guide it in that way, and then click it together.
Now with the excess type of wire, I want to make sure I route that so I know I have a plastic shield, but the shield only comes to here. I'm not going to be wanting this wire hanging down like that. I'm going to see if I can double it up in a loop. I don't want to pinch the wires, so this is where it becomes a little tricky. Try to do your best without damaging the actual wire. I'm just rerouting it back past this bracket that this manufacturer actually supplies, and then put it into the actual, it's almost like a paperclip. I guess that's what I would say, the design that they did. I just basically looped it, so that the excess is up inside there. My wire is not hanging down, nothing is going to catch it, and it's not up hitting on the convertor. That looks pretty good.
When I put the shield back up I've got the R for right side, which would be the passenger side. You can see the cutout of the fender well right here. I'm going to guide it in. You want the tab from the bumper underneath, and you want to put all these little flares up under like that. I'm going to put one bolt in and hold it. Then I'm going to go over here. I've got my fender guide here, so that's going to go on top there, then that one. This has that rubber piece, remember. I'm going to get my electric gun with my 10-millimeter socket. I'm going to do the same on the driver's side, which is the plastic that says L. That's going to go overlap up inside. The one piece I put on, the one bolt I tighten up, of course, like that up inside the fender flare. There we go.
Now I can take my rubber piece here. I'm going to flip that up, make sure I line that up. Okay, up in the front here. Get this one. You got this one that overlaps. This piece has got to go down underneath it. Then we have a push pin that I'm going to put in right here. Then the last one is a replacement push pin.
Thanks for watching. Visit 1AAuto.com for quality auto parts shipped to your door, the place for DIY auto repair. If you enjoyed this video, please click the subscribe button.
Shop Products


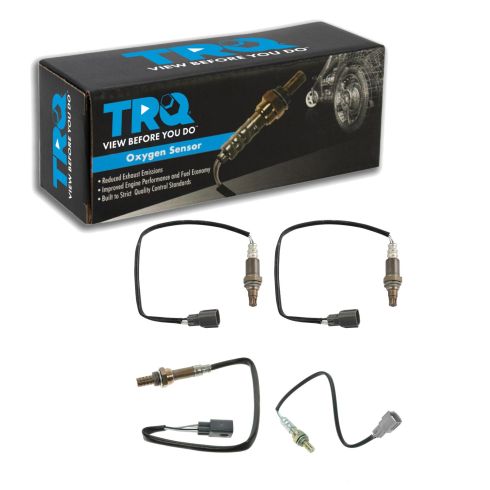
Toyota Avalon Camry 4 Piece O2 Oxygen Sensor Set TRQ OSA60285
Part Details:
- 4 Piece
- (2) Downstream O2 Oxygen Sensors
- (2) Upstream O2 Oxygen Sensors

How to Replace O2 Oxygen Sensor 1997-2003 Buick LeSabre
Check engine light on? Find out how to replace a bad upstream oxygen (O2) sensor before the catalytic converter with this how-to video
