How To Replace Neutral Safety Switch 4 Wire Harness 1992 99 GMC K1500
Created on: 2020-05-21
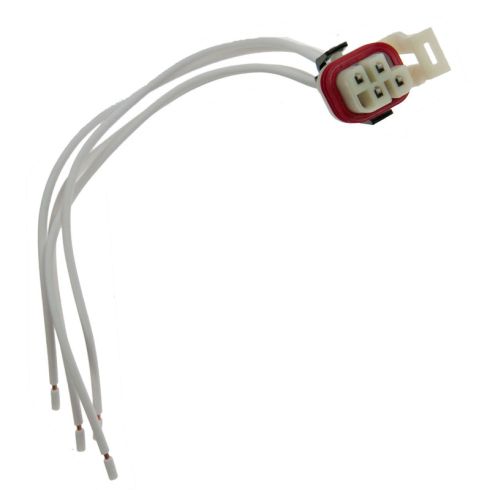
This video shows you how to install a new 4 wire harness for the neutral safety switch on your 1988-02 GMC Sierra.
Tools needed
-
Dielectric Grease
Electrical Tape
Gloves
Heat Gun
Wire Butt Connectors
Heat Shrink Tubing
Crimper
Wire Cutters
Safety Glasses
So once you're safely under the vehicle, if you look along the driver's side of the transmission, you're gonna see your neutral safety switch. Here's the wiring that we're gonna be replacing. So what I'm gonna do is I'm gonna take both these off first. Let's see if I can get it. Okay, that one's a little stiff. The reason for that is because it has a securing point right here. You just use your little fork tool, pry it away from the switch, should come right off and then I can draw this away. Now we're just gonna work at giving ourselves a little bit of slack. To do that, We're gonna get this off of here. Set that aside because we're gonna need it, remove this tape and then pull this up.
That gives us plenty of room and now we can get started. So we're just gonna separate these wires. So there's two over here, two over there. We're gonna do the same thing on our new one, making sure that they match up. The next thing we're gonna do is start by removing one wire at a time. We're gonna cut this one. We'll peel back some of the lining here, and we'll do the same thing to this one. We'll connect it in, and then we'll do the same thing down the line to each one, one at a time that way there you can't mix it up. Give that a nice twist. At this point, you can either solder or you can use these little connectors right here, which I would recommend. When you get them you wanna make sure that you have heat shrink on them. If they don't come with heat shrink, you need to put heat shrink over it because you wanna make sure that no moisture gets inside this connection. Slide that right up in there as far as it can go. Now I'm gonna crimp it down. Give it a nice tug. Make sure it's secure. We've got our new connector here, where this one we cut super close. We're also gonna cut this one.
This one's gonna be the shortest wire coming off of here. So I'm gonna cut it up a little bit higher. Give myself a little bit extra slack because that's how I roll. Trim that off. Now we're gonna take the coating off of this one as well. Give it a nice little twist. Slide it up in there as far up in as it can go. Give it a nice pinch. Okay. Nice tug. You wanna make sure it does not separate. If it separates, you've got the wrong connector or you didn't crimp it tight enough, this feels great. Let's do the same down the line. So this one, the original one I cut short. This one I wanna go a little bit longer, like that, because basically what I want to do is I want to try to stagger these connectors. I don't want them all in one spot necessarily. If I can make them just staggered, it's gonna be much better overall.
I cut that front one. So I'm gonna do the same thing. Cut the front one on this one, this one, like I said, it's gonna be longer than the original one. Just like that. Splice this one in there. Slide it right up and then crimp it down. This is looking great. Crush it down, nice. Last one. All right, so this looks great. The next thing we're gonna do is melt down this heat shrink, so it condenses right up against the wire and keeps all the moisture out. Give it a nice squeeze. Do the same thing to all. Now that we have those done up nice, we're gonna use a little bit of electrical tape and we're gonna continue by protecting these and keeping them securely together. Perfect. Now we're gonna protect the terminal end by using a little bit of dielectric grease. Let's get the wire loom back, put over this. Try to keep these wires as safe as possible of course. Here we are. Make sure they're all in there. Now, we're just gonna put a little sling of tape around the end here just to make sure the wires don't come out and then we'll connect them back into the neutral safety switch. Now we'll just give them a nice tug, make sure they're secure. We're gonna put back on that little securing point here for the wiring.
Shop Products

How to Replace Neutral Safety Switch 1998-2002 Lincoln Navigator
This video shows you how to install a neutral safety switch on your 1998-2002 Lincoln Navigator.
