How to Replace Neutral Safety Switch 2000-03 Chevy Suburban 1500
Created on: 2017-03-03
Watch this video to learn how to fix your shifter if it won’t shift into drive, or your car won’t start. The experts at 1A Auto show how to replace the neutral safety switch on your 00-03 Chevy Suburban.
-
step 1 :Removing the Driveshaft
- Make sure the transmission is in neutral
- Jack up and secure the vehicle on jack stands
- Index the drive shaft with a marker for reinstallation
- Index the boot on the rear of the drive shaft with a marker
- Cut the dust boot clamp at the rear of the drive shaft with pliers
- Peel back and pop the boot off
- Have an assistant hold the driveshaft in place or brace it with a pry bar
- Remove the 11mm bolts at the front of the driveshaft
- Separate the front of the driveshaft from the transmission and let it hang
- Separate the rear of the driveshaft from the splines
- Pull the driveshaft down and out starting
-
step 2 :Removing the Neutral Safety Switch
- Disconnect the connectors from the transmission range switch
- Pop off the end of the cable with side cutter
- Clamp on the backside of the selector shaft with vise grips
- Hold the grips and remove the nut on the end of the selector shaft with a 15mm socket and ratchet
- Remove the vise grips
- Wiggle the arm off of the selector shaft
- Remove the two 13mm bolts from the switch and plate
- Slide the switch off of the selector shaft
-
step 3 :Installing the Neutral Safety Switch
- Clean off the surface of the selector shaft with a wire brush
- Slide the sensor onto the shaft
- Tighten the 13mm bolts
- Pop the tool off the switch
- Press on the arm
- Tighten the 15mm nut with vise grips and a socket and ratchet
- Reinstall the cable islet by pinching it in with pliers
- Reinstall the two connectors
-
step 4 :Installing the Driveshaft
- Lift the new driveshaft into place starting with the rear
- Align the index on the rear
- Align the index on the front
- Tighten the 11mm bolts to the front of the driveshaft
- Hold the drive shaft with a pry bar
- Torque the bolts to 19 foot-pounds in a crossing pattern
- Replace the dust boot clamp and crimp it
Tools needed
-
12mm Socket
13mm Socket
Socket Extensions
Torque Wrench
14mm Socket
15mm Socket
Channel-Lock Pliers
Pry Bar
Jack Stands
Side Cutters
Flat Blade Screwdriver
Ratchet
Wire Brush
Floor Jack
11mm Socket
Marker / Writing Utensil
Hi, I'm Mike from 1AAuto. We've been selling auto parts for over 30 years! We're dedicated to delivering quality auto parts, expert customer service, and fast and free shipping, all backed by our 100% satisfaction guarantee. So visit us at 1AAuto.com, your trusted source for quality auto parts.
In this video, we're going to be working with our 2002 Chevy Suburban 5.3 liter V8. We're going to show you how to remove and replace the transmission range sensor, also known as a neutral safety, or reverse switch.
If you like this video, please click subscribe. We have a ton more information on this and many other vehicles, and if you need this part for your car, you can follow the link down in the description over to 1AAuto.com.
Here are the items you'll need for this repair: jack and jack stands, paint pen or marker, side cutters, flat blade screwdriver, pry bar, 11-15mm socket, ratchet, socket extension, locking pliers, pliers, wire brush, torque wrench
Before removing the front bolts on your driveshaft, make sure that your vehicle's transmission is in neutral. Raise and support your vehicle. We're using a lift to make it easier to show you guys what's going on at home, but this job can easily be done in the driveway or your garage with a jack and jack stands.
Your front driveshaft is located here between the front differential and the transfer case flange on the driver's side of the transmission. If you're going to be reinstalling your old driveshaft, you'll need to index it to make sure it goes back in the same way it came out. Do this by drawing a line on the flange and the driveshaft with a paint marker. Cut the clamp on the dust boot with a pair of side cutters. It helps to twist when you're cutting these, and just kind of snap them off. Remove the clamp and peel back the boot. You may need a flat blade screwdriver to help pop the boot off. Once the boot's peeled off, we'll index the yoke to the side of our transfer case housing.
Stick a pry bar in between the forks of the yoke and the driveshaft, and brace it against your torsion bar. You can then loosen the bolts with an 11 millimeter socket ratchet and extension. Move the U joint strap. Rotate your driveshaft 180 degrees and reinstall the pry bar. Remove the remaining two 11 millimeter bolts.
If your driveshaft is rusty like ours is, you may need to use a pry bar to remove the driveshaft from the yoke. Sometimes they will come out by hand. Move it out of the way of the yoke and slide it out of the transfer case.
With the driveshaft out of the way, you can now access your transmission range switch. Disconnect the connectors by lifting up on the tab and releasing them from their sockets. We'll just hang those out of the way for now. Slide a pair of side cutters behind the end of the cable and pop it off. Using a small pair of vice grips, clamp onto the backside of the selector shaft on your transmission and hold the vice grips and use a 15 mm socket ratchet to remove the nut on the end of the selector shaft. You can then remove your vice grips and wiggle the arm off of the selector shaft.
You can now remove the two 13mm bolts securing the switch and plate to the transmission with the 13mm socket and ratchet. Now normally, you should be able to just slide it off of the selector shaft, but ours has a ton of rust build up on it, so we're going to have to pry it off, which is going to break the switch. It's no big deal since we're here to replace it. Remove it from the vehicle.
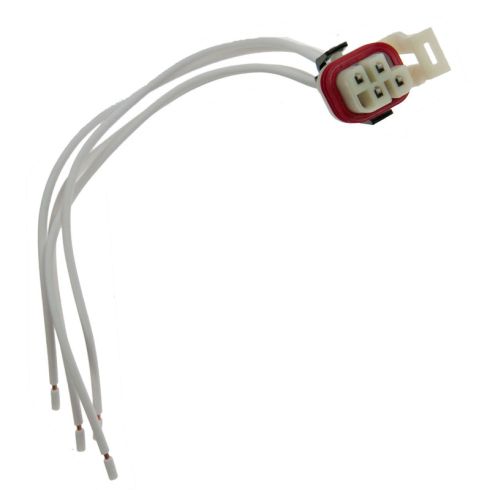
Here we have the old transmission range sensor that we removed from our vehicle, and our new part from 1AAuto.com. As you can see, these parts are exactly the same with the same backing plate, same sensor body, same two electrical connectors on the backside, and the same dial here which is actually what your selector shaft rotates to tell the switch which position its in. It even comes with a new alignment tool which keeps this in the correct position, so we can bolt it down, there is a little adjustment on the holes here, so it sits in exactly the right place, and then we pop that off and we know that our sensor is calibrated and adjusted correctly.
If your old sensor has broken and is preventing your vehicle from starting when it's in park or neutral, or your reverse lights aren't kicking on when you're in reverse, this part could be at fault, and this new part from 1A Auto will go in direct fit, just like your original equipment and fix you up right.
You can now use a wire brush or a file to remove all of that build up and corrosion from the selector shaft to make sure your new switch goes on smoothly. Once the selector shaft is free of burs and debris, carefully slide the sensor back on. Now that little alignment tool that comes on there will help align these slotted holes, so our sensor sits exactly where we want it to. Once that's in, tighten down two 13mm bolts. Once it's tightened down, simply pop the tool off, re-install your selector lever, which is also keyed, so that'll only go back on one way, as well as the 15mm nut.
This doesn't really require a lot of torque, but should still clamp onto it with your vice grips just to keep it from turning, potentially damaging the switch while you snug it up. Reinstall the cable eyelet. You may want to use a pair of pliers to just carefully pop it on there and make sure it's fully seated, that it doesn't just fall off on you, and re-install your two electrical connectors.
Reinstall the splined-end of your driveshaft into the transfer case. Then set the alignment marks on your driveshaft, and reinstall the strap and the 11 millimeter bolts. Place the pry bar back inside of the yoke and torque the 11 millimeter bolts to 19 foot-pounds. Remove your pry bar and rotate the driveshaft 180 degrees. Your transmission should still be in neutral, and repeat these steps.
Install a new clamp around the boot. The way these ones work is you loop it around and then hook it over, and I'll show you how to crimp it. You get it hooked onto itself like that and then use a pair of side cutters. If you don't have a crimping tool like this, set it over the edges of the crimp and then pinch it down nice and tight. If you're using side cutters, it's important to be careful here and not go too tight, or you'll just cut through it.
Thanks for watching. Visit us at 1AAuto.com for quality auto parts, fast and free shipping, and the best customer service in the industry.
Shop Products


How to Replace Neutral Safety Switch 2003-2011 Honda Element
This video shows you how to install a new neutral safety switch in your 2003-2011 Honda Element.
