How to Replace NC Speed Sensor 2006-11 Toyota Camry
Created on: 2017-10-10
New Vehicle Speed Sensor from 1AAuto.com How to remove, install, change or replace a rusted or defective speed sensor on 09 Toyota Camry.
-
step 1 :Removing the Air Intake
- Remove the 10mm bolts from the air box housing
- Disconnect the sensors
- Loosen the hose clamp on the air intake tube
- Lift the airbox
- Remove the air filter
-
step 2 :Removing the NC Speed Sensor
- Unplug the electrical connector
- Disconnect the sensor
- Remove the 12mm bolt from the sensor
-
step 3 :Installing the NC Speed Sensor
- Insert the sensor into the transmission
- Tighten the 12mm bolt to the sensor
- Connect the connector
-
step 4 :Installing the Air Intake
- Insert the air filter
- Place the cover on
- Connect the air intake tube and hose clamp
- Connect the connectors
- Tighten the 10mm bolts to the air box housing
Tools needed
-
12mm Socket
Socket Extensions
Flat Blade Screwdriver
10mm Socket
Ratchet
Needle nose pliers
Hi, I’m Mike from 1A Auto. We’ve been selling auto parts for over 30 years!
I'm going to remove the air box, just slightly out of the way, so that I can get to this connector better and undo it. Use a 10mm socket and ratchet. Loosen this up. There's a second one on the back side. Unplug this electrical connector here. Unplug this one here. This harness is actually connected to the air box, so can't pop it off, I'm just going to leave it here and move it to the side. Then loosen this clamp on the intake tube. Lift up the air box. Make sure those are fully released. Take our air filter out of here so it doesn't get damaged.
So, this harness here has a little push connector. I'm going to take these needle nose pliers and just push them together, and just pop it out. Put that aside. Put this aside, so it doesn't get damaged.
Move the NC sensor, which is located at the top of the transmission. There's an electrical connector here, and a single bolt holding to the transmission. And unplug the electrical connector by squeezing the plug and pulling it off of the sensor. Use a 12 mm socket and ratchet to remove it. Just got to work the sensor back and forth. Just kind of pushing it back and forth, it breaks the seal. Just going to work the sensor back and forth. Work it out over the O-ring. It's got a very tight seal, so it doesn't leak.
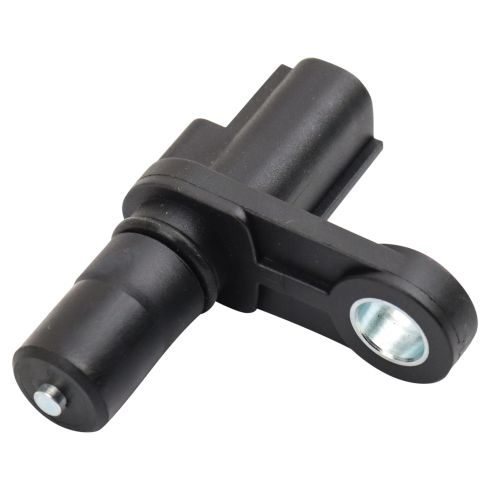
Here's the original sensor from our vehicle. Going to wipe off some of the oil on here, transmission fluid. See it's similar in design to the brand new one from 1AAuto.com. Same style connector. Same style single mounting hole. Comes with a new O-ring. This should fit in and work great.
Reinstall the sensor. Just reverse the removal. We have to work it into the opening the transmission. We just work it back and forth, and it sits down. Line up the bolt hole. Reinstall the bolt. Reconnect the electrical connector. Push it on until it clicks. Sensor is replaced.
Reinstall the lower air box. We've cleaned out all the debris that was in there. That's going to sit right back on the bracket. Get the bolts, and get them started. Tighten them down, socket and ratchet. Install the intake tube back into the box, just slides right over. Line it up on the radiator support. Just going to tighten those down, feel like I'm tight then I'll stop. Don't need to kill these, they're just holding plastic into the thin sheet metal.
Reinstall the air filter. Install the air box cover. It's got two tabs over here that need to go into these two hooks. Slide it over, and line up the little slot in the rubber with the plastic alignment tab. Make sure that the clamp is in the grooves. Tighten the screws holding in the air box. Then reconnect our electrical harness, clip it back into the spot on the air box were. Connect the mass air meter. And this little valve here, reconnect it.
Thanks for watching. Visit us at 1AAuto.com for quality auto parts, fast and free shipping, and the best customer service in the industry.
Shop Products
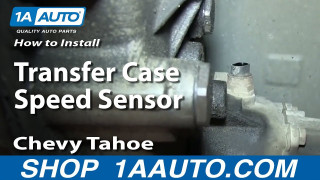
How To Replace Transfer Case Speed Sensor 1995-99 Chevy Tahoe
This video from 1A Auto will show you step by step how to replace the transfer case speed sensor on your 95-99 Chevy Tahoe.
