How to Replace Multifunction Switch 1995-99 GMC K1500
Created on: 2017-02-24
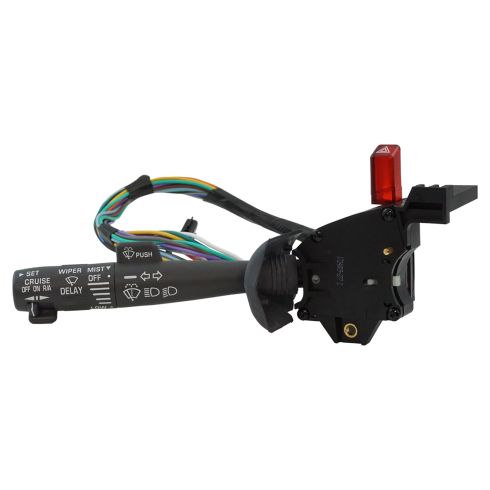
Learn how to replace the multifunction/turn signal stalk, high beam and wiper switch on your 95-99 GMC K1500 with this instructional video!
-
step 1 :Disconnecting the Battery
- Remove the negative terminal with a 5/16 or 8mm wrench
-
step 2 :Removing the Air Bag
- Pry the pins up and out from behind the steering wheel
- Disconnect the air bag wiring harness
- Remove the orange safety
-
step 3 :Removing the Steering Wheel
- Insert the seat belt through the steering wheel
- Click in the steering wheel
- Crack the 21mm bolt loose
- Release the seat belt and remove it from the wheel
- Finish removing the 21mm nut
- Wiggle the wheel up and off by hitting the back sides or use a puller
-
step 4 :Removing the Steering Column Cover
- Remove the snap ring on the clock spring with a pair of snap ring pliers
- Tilt the column all the way up
- Remove the lever by pulling it out
- Remove the two T25 Torx screws on the bottom of the cover
- Pull the lower column down
- Remove the two inverted Torx screws with an inverted E5 socket
- Reinstall the tilt lever
- Push down the column
- Remove the lever
- Push down the small hole in the top of the ignition cylinder with a hooked pick
- Hold the key the key in the cylinder and press the hole to pull out the cylinder and remove the upper cover
-
step 5 :Removing the Lower Dash Panel
- Remove the four 7mm screws along the bottom near panel
- Pop the panel and its plastic clips out
- Pull out the e-brake release handle
- Compress the tabs on each side of the release handle
- Turn the e-brake and slide the cable out
-
step 6 :Removing the Multifunction Switch
- Remove the four 10mm bolts from the metal knee pan
- Remove the two T25 Torx screws from the multifunction switch
- Disconnect the wiring harness
- Remove the multifunction switch
- Remove the two 7mm bolts in the middle of the ignition switch harness
- Pry the harness out of the housing
- Press out the green tab and safety tab
- Remove the second connector
- Remove the multifunction switch
-
step 7 :Installing the Multifunction Switch
- Insert the multifunction switch and harness into place
- Reinstall the T25 Torx screws to the switch
- Plug the two-wire connector into place and reingage the green safety tab
- Lock the harnesses into place
- Put the wiring into place
- Tighten the 7mm bolts to the harness
- Reattach the vent
-
step 8 :Installing the Lower Dash Panel
- Insert the metal dash panel into place
- Tighten the bolts to the metal
- Pull the e-brake cable back through the opening and twist it to lock it
- Press the panel into place
- Tighten the four 7mm screws along the bottom of the panel
-
step 9 :Installing the Steering Column Cover
- Spread open the snap ring and slide it over the shaft
- Reinstall the upper column cover
- Insert the cylinder into place with the key in
- Turn it forward and back to engage
- Reinstall the tilt lever
- Raise the column slowly
- Reinstall the two E5 inverted Torx screws
- Remove the tilt rod
- Slide the lower column into place
- Tighten the two T25 Torx screws
- Reinstall the tilt lever
-
step 10 :Reinstalling the Steering Wheel
- Thread the harness through the steering wheel
- Remove the alignment pin from the clock spring
- Insert the wheel to the splines
- Tighten the 21mm nut
- Torque the nut to 29 foot-pounds
- Clip in the harness
-
step 11 :Reinstalling the Air Bag
- Connect the harness to the air bag
- Install the safety ball
- Clip in the air bag and push it in
-
step 12 :Reconnecting the Battery
- Put your key in and turn it to the run position
- Connect the negative terminal with an 8mm wrench
Tools needed
-
Torque Wrench
8mm Wrench
Steering wheel puller
Pick
21mm Socket
Side Cutters
Flat Blade Screwdriver
Snap Ring Pliers
E5 Socket
7mm Socket
10mm Socket
1/2 Inch Breaker Bar
T25 Torx Driver
Hi, I'm Mike from 1AAuto. We've been selling auto parts for over 30 years! We're dedicated to delivering quality auto parts, expert customer service, and fast and free shipping, all backed by our 100% satisfaction guarantee. So visit us at 1AAuto.com, your trusted source for quality auto parts.
In this video we're going to be working with our 1996 GMC Sierra K1500. We're going to show you how to remove and replace your vehicle's multifunction switch, which runs the wipers, high beams, and turn signals.
If you like this video, please click subscribe. We have a ton more information on this truck, as well as many other makes and models. If you need this part for your vehicle, you can follow the link down in the description over to 1AAuto.com.
Here are the items you'll need of this repair: 7 to 21mm socket, ratchet, socket extension, 8mm wrench, breaker bar, torque wrench, T25 Torx socket, E5 inverted Torx, flat head screwdriver, steering wheel puller, side cutters, snap ring pliers, 90 pick tool, zip ties
Remove the negative post from your battery using a 5/16s or an eight millimeter wrench. Be very careful, this wrench isn't long enough but if you have a longer one, you may be able to hit the positive battery terminal with it. You want to be very careful you don't do that. Remove the terminal and isolate it from the battery.
Now just so you can see, because it's pretty difficult to show on the back of the steering wheel, there are these notched pins, all four of them on the airbag and these sit in these four holes. What I did to release them is there's openings in the back you can reach through, the flat blade screwdriver and pry them up and out of the way. Pretty difficult to get back there and see that, but you just need to reach in there and pry it out of the way with your screwdriver and it'll pop itself up. Remove the airbag.
There's a little hook on the harness, you need to disconnect to get this out all the way. Remove the orange safety. You may need a screwdriver to release the electrical connector here. Put your seatbelt through the steering wheel. This will help to hold it while you break the 21-millimeter bolt in the center loose. Release your seatbelt and remove it from the wheel. Make sure that the steering wheel is nice and straight and flat. Finish removing the 21-millimeter nut and wiggle the wheel or hit the back sides.
Now if you can't just knock the steering wheel off by hand, you can use a steering wheel polar. This is actually kind of a universal polar. These are available from 1AAuto.com, the same one we have here and it comes with a variety of bolts so pick the ones that fit your vehicle.
Go ahead and thread them all the way and you can just do this by hand, because they'll bottom out in there. If you try to get them much tighter than that, you could risk damaging something underneath. Once those are in, install the center bolt, tighten that down until it bottoms out on the center bolt of the steering wheel. I'm going to try to keep this straight using a 19 millimeter socket and ratchet and holding the wheel straight, tighten down the center bolt. Once it comes free, the wheels should come off pretty easily. Carefully remove the steering wheel. Slide the wire for the airbag clock spring through it.
Remove the snap ring on the clock spring with a pair of snap ring pliers. Simply put the tips of the pliers into the openings on the snap ring. Spread the snap ring and lift it up out of its grooves. Slide the snap ring off. If you have a tilt steering column, make sure that it is tilted all the way up. Grab the lever firmly. Pull that out. Remove the two T25 Torx on the bottom of your steering column cover. Pull down to separate your column, and then push in and pull out to release these hooks in the back.
Now there are two of these inverted T5 Torx that you need, an E5 inverted Torx socket to remove. However, if you have a 6.4 millimeter that's on there pretty snug and as long as you go careful, you should be able to spin them right out. Reinstall the lever for your tilt column if equipped. Push down and remove the lever again, so you don't bump it. It's hard to show and we'll show you when the piece is removed, but there's a small hole in the top of the ignition cylinder that you can get with a hooked pick.
I'm looking through the hole for the hazard switch to see this. What you need to do is push down on that. You want to hold your key like you're trying to start it and then push down on that little hole. You'll feel it released. Slide it out as far as it will go and turn it back some. Remove it fully so you can remove your steering column upper cover.
Now just to give you a better idea of what we were doing with that cover on top and yours will be right here blocking your view but you can look through, reach in to this whole. Key to the start position, push down, pull out, remove your pick, rotate backwards, remove your cylinder.
Remove the four 7 mm screws along the bottom knee panel of the dashboard with a 7mm socket and ratchet. We have some, it looks like, wood screws and some little machine screws that have been put in here. It looks like they might be for an old break controller for the trailer or something like that. I may have to remove these, but they shouldn't be there on your vehicle.
Now all along the top of the knee panel and the dash there are some plastic clips, so we just have to pop those out. Pull out your e-brake release handle as far as you can, and use a small flat-blade screwdriver to compress the tabs. There's one on each side. We're not going to be able to show you the one on the inside of the panel, just because of the way the dash is shaped, but it's on the opposite side of this clip. Then you should be able to turn the e-brake and slide the cable out to remove your knee panel.
Remove the four 10mm bolts holding the metal knee panel to the dash with a 10mm socket and ratchet. Remove the metal knee panel from the dash. I'm just going to remove this dash vent so I can see a little bit better. Remove the two T25 Torx screws from your combination switch or multifunction switch with a T25 Torx socket and ratchet, and one at the front on the bottom left corner. Careful not to hit or damage your airbag clock spring while you're at it. Peel open the wrap around the harness. This is kind of just like a really wide electrical tape. You can just peel that off.
Go through the opening in the dash that the center vent was and remove the 7mm bolt in the middle of the ignition switch harness. On the side of the connector to the ignition switch, your multifunction switch is another 7mm screw you'll need to remove. Once that's out, you can slide that connector up and remove the harness. At the front of the switch on this side of the connector, pry up and slide the side connectors out of the main connector.
If you follow the rod from your gear selector, you'll find a little connector up here. Push this down with a small flat-blade screwdriver and remove it, as this ties into our multifunction switch, along with your two connectors we've removed from the ignition. Once the safety tab is out, push down with a small flat-blade screwdriver and remove the connector.
Now feed the two wires and the connector over the top of the steering column and pull it down with the rest of your wiring harness. You can now slide the harness out of the dash and remove your multifunction switch from the vehicle.
There's nothing wrong with our old multifunction switch, so we're just going to reinstall it, but the process would be exactly the same if you were installing your new part from 1A Auto.
Simply send the wiring harness back down in the column. Be careful not to jam or catch it on anything. We'll put our switch back into place. Be sure that you line everything up nicely. Install your new switch onto the column. It'll drop down into place when you have it aligned properly, and reinstall the two T25 Torx screws with your T25 Torx socket, ratchet, and a little extension.
Send the little two wire electrical connector back over the column, plug it back into its switch. Don't forget to reengage the green safety tab once it's in. Slide the multifunction switch harnesses back into their slots until they lock in on the ignition switch harness. Then push back up on the receptacle and set the connector back into place. This should go in at least partially.
Slide the receptacle back down into its bracket and tighten our screw back up with our 7mm socket and ratchet. Don't forget the 7mm screw on the side of the plug receptacle. Resecure all of the harnesses and the sheathing here, and then we'll throw a few zip ties back on there where we cut them out from at the top and bottom.
Reattach your vent. Reinstall the steel support for the knee panel and the four 10 mm screws. Tighten down the bolts with the 10mm socket and ratchet. Pull your e-brake cable back through the opening and twist it, it'll lock it back into place. Line up your clips, these ones on the dash vent you should pop in first. Once the clips are in, reinstall all four of the 7mm screws. Pop your e-brake release handle back into place.
Reinstall the upper half of your steering column cover. Be sure to line up this little rubber boot for your gear selector lever. Just line up the channels and slide it in there. This is the detent that we had to hit on the ignition cylinder. Slide that back in. Make sure your key isn't all the way before you start doing this. Slide it all the way in, turn it forward and back to make sure it engages.
Reinstall your tilt lever. Place one hand firmly on top of the steering column. Release the lever and slowly allow it to go up. One thing you don't want to do, and I'm just going to do this for demonstration purposes, is just release the lever because that thing really moves. If this isn't aligned, well your shift is not in the right place, you've left a tool in there or even worse if your fingers were in here for some reason, that's going to do some damage. Make sure you let it go up slowly so you can reinstall your lower cover.
Reinstall your two E5 inverted Torx screws into the upper steering column cover. Remove the tilt latch rod again and now these hooks need to slide in and under and then pull forward to engage. Line up the lower boot for your gear selector after you've set the hooks in the back of your column cover. Snap everything back into place. Once it's lined up, reinstall your to two T25 Torx screws on the bottom of the column.
Reinstall your tilt lever. Carefully reinstall the harness for your clock spring and then pull the alignment pin out of your new part.
Reinstall your wheel onto the splines. Now one of the cool things about these wheels is they have a keyed spline so you can see I can't get it on and then it lines up and falls right in. Install the 21-millimeter nut as tight as you can toward the steering wheel nut to 29-foot pounds.
Make sure to attach the harness back into its clips as well as the one on the airbag, but we'll reconnect our connector and install our safety tab first. Slide the bag into place and just push it in firmly to engage all four clips. Now the most important step anytime you work on your airbags or anything that has to do with the airbag system, just put your key in, turn it to the run position, then reconnect your negative battery terminal. Remember to tighten this down with a 5/16s wrench. Now the reason we do this in the order that we did is power just came back on in the vehicle and our key is already on.
If anything bad had happened with the airbag like it shaved wire or some other issue, the bag would have deployed now while we're out here safely under the hood, rather than once we get the vehicle and turn the key and we're sitting right in front of it. While airbags are meant as a safety device in improper conditions, they can be very dangerous.
Thanks for watching. Visit us at 1AAuto.com for quality auto parts, fast and free shipping, and the best customer service in the industry.
Shop Products

How to Replace Wiper Switch 2005-16 Toyota RAV4
Watch this video to learn how to remove and replace the windshield wiper switch in 05-16 Toyota RAV4s.
