How to Replace Mirror 2004-09 Dodge Durango
Created on: 2012-07-25
Check out this video teaching you how to replace a cracked or broken side view mirror on your 04-09 Dodge Durango.
-
step 1 :Removing the Door Panel
- Pry the switch panel up and out.
- Disconnect the three connectors on the switch panel.
- Pry out the circular panel behind the door handle.
- Remove the Phillips screw.
- Remove the two Phillips screws at the bottom of the door panel.
- Lift up on the door panel and pull it back.
- Disconnect the blue clip from the rod and remove the door panel.
-
step 2 :Removing the Side Mirror
- Disconnect the mirror harness.
- Remove the three 10mm nuts from the mirror.
- Pull the mirror from the door.
-
step 3 :Replacing the Side Mirror
- Remove the shipping protector from the new mirror.
- Run the harness down through the door.
- Line up the studs on the mirror and push it into the door.
- Replace the three 10mm nuts. Start them by hand, then tighten them with the ratchet.
- Reconnect the mirror harness.
- Plug in the mirror harness on the switch panel and test the new mirror.
- Unplug the switch panel.
-
step 4 :Replacing the Door Panel
- Pull the harnesses through the door panel.
- Reconnect the blue clip to the rod.
- Line up the door panel and push it down over the door lock.
- Press the door panel into place.
- Reinstall the two Phillips screws at the bottom of the door panel.
- Replace the Phillips screw behind the door handle.
- Reconnect the harnesses to the switch panel.
- Push the panel in front first then press the back down in.
- Replace the circular panel behind the door handle.
Tools needed
-
Flat Blade Screwdriver
Phillips Head Screwdriver
10mm Socket
Ratchet
Brought to you by: 1A Auto your source for quality replacement parts and the best service on the Internet.
Hi, I'm Mike from 1A Auto. I hope this how-to video helps you out. The next time you need parts for your vehicle, think of 1AAuto.com. Thanks.
In this video, we're going to show you how to replace a side or rear-view mirror on this 2005 Dodge Durango, pretty much the same as any 2004 to 2009. We show you the driver's side. The passenger's side is pretty much the same. The tools you'll need are a small flat blade screwdriver, A Phillips screwdriver and either a 10 mm wrench or a 10 mm socket and ratchet.
Okay, take a small screwdriver and kind of push towards the front and pry up on your panel here. Okay, the back comes up and out and the front slides out and then there's three connectors. They just have little tabs. You push with your thumb, pull up and out. Now, in behind your door handle, just pry out this little cover here with a small screwdriver, and there's a Phillips screw there as well as a Phillips screw under there and one further back there.
I'll just fast forward here. I'm just using a Phillips screwdriver and removing those three screws I just showed you. Once those screws are out, just lift up the panel and then start pulling it out. You'll see a little blue clip back here. Pull that blue clip back off the rod, see, and pull the rod up and remove your door there. Your mirror connects in right here. There's a tab here. It's a little button. Just push that and remove; and then there's three 10 mm nuts. You need a socket ratchet like this or just a wrench.
I'm going to fast forward as I remove those three nuts and then, at the end here, you'll see I pulled the mirror off. You do have to just kind of close your door a little bit to get the mirror off as it kind of hits the A-pillar. Your mirror comes off. New mirror from 1A Auto designed to fit just like the original. Okay, it's going to go right on there. We're going to just about shut the door. Then, you get the harness in. Then, put the studs through. This does come with a gasket and everything. Take that shipping protector off. Then, open up the door. Just start this top one on.
I'll fast forward here again as I start all three of the 10 mm nuts back on and then tighten them. When you tighten them, you want to tighten them up nice and firm, but don't over-tighten them. You could actually break or damage the mirror if you over-tighten them. Okay, test the mirror. You put this panel back on. Make sure your harness is going through there. Hold this rod out. Put it into that blue clip and lock the clip on. Make sure your door lock goes through there. You just want to press it against. You can look back in here and see where all the little hooks are, in the front. Make sure that the front and rear go in flush with the door. You just want to make sure all the hooks are on there correctly. Slide down, oops. I realized that this just came out. Make sure that lock is on there. Slide it right down. Okay everything should be nice and tight around the edges.
Here, I'm going to speed it up again as I just reinstall the three screws, the two at the bottom and the one in behind the door handle. Those screws are what hold the door handle down in place. The harnesses are out. Slide this down. Slide the front end first and the rear. This can be a little bit of pain. I'll just put this little trim door back on.
We hope this helps you out. Brought to you by www.1AAuto.com, your source for quality replacement parts and the best service on the Internet. Please feel free to call us toll free: 888-844-3393. We're the company that's here for you on the Internet and in person.
Shop Products


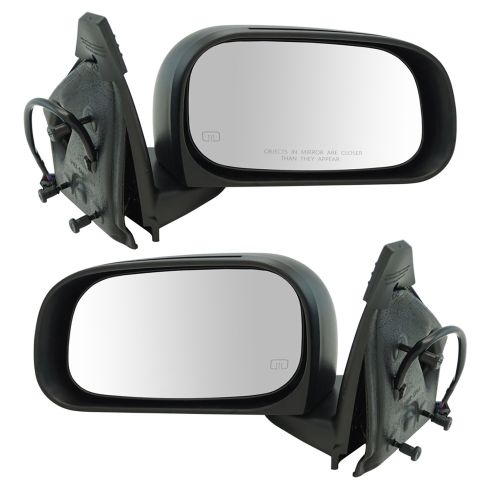
Dodge Durango Driver & Passenger Side 2 Piece Mirror Set TRQ MRA09215
Part Details:
- 2 Piece
- Paint to Match
- (1) Passenger Side Mirror
- (1) Driver Side Mirror
- Yes
- Electric
- 5
- 3
- No
- Black
- No
- No
- Manual
- Textured
- Plastic
- No
- No
- 7.87 in
- Without Memory
- No
- Black
- No
- Textured
- No
- No
- No
- No
- No
- No
- No
- No
- Clear

How to Replace Side Mirrors 2002-07 Subaru Impreza WRX
How to repair, install, fix, change or replace a broken, smashed, cracked, or shattered side view mirror on 02, 03, 04, 05, 06, 07 Subaru Impreza WRX
