How to Replace Mirror 1993-97 Ford Ranger
Created on: 2011-10-18
How to repair, install, fix, change or replace a broken, smashed, cracked, or shattered rear side view mirror on Ford Ranger model years 93, 94, 95, 96, and 97.
-
step 1 :Removing the Door Panel
- Pry off the window crank cover with a flat blade screwdriver
- Remove the T20 Torx screw from the window crank handle
- Remove the two Phillips screws from the door pull
- Pull off the door pull panel
- Remove the Phillips screw behind the door pull panel
- Remove the Phillips screw from the door pull panel
- Lift the door panel up and off
-
step 2 :Removing the Mirror
- Pull off the mirror base backing
- Remove the three 11mm nuts from the mirror
- Pull off the mirror
-
step 3 :Installing the Mirror
- Put the mirror into place
- Fasten the three 11mm nuts onto the mirror
-
step 4 :Installing the Door Panel
- Lift the door panel into place
- Insert the Phillips screw into the bottom of the door panel
- Insert the Phillips screw behind the door pull panel
- Push on the door pull panel
- Insert the two Phillips screws into the door pull panel
- Put the window crank into place with its washer
- Insert the T20 Torx screw into the window crank
- Push on the window crank cover
Tools needed
-
Socket Extensions
Flat Blade Screwdriver
T20 Driver
Phillips Head Screwdriver
Ratchet
11mm Socket
Brought to you by 1AAuto.com, your source for quality replacement parts and the best service on the Internet.
In this video, we're going to show you how to replace the mirror on this 1996 Ford Ranger, same as any '93 to '97 Ranger. This vehicle does have the manual locks and windows and manual mirror as well. Tools you'll need are flat blade screwdriver, a T20 Torx driver, Phillips screwdriver and an 11mm socket with a ratchet and extension.
You're actually going to go right in behind and, with a screwdriver, pry out lightly. You can see this comes out. You want a T20 Torx screwdriver. We'll fast forward as we remove that screw and take that crank handle off. Underneath here, you can see there's two Phillips screws. You'll want a smaller number one screwdriver. Fast forward again as we remove those two Phillips screws.
Now, you'll want to pull your panel right off and then there's another Phillips screw right here. There's a screw at the bottom of your door panel, you may have to dig through your rug a little bit to get at it. Remove it. Now take your panel, lift it up and it comes right off.
The mirror is right up here, pull this off and right inside you'll see there's three 11mm nuts to remove. Use an 11mm socket with a ratchet and extension. Fast forward here and it does take some torque to get them started sometimes and then be very careful not to drop the nuts down into the door as you're taking them out. Now your mirror comes right off.
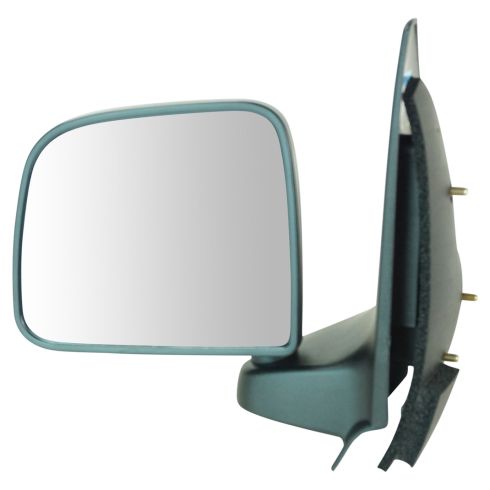
Here's our original mirror and the new mirror from 1A Auto. You can see it's exactly the same. It's going to go in there and it's going to bolt on the same. The gasket's a little larger. It incorporates the two gaskets on the original into one but it's going to bolt on and these mirrors get broken off a lot. Obviously, to reinstall, put the panel there, take your extension with the bolt inside, carefully put it in there and start it on. After you start that first one, then start the other two, again carefully. Make sure you don't drop those nuts down into the door and then tighten them up firm but don't over-tighten them.
Put the door panel back on, up and over your door lock here first. You push it in place and down. Just put this screw in first. There's a little line up tab right down here. Make sure that goes in. Fast forward through putting those two Phillips screws back in. You want to tighten those firm but don't over tighten them. There's a little washer on the window crank tool. Put it in place. Put in a T20 Torx screw.
We hope this video helps you out. Brought to you by www.1AAuto.com, your source for quality replacement parts and the best service on the Internet. Please feel free to call us toll-free, 888-844-3393. We're the company that's here for you on the Internet and in person.
Shop Products


Ford Mazda Driver Side Mirror TRQ MRA05133
Part Details:
- Textured Black
- Black
- Manual
- No
- No
- Clear
- No
- Textured
- Plastic
- Flat
- No
- No
- No
- No
- No
- No
- No
- No
- No
- No
- Manual
- No
- No
- No
- Black
- Textured
- No

How to Replace Side Rear View Mirror 1992-99 Buick LeSabre
Find out how to replace the door panel and the side view mirror with this how-to video
