How to Replace Mirror 1993-2005 Ford Ranger
Created on: 2010-07-30
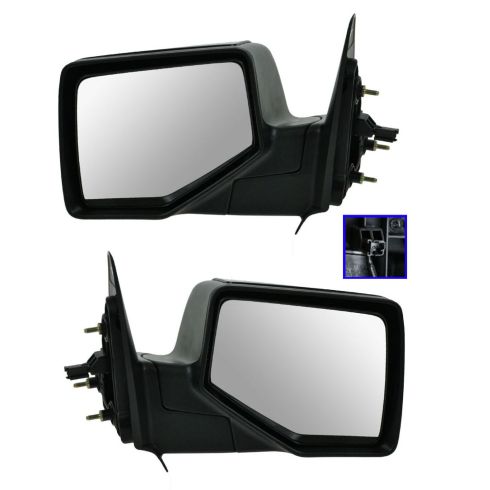
If this mirror needs to be replaced, this video will show how to remove the door panel to access and change the mirror. Follow these steps and learn to DIY
-
step 1 :Removing the Door Panel
- Disconnect the negative battery cable.
- Remove the two Phillips screws behind the door pull.
- Pull the panel out.
- Disconnect the harnesses.
- Remove the Phillips screws and disconnect the power window switch.
- Remove the two Phillips screws in the door panel.
- Lift the door panel up and off.
-
step 2 :Removing the Side Mirror
- Carefully peel off the water shield (If the truck has power mirrors).
- Remove the 6mm bolts that secure the speaker.
- Remove the speaker.
- Disconnect the mirror harness.
- Remove the three 11mm nuts that secure the mirror.
- Pull the mirror out and off.
-
step 3 :Replacing the Side Mirror
- Feed the harness down through the door.
- Line up the mirror and push it into place.
- Replace the three 11mm nuts.
- Reconnect the mirror harness.
- Replace the speaker and the 6mm bolts that secure it.
- Replace the water shield.
-
step 4 :Replacing the Door Panel
- Push the door panel down into place.
- Replace the two Phillips screws in the door panel.
- Reconnect the power window switch to the switch panel and replace the screws.
- Reconnect the other harnesses to the switch panel.
- Line up the panel and push it into place.
- Replace the two Phillips screws under the door pull.
- Reconnect the negative battery cable.
Tools needed
-
Flat Blade Screwdriver
Phillips Head Screwdriver
8mm Wrench
6mm Socket
Ratchet
11mm Socket
Brought to you by 1AAuto.com, your source for quality replacement parts and the best service on the Internet.
Hi, I'm Mike Green. I'm one of the owners of 1A Auto. I want to help you save time and money repairing and maintaining your vehicle. I'm going to use my 20+ years experience restoring and repairing cars and trucks like this to show you the correct way to install parts from 1AAuto.com. The right parts installed correctly, that's going to save you time and money. Thank you, and enjoy the video.
In this video, we'll be showing you how to remove the mirror on this Ford Ranger. This truck does have basically power everything, so some of the steps may be a little different if you have a manual mirror or manual windows, but you should be able to pick up enough and we have some other videos for getting the window handle off and stuff like that if you need to. Tools you're going to need are flat-blade screwdriver to help you with some electrical connections, Phillips screwdriver, some sockets, and 8mm wrench to disconnect your battery.
First thing you're going to want to do is disconnect your negative battery cable. Start by removing two screws that are right down here under the door panel. They're both Phillips screws. Again, depending on year and options, these screws might be from above on the door pull. Once we remove those screws, we can actually just pull on this panel, and it snaps in at the top so carefully give it a good tug. You can see that there's clips up here and one down here that hold it.
Now you'll actually want to push all these switches through. They all kind of have little thumb tabs that you push on and come through.
This mirror switch, use a little screwdriver and kind of work it in there. Pull it off. Feel that harness back through. Push that switch through. That's the lock switch. Push it through. Use your screwdriver, work it in. Okay. Harness comes through. Power window switch has a couple of screws on it. Take them off the foray and feed the switch through. Just a little easier. Power window switch here, push it down. Push that tab down.
Once you have the window switch through, then you just want to pop this bezel off, which is on the top of the bottom, got to pry up like that. Pry up like that. That bezel comes off. We're going to feed that through the panel. That's off. Now you want to remove two more screws. One here and one down here. Once those screws are out, you just lift up on the panel. Lift it up over the door lock here. It comes off. Now the back side, it just has a bunch of hooks that hook into the door. To access the inside of the door, you'll need to remove this shield, and just do this very carefully because this protects your door panel and stuff from getting water in it.
If your truck has a manual mirror, you don't need to take the shield or anything off. There's three bolts up here that you can just undo and the mirror comes off. If your truck has a power mirror, as this one does, you're going to need to remove the speaker, here. These are 6mm bolts. Speaker comes out. If you want, you can disconnect the speaker. Then right in here, your mirror harness connection so you'd basically pry up under there and pull it apart. Get this back on here. Now on this power mirror, there's three 11mm bolts. One, two, and three. I'll remove those. The bolts are out. We're trying to just feed it through, and it's off.
Obviously reinstallation is the same thing. Get the harness down in if you have a power mirror. If you don't, then you don't have to worry about the harness. Put the studs in the holes. I like to start my top one first. Tighten these up. You don't have to have them really tight. It is a plastic mirror so just really snug. Plug in the plug. Put our speaker back on, you're in. Now we'll put the water shield back on and the door panel back on. Okay. We're going to fast forward through putting everything back together because once you've taken it apart, it's pretty easy to get it back together. You might be able to pick up enough here if you're worried about it, you can just check out our video for the Ranger door panel video. Once you get it all back together, you should be all set.
We hope this helps you out. Brought to you by www.1AAuto.com, your source for quality replacement parts and the best service on the Internet. Please feel free to call us toll-free, 888-844-3393. We're the company that's here for you on the Internet and in person.
Shop Products


2006-11 Ford Ranger Driver & Passenger Side 2 Piece Power Without Memory Paint to Match Textured Black Mirror Set Power TRQ MRA09194
Part Details:
- Paint to Match
- Textured Black
- 2 Piece
- (1) Passenger Side Mirror
- (1) Driver Side Mirror
- Electric
- 3
- No
- Black
- No
- No
- Manual
- No
- No
- Plastic
- No
- No
- Without Memory
- Yes
- Textured
- Black
- No
- Smooth
- No
- No
- No
- No
- No
- No
- No
- No
- Clear

How To Replace Rear Side View Mirror 2009-13 Chevy Traverse
Check out this video teaching you how to replace a cracked or broken side view mirror on your 09-13 Chevy Traverse.
