How to Replace Mass Air Flow Sensor Meter 2007-09 Toyota FJ Cruiser
Created on: 2019-07-02
Learn the steps for replacing the MAF sensor on this Toyota FJ Cruiser with this how-to video
-
step 1 :Removing the Mass Air Flow (MAF) Sensor
- Remove the 10mm bolts from the engine cover
- Lift the engine cover up and off
- Disconnect the wiring harness and inspect it for rainbow colors, corrosion, or debris
- Remove the Phillips screws from the MAF sensor
- Lift the MAF sensor up and out
-
step 2 :Installing the MAF Sensor
- Insert the MAF sensor into the intake
- Tighten the Phillips screws to the MAF sensor
- Connect the wiring harness to the MAF sensor
- Insert the engine cover into place
- Tighten the 10mm bolts to the engine cover
Tools needed
-
Phillips Head Screwdriver
10mm Socket
Ratchet
Hey, friends. It's Len here at 1A Auto. Today I'm working on a 2007 Toyota FJ Cruiser, and I'm going to show you something very simple. We're going to replace a mass airflow sensor. If you need this or any other part, you can always check us out at 1aauto.com. Thanks.
So here we go. We're going to remove this 10 millimeter and this 10 millimeter. That's what the nut looks like, by the way. Both the same. We'll set these aside, grab our cover, and lift off from the front fully towards us. There's our engine cover.
So here we go. First things first, I'm going to squeeze this right here. Give this a little wiggle. We always check our electrical connectors. Make sure you don't see any funny colors, corrosion, debris, or rust. That looks pretty good to me. We'll set this aside. Here's our mass airflow sensor, obviously. We've got a Phillips head and a Phillips head. Use my Phillips head screwdriver here. Remove both these screws. There's one--pretty small. Set it aside. Phillips head screw number two, same as the first. We don't have to worry about mixing them up. We'll grab our sensor, lift it up, and that's what it looks like. Easy peasy.
So here we go, friends, a quick product comparison for you. I just want to take out our old one. We've got our brand new one straight from 1aauto.com. We'll open it up. Comes in a nice little package. No return if opened, so this is very important. You want to make sure you pay special attention to everything you can see of this. They put it in a nice clear package for your so you can double check. Make sure it looks the same. Just like this. Like this. It's got the same mounting holes, same height, looks about the same. If you think it matches up, you should be clear to open it. If it's different, do not open the package. Just contact us and we'll help you out. So it looked about the same. I'm going to go ahead and open it.
Now we can hold these side by side and take a peek. As you can tell, the shapes look exactly the same. Got the same amount of prongs in there. Five prongs, same connector. Got the same mounting points. Even comes with a brand new gasket. I don't see any reason why this wouldn't be a quality part to install into our vehicle, so I'm going to go ahead and do it. If you need this or any other part, you can always check us out at 1aauto.com. Thanks.
Okay, so something that I want to show you real quick since I have it out. As you can tell, the little wire there, it's looking pretty nasty, discolored, right? It's supposed to look metal, shiny, pretty, something like the other side. So when this is metering the air as it's getting sucked through your engine or into your engine, the air is coming through this direction, and then this is catching/accumulating any dust that might be coming by, and it's getting pretty nasty in there. This is going to cause a running condition for fuel economy, all sorts of things. It's a good thing that we're replacing this with a quality 1A Auto part.
So here we are friends. Now it's time to go ahead and reinstall our quality 1A Auto part here. We've got our mounting holes, mounting holes on the intake area. That's going to slide it right in. Those holes should line up perfectly and they do. We remember it went this way because, well, we have the connector. The connector has to reach in. If you put it the opposite way, odds are this isn't going to reach. We'll take our Phillips head screwdriver. We're going to start one of these screws in. I'm not going to tighten it down until I have the other one started in as well. This is super important. The reason for that is because if I tightened it down and this needed to be moved a little bit, I wouldn't be able to move it and I wouldn't be able to line up the hole correctly and I could cross thread this end. I'm only threading into plastic here so you don't want to cross thread it and you definitely don't want to over tighten it and strip out the hole.
Once it feels like it bottoms out, like that just felt like it did, just give it a little bit. Do this one. Okay. Bottomed out, a little bit. I always like to give it a little shake. If you wanted to, you could put a little dielectric grease on there. For the purpose of this video, I'm not going to worry about it. I take my connector, I'm going to push it in and I'm going to listen for a click noise. I heard an audible click. I'll give her a nice little tug. It feels good. It's not coming off. Here we are, easy peasy. Got our cover. We're going to line this and this up with this and this. When it comes down, we're going to have these studs. They should fit inside the holes. Let's give it a try. There we are. Cover two. That's there. 10 millimeter. There we are. All set.
Thanks for watching. Visit 1aauto.com for quality auto parts shipped to your door, the place for DIY auto repair, and if you enjoyed this video, please click the subscribe button.
Shop Products
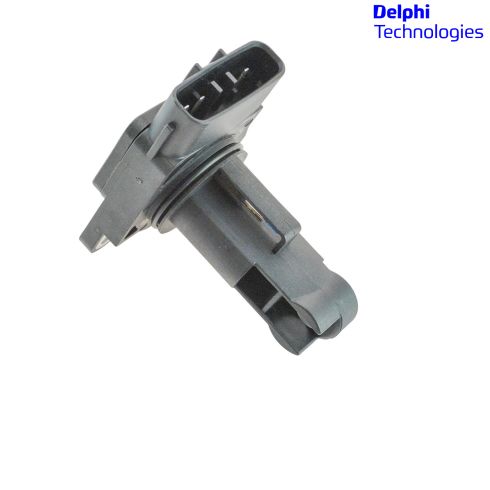
Mass Air Flow Sensor Delphi AF10135
Part Details:
- Hardware
- Tool Kit
- Direct Fit Replacement - Guaranteed to fit and function for your specific application
- Quality Tested - built to a strict level of product standards.
- 5
- No
- Bolt-On
- Specific
- Black and Silver
- No
- Female
- Rectangle
- Blade
- No
- 2
- 1
- No
- Male
- Standard Replacement

How to Replace MAF Sensor 1996-98 GMC K1500 V8 5-7L Sierra
How to remove, install, fix, change or replace a broken Mass Airflow Sensor / Meter on V8 5.7L
