How to Replace Lower Intake Manifold 2005-10 Chrysler 300
Created on: 2016-12-28
How to remove the lower intake manifold on 06 Chrysler 300
-
step 1 :Draining the Radiator
- Raise and support the vehicle on jack stands
- Have a drain bucket ready
- Open the petcock at the bottom passenger side of the radiator
- Let the coolant drain
- Close the petcock
-
step 2 :Depressurizing the Fuel Lines
- Open the trunk
- Lift the trunk carpet
- Remove the fuse box cover
- Remove the fuel pump relay from the fuse box
- Run the engine until it dies
- Crank the engine again to make sure there is no pressure in the fuel system
-
step 3 :Removing the Upper Intake Manifold
- Loosen the throttle body hose clamp with a flat blade screwdriver
- Pull the coolant line out of the intake hose
- Pull the intake hose off the throttle body
- Remove the sensor from the intake hose
- Disconnect the two hoses from the intake manifold
- Disconnect the MAP sensor from the top of the intake manifold
- Disconnect the two writing harness from the intake control valves at the front of the intake manifold
- Disconnect the wiring harness from the throttle body
- Remove the two 10mm nuts from the throttle body
- Remove the seven 10mm bolts from the center of the intake manifold
- Remove the two 10mm bolts from the manifold brackets
- Remove the two 15mm bolts from the bottom of the throttle body bracket
- Remove the bracket from the throttle body
- Remove the two 15mm bolts from the manifold brackets
- Pull off the intake manifold
-
step 4 :Removing the Fuel Rail
- Put paper towels into the intake manifold to keep out debris
- Remove the four 13mm bolts from the fuel rail
- Put a fuel line disconnect tool onto the fuel line
- Pull the fuel line off the fuel rail with fuel line disconnect tool
- Disconnect the wiring harness from each fuel injector
- Pull he fuel rail up and off
- Put paper towels into the fuel injector holes
-
step 5 :Removing the Lower Intake Manifold
- Disconnect the coolant temperature wiring harness
- Loosen the hose clamps with pliers
- Pull the hoses off of the lower intake manifold
- Pull the lower intake manifold up and off
-
step 6 :Cleaning and Preparing the Lower Intake Manifold
- Clean the lower intake manifold with throttle body cleaner and a wire brush
- Allow the lower intake manifold to dry
- Remove the Gaskets from the cylinder heads
- Clean the gasket mating surface with brake cleaner and a paper towel
- Clean the lower intake manifold mating surface with brake cleaner and a paper towel
- Make sure there is no debris in any of the ports
- Put the gaskets into place with the flat side up
- Remove the paper towels from the fuel injector holes
-
step 7 :Installing the Lower Intake Manifold
- Make sure the intake manifold area is clear
- Lower the lower intake manifold into place
- Start the four 13mm bolts for the lower intake manifold
-
step 8 :Installing the Fuel Rail
- Lubricate the fuel injector O-rings with clean fuel
- Seat the injectors into their holes
- Start the four 13mm bolts for the fuel rail by hand, starting at the center
- Tighten the four 13mm bolts to 21 foot-pounds of torque
- Push the fuel line onto the fuel rail
- Check that the fuel line is connected
- Connect the fuel injector wiring harnesses
-
step 9 :Installing the Upper Intake Manifold
- Connect the coolant temperature sensor wiring harness
- Connect the hoses to the lower intake manifold
- Tighten the hose clamps with pliers
- Remove the paper towels from the intake manifold
- Clean the intake manifold surface with brake cleaner
- Connect the PCV breather hose to the back of the valve cover
- Remove the old gasket from the upper intake manifold with a pick
- Press in the new intake manifold gasket
- Remove the old EGR seal
- Push on the new EGR seal
- Put the upper intake manifold into place
- Click the automatic transmission dipstick into place
- Start the 10mm bolts for the manifold
- Tighten the seven 10mm bolts in the center of the manifold to 9 foot-pounds, starting at the center
- Connect the MAP sensor to the manifold
- Connect the wiring harnesses for the two intake control valves
- Put the manifold brackets into place
- Insert the two 15mm bolts into the brackets
- Insert the two 10mm bolts into the brackets
- Connect the PCV hose to the manifold
- Connect the two hoses to the manifold
- Connect the throttle body wiring harness
- Put the throttle body bracket into place
- Start the two 10mm nuts onto the top of the throttle body bracket
- Insert the two 15mm bolts into the bottom of the bracket
- Tighten the two 10mm nuts onto the bracket
- Push the intake hose onto the throttle body
- Tighten the intake hose clamp with a flat blade screwdriver
- Snap the coolant line into the intake hose bracket
- Connect the MAP sensor to the intake hose
- Push the intake hose onto intake tube if you disconnected them
- Tighten the intake tube clamp with a flat blade screwdriver
-
step 10 :Priming the Fuel System
- Connect the fuel pump relay to the fuse box
- Turn the key to the on position until the fuel pump shuts off
- Turn the key to the off position
- Repeat this three times
- Check that the engine starts
- Turn off the vehicle
- Clip on the fuse box cover
- Put the trunk carpet into place
- Close the trunk
-
step 11 :Filling the Coolant
- Twist off the coolant reservoir cap
- Fill the reservoir with coolant
- Start the vehicle
- Turn the heat to high
- Turn the fan on low
- As The coolant level lowers, fill it at least to the minimum line
- Do this until the engine reaches operating temperature and heat flows consistently from the vents
- Twist on the radiator cap
- Close the hood
- Test drive the vehicle
- Check the coolant level
- Add coolant as necessary
Tools needed
-
Socket Extensions
Torque Wrench
Jack Stands
Anti-Freeze
Brake Parts Cleaner
Throttle Body Cleaner
Pick
Gloves
Flat Blade Screwdriver
Paper Towels
Drain Pan
Slip-Joint Pliers
Ratchet
Wire Brush
Floor Jack
Needle nose pliers
Complete Metric Socket Set
Hi, I'm Mike from 1A Auto. We've been selling auto parts for over 30 years. We're dedicated to delivering quality auto parts, expert customer service, fast and free shipping, all backed by our 100% satisfaction guarantee. Visit us at 1AAuto.com, your trusted source for quality auto parts.
In this video, we're going to be working with our 2006 Chrysler 300, 3.5 liter, V6. We're going to show you how to remove and replace the lower intake manifold, as well as how to clean out all of that carbon buildup inside of it while we have it out of the vehicle. If you like this video, please click "subscribe". We have a ton more information on this car as well as many other makes and models. If you need parts for your vehicle, you can follow the link down in the description over to 1AAuto.com. Here are the items you'll need for this repair.
We are using a lift to make it easier to show you what's going on, but this job can easily be done at home on a jack and jack stand. Open the petcock at the bottom passenger side of the radiator. Allow the coolant to drain into a proper receptacle. Once the coolant has finished draining, go ahead and close the petcock. You may still want to keep the drain bucket underneath there, just in case there are any little drips.
Open the hood latch on your vehicle. Open it fully. Lift up the carpet in your vehicle's trunk. Here you'll find the battery and the rear fuse panel. This relay all the way at the end closest to the back of the vehicle, on the right it is our fuel pump relay. We'll remove that and go back up to the driver's seat of our vehicle. With the fuel pump relay disconnected we'll turn the key, run the vehicle until it dies, and then we'll shut it off and crank it a few more times, just to ensure that there's no more fuel getting through the injectors. Now that we know there's no fuel pressure left in the system we can safely work on it.
To remove your intake manifold we'll loosen the clamp at the throttle body with a flat blade screwdriver. You may want to disconnect this sensor. Looks like ours has been glued on because the clip is broken. You can also simply pop it out of the boot. Disconnect these two hoses from the back of the intake located just behind the throttle body. These just pop off by hand. There's one more at the back of the manifold.
Pull back on the red safety tab, push down and disconnect the sensor from the top of the intake, as well as the two electrical connectors at the front. Disconnect the connector from the throttle body. Again, we have one of those little red safety tabs we have to push down. Then we'll push down the tab and remove the connector.
We'll remove the two 10 millimeter nuts from the throttle body, the seven 10 millimeter bolts from the center of the intake manifold here, as well as the two 10 millimeter nuts over on the passenger side of the intake manifold. We'll do this using a 10 millimeter socket and ratchet where we can and a 10 millimeter wrench where it's a little too tight. Remove the two 15 millimeter bolts at the bottom of the throttle body bracket.
We're doing this with a 15 millimeter socket and ratchet. Remove the bracket from the throttle body. There's a 15 millimeter bolt at the bottom of the bracket on the passenger side of the intake manifold, both front and rear. We'll loosen those up with a 15 millimeter wrench until we can slide them off of the studs. Once you've loosened the brackets go ahead and slide them off the studs. Now we'll lift up on the intake manifold, slide it forward to release it from the EGR tube at the back. Once you're off that tube, lift up being careful for that transmission dipstick and remove the manifold from the vehicle.
While the top of the intake manifold is exposed we're going to wad some paper towels in there, just to keep any dirt and debris from getting in there while we're working.
Remove the four 13 millimeter bolts. There are two on each side securing the fuel rail down onto the cylinder head. We'll do this using a 13 millimeter socket, ratchet, and extension. Using the fuel line disconnect tool go ahead and slide this over the fuel line in the back. What you want to do is pull that line toward you while setting the tool in. You'll feel it click when it's in place. Push the tool and pull the line off at the same time. We'll push our line up vertically to prevent it from leaking while we work on the fuel rail.
Now there are one of two ways to remove the fuel rail and it's all going to depend on what you're doing. If you're replacing the rails and the injectors as a result of some kind of fuel contamination issue or debris getting into the system, then you'll want to remove the electrical connectors for each injector, which you do by popping up on the red tab until it releases, then pushing down on the black tab and removing the connector from the injector. You'll repeat this process all the way around and then remove the fuel rail with all six injectors still installed.
With all the connectors disconnected go ahead and remove the fuel rail with all the injectors still inside. This is the best way to remove it, because you can remove it with the injectors out of the rail. However, you're going to cause it to leak out of all these openings and end up spilling it everywhere. Well this is a pretty clean way to remove it. You can see I've capped the end here with my hand, just keeping all that fuel from spilling out while we remove the rail.
We're going to use some paper towels to wad up those injector holes as well to make sure we don't have any debris fall into our cylinder heads, which could cause some bigger issues later on. You'll notice that I'm tearing off short sections, folding it over and wadding them together to make sure that there's actually a little bit of tension on that.
Disconnect the coolant temp sensor connector at the front of the lower intake manifold here. Just pry that red tab back with a flat blade screwdriver. Once it's out of the way, we'll push down and remove the connector. Now we'll use a pair of pliers. You can use needle nose or a regular flat jaw plier, whatever works best for you, to remove this hose clamp and the hose as well as the two at the back. Using a pair of groove jaw pliers, work the hose back and forth to free it from the fitting. We'll remove it. Remove the lower intake manifold from the engine.
Since our lower intake manifold is off, we have some pretty heavy carbon deposits built up in here. This is going to restrict flow to our engine and cause a loss of power and efficiency. Since we have it off of the vehicle anyway, we're going to use some intake and throttle body cleaner and a wire brush, and clean some of that out. You may want to wear some gloves and a dust mask when working on cleaning these out because it can create some fumes and debris that you don't want to get on you. You can really tell how big of a difference this makes. With just a few minutes and some simple cleaning supplies, we've really cleaned out and opened up that lower intake. This is going to give us some better throttle response. Our engine is going to flow air a lot better, meaning we'll get more power and better efficiency out of it. It only takes a little bit of time while we are in here anyway, so go ahead and clean out the rest of the problems.
Since we have a parts washer, I'm just going to use some of this intake cleaner just to start loosening up some of the heavy stuff. We'll use a parts washer to clean out the rest of our intake. Some parts washers use a kerosene based solvent, while others use mineral spirits and several other different types of chemicals and cleaners as well as different varieties of brushes. Some of these things are going to work better than others depending on what it is you're trying to clean, but ours seems to be doing pretty well with the carbon. Once I'm done getting the bulk of it out with the parts washer, I'll probably go through it one more time with the throttle body cleaner and wire brush, just to make sure it's all nice and uniformly clean.
While we're waiting for our lower intake manifold to dry, we'll remove and prep the gasket surfaces on the cylinder heads. Remove the old gaskets. Make sure any extra material stuck on there is removed as well. You don't really want to scrape a surface like this, just because it'll cause particulates and debris to fall down into the cylinder heads, which could damage our valves, cylinder walls, for our pistons and rings. What we'll want to do is just use some clean paper towels or a lint-free rag of some sort and some cleaner to wipe down all the old debris and material that's on top of the heads. All I'm going to do here is spray some solvent. I'm using a brake cleaner, but there's a variety of solvents you can use to wipe this down. We're just going to spray that right onto the paper towel.
These gaskets don't use a sealant or anything like that from the factory, so the majority of this will come right off. Make sure you pick up any chunks of paper towel that tear off so they don't fall anywhere they shouldn't. You can see how nice and clean the side we've already done is. Around the cooling jackets there is some discoloration, but if you run your finger over it, it is nice and smooth so that's just a little bit of staining. It's not any kind of debris or anything built up on there that's going to cause an issue with our sealing. Now we're going to want to go ahead and make this side look as good as this one.
Now we'll repeat the same cleaning process we just did on the gasket surfaces on the cylinder head, so the bottom side of our intake manifold here. This won't be as important to keep the debris from falling into because we can always just clean it out before we reinstall this onto the motor. Once again, you can see we do have some metal pitting and corrosion from where our cooling jackets are, which is fine and totally expected, as long as that surface is as smooth and clean as you can get it. We'll go ahead and repeat this process on the other side of our manifold.
Most importantly, once we've finished cleaning all of these surfaces off, we're going to want to go ahead and check out all the ports and make sure that we didn't drop any debris or paper towels or anything like that that's going to get sucked into our engine and cause a much bigger issue than we set out to fix. The more time you spend being thorough here and making sure that all your surfaces are clean and that your ports are clean, the nicer these gaskets are going to seal and the less likely it is you'll ever have to do this job again.
Your lower intake manifold gaskets have these little rings on them which will seat into these two center bolt holes, so as long as those are facing down, you want the flatter edge facing up. This gasket will work on either side. Just go ahead and install those.
We'll remove the paper towels from our injector openings since it will be going back on in a moment and we don't want to risk pinching it in between the intake when we reinstall. Be sure all of your injector harnesses and any other wiring, debris, or anything else has been removed and placed out of the way.
Reinstall your lower intake manifold. Place that on there gently so we don't disturb any of our gaskets on the way in. Make sure it's all lined up and we'll reinstall our bolts. Remember that only four go in for now, and then our fuel rail. Start the four lower intake manifold bolts that are going to be securing the manifold without contacting the fuel rail. This will help ensure that everything stays aligned properly when we go to put our fuel rail in.
Lubricate the o-rings on the bottom of the injectors with some clean fuel. Place the fuel rail back into the lower intake. Be sure to seat all of your injectors before installing any hardware. Reinstall the four 13 millimeter bolts into the fuel rail. We'll just start these by hand for now to make sure that everything is all lined up. Torque the bolts to 21 foot-pounds, again working your way from the middle out. The actual torque spec here is 250 inch-pounds which works out to 20.8 foot-pounds, so we're just going to go for 21.
Reconnect the fuel line at the back. This is a quick-connect fitting, so all you have to do is push it over that rib and make sure it's locked on. Reinstall all of your fuel injector connectors. Don't forget to lock down the red safety tabs as well. Make sure they're all on there good.
Reconnect the connector for your coolant temp sensor. Reattach all three hoses, the one at the front and the two at the rear. Don't forget to bring those clamps back up where they belong. Remove the paper towels from the intake. Clean down this mating surface with some solvent and paper towels or a clean rag. Once again I'm using a brake cleaner here, but there's a variety of solvents you can use to get all that old debris and oil off.
Install your PCV breather tube on the back of the valve cover. You've got a nice little marking on it that says PCV with an arrow so you know which end goes where, and the other end should fall just about over here, where the back of the intake will be.
Remove the old gasket from your intake manifold using a small straight pick here, just to get in there and start popping it out. You should be able to remove the rest by hand. Start your new gasket. Line up. Press that in. Our old EGR seal is damaged so remove that. Install our new one. Make sure it sits all the way back past its edge.
Reinstall your intake manifold, being sure to set the opening for the automatic transmission dipstick into its proper place on the manifold. We'll also want to be careful for the bolts. We'll have to line up our EGR tube as well. Just be mindful of all of these things while we set it into place. Once the EGR tube is set and the intake is laid down onto the lower manifold, clip your automatic transmission dipstick back into place and start all of the 10 millimeter bolts by hand, just a couple of threads, to make sure they're all lined up before we tighten them down.
Tighten up the seven 10 millimeter bolts at the center of the intake. We're not going to tighten these down all the way yet. You just want them a little bit and then we'll have to torque them. Torque these bolts to nine foot-pounds. The manufacturer specification is 150 inch-pounds. However, it's a lot easier to do with this wrench and that number rounds up to about nine foot-pounds. We want to start these in the center and work our way out in a cross pattern.
Reconnect the map sensor. Push the safety into place. Reconnect the two intake tuner valve control. Reinstall the support brackets at the front and rear on the passenger side of the intake. We'll start those 10 millimeters on, just a couple of threads to keep it in place. Using a 15 millimeter socket and ratchet to tighten up those two bolts all the way at the bottom of those support brackets. Once the bottom of the support brackets are tighten down you can use the 10 millimeter socket and ratchet to finish tightening up the top two bolts.
Reconnect the PCV hose and this fitting closest to the EGR tube. We have a small hose here, and a large hose next to that. Reconnect the electrical connector onto the throttle body. Lock the safety tab back into place. You can now set the support bracket back over the throttle body bolts. Make sure it doesn't get caught up in any of the wiring down below. We'll spin our two 10 millimeter nuts on at the top by hand, just to keep that in place. Reinstall the two 15 millimeter bolts at the bottom of the bracket by hand. Tighten up the two 15 millimeter bolts at the bottom of the bracket with your socket and ratchet. Tighten up the two 10 millimeter nuts at the top.
Install the other end of the intake boot onto the throttle body. Tighten it up with your flat blade screwdriver. Reinstall the coolant tank line bracket on the side of the intake tube. Reinstall the map sensor into the intake tube. Earlier when we removed our intake, we wanted to wait until we had the intake tube reinstalled to make sure this all lined up properly. Now that we've got it where it needs to be we'll go ahead and tighten that down.
Once your fuel system is put back together and you're ready to run the vehicle, reinstall your fuel pump relay. Now we'll turn the key to the on position until we can hear the fuel pump shut off. Turn the key off and repeat that process three times before starting our vehicle. Now our vehicle is good to go. Once you've reinstalled the relay, put the back of the cover back on first, snap the front in, set your trunk carpet down.
In order to properly fill and bleed the cooling system on your Chrysler 300, you'll want to fill the radiator overflow, which has a pressurized cap, meaning that this system is based off of this reservoir as opposed to having its own cap at the top of the radiator. Fill this as much as you can with a 50/50 mix of the appropriate Mopar coolant, then run the vehicle with the heat set to vent on its lowest speed. This will allow the heater core to open and circulate coolant in and push air bubbles out.
Monitor the level of the coolant in the bottle, and when it bubbles and lowers, be sure to keep it topped off at least to the minimum line. After the vehicle has reached its appropriate running temperature and hot air is coming through the vents, allow it to run for a few more minutes, ensuring that there are no more bubbles or turbulence inside of the cooling system. Once these bubbles are gone, keep about a half a jug of this 50/50 coolant mix with you, reinstall your radiator cap, and go for a test drive. Ensure that the level is still up top after the test drive. Otherwise, you'll want to let it cool, remove the cap, refill your coolant, reinstall the cap, and drive it again.
Thanks for watching. Visit us at 1AAuto.com for quality auto parts, fast and free shipping, and the best customer service in the industry.
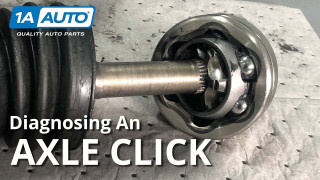
Why Does My Car Axle Click Diagnosing and Explaining Axle Noises
Watch this video to learn about CV axles, and why they may click when damaged or worn.
