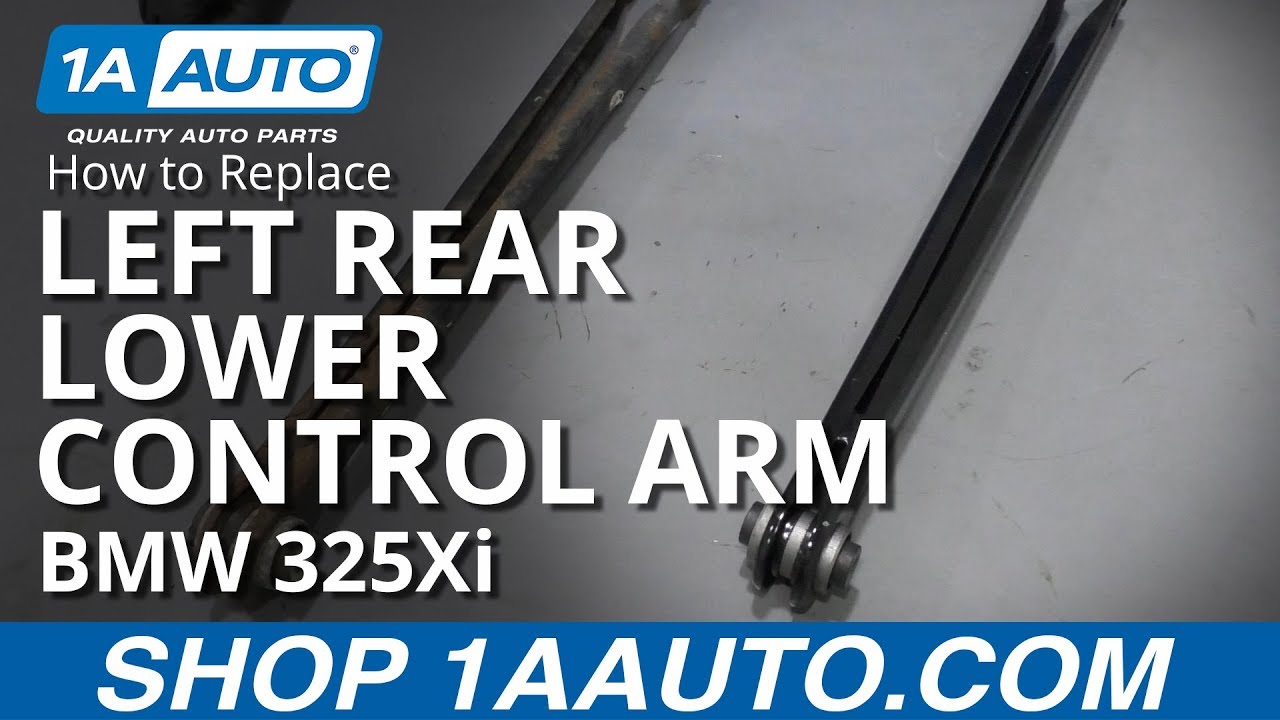
How to Replace Left Rear Lower Control Arm 2001-06 BMW 325Xi
Created on: 2019-06-18
Watch this video to learn how to replace the rear left lower control arm on your 01-06 BMW 3 Series vehicle. 1A Auto shows you how, step by step!
-
step 1 :Removing the Wheel
- Loosen the 17mm lug bolts with the vehicle on the ground
- Raise the vehicle with a floor jack
- Secure the vehicle on jack stands
- Remove the lug nuts
- Pull off the wheel
-
step 2 :Removing the Left Rear Lower Control Arm
- Apply Rust penetrant to the inner and outer control arm nuts and bolts
- The outer lower control arm bolt adjusts wheel alignment, so make note of its position
- Remove the outer 18 mm nut from the outer 18 mm lower control arm bolt
- Tap the 18 mm bolt out with a hammer and punch
- Support the exhaust pipes
- Remove the muffler from the rubber mounts
- The exhaust can be moved to the side for access
- Loosen the 21 mm nut from the 21 mm left side differential mounting bolt
- Support the differential
- Remove the 21 mm left side differential mounting bolt
- Raise the differential slightly
- Remove the two 10 mm bolts securing the differential brace heat shield
- Remove the two 13 mm bolts on each side of the differential brace
- Remove the 18 mm nut on each side of the differential brace
- Remove the differential brace
- Replace the two 18 mm nuts to their studs
- Loosen the two 18 mm subframe bolts on either side of the differential input
- Shift the position of the differential to access the inner 18 mm lower control arm bolt
- Remove the inner 18 mm bolt. The inner nut has a self-holding ear.
- Remove the plastic control arm cover
- Remove the lower control arm
-
step 3 :Installing the Left Rear Lower Control Arm
- Install the inner end of the lower control arm with the flat part facing up
- Insert the inner bolt through the control arm and thread it onto the self-holding nut
- Install the outer control arm onto the wheel knuckle, using a pry bar to position the knuckle, if necessary
- Insert the outer bolt, making sure to align it to the same orientation as when it was removed
- Place the cam washer on the bolt, and replace the 18 nut, and tighten it
- Using a jack, or jack stand, lift the lower control arm to approximate ride height
- Torque the outer 18 mm nut to 81 ft-lb
- Tighten and then torque the inner 18 mm bolt to 81 ft-lb
- Replace the plastic control arm trim
- Insert the 21 mm differential mounting bolt, and install the nut loosely
- Tighten the two 18 mm subframe bolts
- Remove the differential support
- Torque the two 18 mm subframe bolts to 70 ft-lb
- Tighten the 21 mm differential mounting bolt and nut
- Torque the 21 mm bolt to 128 ft-lb
- Remove the two 18 mm differential brace nuts from the studs
- Install the differential brace on the studs and replace the 18 mm nuts
- Tighten the two 13 mm bolts on each side of the differential brace
- Tighten the two 18 mm differential brace nuts
- Replace the heat shield with the two 10 mm bolts
- Replace the muffler on the rubber mounts
-
step 4 :Installing the Wheel
- Slide the wheel into place
- Start the 17mm lug bolts by hand
- Tighten the lug bolts preliminarily
- Lower the vehicle partially to the ground
- Tighten the lug bolts to 95 foot-pounds in a crossing or star pattern
- Lower the vehicle completely
Tools needed
-
Socket Extensions
Hammer
Rust Penetrant
Pry Bar
18mm Wrench
17mm Socket
Jack Stands
18mm Socket
21mm Socket
21mm wrench
Center Punch
10mm Socket
Ratchet
Floor Jack
1/2 Inch Breaker Bar
What's up guys? I'm Andy from 1A Auto. In this video, I'm going to show you how to replace the driver's side rear lower control arm on this 2001 BMW 325xi. Now the driver's side lower control arm is a lot more difficult than the passenger. There's more steps involved, so if you need this part or other parts for your vehicle, click the link in the description and head over to 1aauto.com. I'm going to take the wheel off. I'm going to use a 17 millimeter socket and this air gun that we sell at 1aauto.com. If you don't have an air gun, what you can do is use a breaker bar and loosen up all of the lug nuts before you raise the vehicle. When I go to take the last lug nut out, I'm just going to support the wheel. Just push on it because these are lug studs, not lug nuts, so there's no studs holding the wheel on after you get them all off.
Slide that out of the way and grab the wheel. Pull it off. I'm just gonna take some rust penetrant. This nut and bolt is pretty rusty. Spray that down and then also up here, spray this one down because we're going to take that one out next. I'm going to use a 18 millimeter socket and I'm just going to hammer it on because this one's pretty rusty. I'm going to use that 18 millimeter wrench on the backside to hold the bolts on. Now this bolt has a cam on it, at least cam washers. That's going to adjust the alignment on this vehicle. So after you are done this job, you're going to want to go to alignment shop and have your alignment performed. So try to keep in mind where the alignment cam is, so when you put the new arm on, it's going to be close. But at least keep in mind you have to go get an alignment.
Now I'll take this gun, loosen this nut up as I hold the wrench. If you don't have a gun, just use a breaker bar. So this nut is a pretty badly rusted and it's starting to strip. So I'm actually going to bang a 17 millimeter socket on there. It's going to be a little tight, but it will fit. So this nut's really tight on there so I'm just going to use a breaker bar, loosen it up. Now that it's loose, I can use the gun. Slide that out, can take that cam washer off of there. Just going to use this punch and punch the bolt out. We sell these punches in a kit from 1aauto.com. Make sure you save that. Then from the backside of the bolt I'll just punch it out.
Alright, to take that bolt off the rest of the way, I'm just going to use a pry bar, make sure I don't hit the brake line. Just slide this out, slide the bolt out. There it is. Need to access the bolt right here and it's pretty tight in there. The exhaust is in my way. The differential might be in my way as well, but for starters, I need to move the exhaust. So I'm going to support the exhaust with a screw jack, and I'm going to take these mounts off just at the rubber part right there, and then there's also one right here. So this one is already a little bit loose. I can just take a pry bar, get in there and pry this out. You can use a little soapy water to help you get it off if you want. Same with this one.
Then I can move the exhaust to the side a little bit and then I can access this bolt a little bit better. So next I want to remove this bolt but I can't because I can't even get the socket in there. You can try to get a wrench in there. Obviously this isn't the right size, but you could try to get a wrench in there and see if you can get that bolt out. But I need to move this differential over a little bit. So I am going to loosen this bolt up. I already removed the hangers for the exhaust and pushed that over a little bit. That helped out. So now I'm going to take a 21 millimeter wrench, stick it on this nut right here, and then I have a 21 millimeter socket and a breaker bar and I'm going to loosen this up.
Right so I have this bolt loose, got that nut loose. I can switch to a ratchet. Before I do that, I want to support the rear differential. I'm just going to use the screw jack and place it underneath there. So I'm going to use a pole jack underneath here. I have a rubber pad. You could use a block of wood or something just so that you don't damage anything. That's good, get that supported, you can take this bolt out. That's loose enough. Just take that nut off, right there. Try to move the differential up and down, slide the bolt out. Now I can just move this differential up a little bit, not too much, and it gives me a little more room in there. I can try to get a socket on there.
So I need to access these two bolts right here. There is this plate in my way. I am going to take this out. There's two nuts on either side right there and there's a couple of little smaller bolts that I have to take off as well. So let's take those out. Let's start by taking this shield out right here. I'm going to take take those two bolts out right there. All right, I'm going to take the shield off. I'm going to take these two bolts out and use a 10 millimeter socket and ratchet. Take that one out and take this one out. Slide that off.
So there's two bolts right here, two bolts right here. I'm going to use a 13 millimeter socket extension and a ratchet. Take these out, cut all those out. Now I want to take these two nuts out. I am going to use a little rust penetrant. These nuts are pretty rusty. Now I'm going to take this nut off and this nut. I'm going to use an 18 millimeter socket and a breaker bar. I'm going to do the same on this side. I'm just going to use a shorter socket so I can get above the exhaust. If you're having trouble with the exhaust, you can pull the exhaust down completely out of your way. But I would rather just try to work around it. It's a little loose. I can switch to a ratchet. All right, now these are loose enough I can take those off. Take this one off. Slide this out of my way.
No, what I am going to do is right now the differential is supported so I was able to take that bracket out. This whole lower sub frame is bolted in, in the back side as well, but I don't want this to fall down anymore. So I'm going to take those nuts and I'm just gonna stick those right here and right here because when I take these bolts out, the sub frame might fall down. So rather than having it go all crazy, I'll just put those back up and just remember I have to take those back off before I put that bracket back on. Now I'm going to take a 18 millimeter socket and a breaker bar. I'm going loosen these bolts up. I'm just going to switch to a ratchet and the same 18 millimeter socket.
So I didn't take these bolts out. I just loosened them up about an inch of clearance right there, which is going to be good. I can just position the rear differential up a little more. With those loose, now I can go up with this and just take a pry bar and just position this out a little bit just like that. So you have more clearance in there. You can pick, take a block of wood or something. Just be careful. Don't pry too much, you don't want to mess up the axles. And then I can get in there with my 18 millimeter socket and breaker bar. Loosen up that bolt. Once that's loosened with the breaker bar, I can switch to a ratchet with an 18 millimeter socket. And then once my ratchet gets a little too tight, then I'm going to use my gear wrench, 18 millimeter. And that's all the way out.
This is basically the nut that goes on the backside. It's not actually a nut, it's just a little cam type thing that the bolt threads into and this prevents it from spinning, so you don't actually have to put a wrench on the backside or anything. So that's good that that's out. So now we're ready to pull the bolt out. Take a pry bar and try to pry it out. And it's almost there. I could still use the ratchet wrench a little bit. Just don't want to get the ratchet wrench stuck.
I am going to use a long pry bar. Get in here and pry so that I can slide the lower control arm down a little bit. Actually before I do that, pull the cover off right here. Slide that out of the way. Now I can pry this out, slide that down like that. Now I should be able to grab this bolt and slide it up and there we go. Got it out. Here's the old part. Here's the new rear lower control arm from 1aauto.com. The length is the same, the bushing is the same, it's got the same shape, has the same tabs for the alignment cam on the back. Get yours at 1aauto.com, you'd be ready to rock and roll.
Now I'm going to slide this in with the curve on the bottom part of the lower control arm. Slide it in right here, slide that in position there, take the bolt, get the bolt lined up. So I do want to put this on the back side. I want to pull the bolt out a little bit and then over here, take this, this is going to slide on the front side and just try and get the bolt threaded on that. That's good. Once that's started, then we can tighten the bolt down. Before I tighten that bolt up, I actually want to put the bolt in for the lower control arm over here. I'm going to take one pry bar right here, I'm gonna take another pry bar right here. Try to get this in position. I'm going to have to push it, push the arm a little bit, and then just try to separate it. Get that to line up. That's lined up and I can take the bolt and the bolt's going to go from the front of the control arm towards the back.
Just try to slide this through. We can put this cam washer on and then the bolt. Now this cam on this side was the opposite of the passenger side. This cam take a 18 millimeter wrench. Just going to twist this. So this cam was in this position when it came off, so we'll tighten that up like that. Just take a 18 millimeter socket and ratchet or a ratchet wrench. Snug this up. Put a 18 millimeter socket and ratchet on the other side. Just make sure this turns pretty good. That's good. Looks good on both sides. Just snug that up for now.
Okay, at this point before I tighten two bolts up before I torque them, I'm gonna take a screw jack or a pole jack and try to get the suspension where it would be if the vehicle was on the ground. You just got to be careful when doing this. Ideal would be if you had some ramps, if you were driving on some ramps and then you could tighten those bolts. But obviously that's not the easiest thing in the world, so I'm just going to move it as close as possible. That way the bushings that are in the arms will last longer versus they won't twist as much. So try to get it as close to right height as possible.
I'm just going to use a ratchet wrench. Tighten this bolt down and then I will torque it with a torque wrench. Now I'm going to use my 18 millimeter socket and this torque wrench. We actually sell this out 1aauto.com. I'm going to torque this bolt to 81 foot-pounds. And right here while the screw jack is still there, I'm going to take a 18 millimeter socket and ratchet on the backside of this cam bolt and torque this nut right here to 81 foot-pounds. Keep in mind putting this cam washer, how it was when it came off, if it was twisted a little bit, and try to get it roughly the same area. That way, when you go to have it aligned, it'll be closer.
Now that those bolts and that nut is torqued, I can loosen this up. Now I can loosen the rear differential, loosen this screw jack down a little bit, pole jack, slide this bolt in back here. I might have to push the differential forward a little. Take a pry bar, push it forward a little bit. Or you could snug up those bolts a little. But we want to get all the bolts in before we torque them down. There we go. Slide that in. Take the nut, install the nut.
From the front side, I'm just going to take a 18 millimeter socket and ratchet. Just snug these up, not too tight. Just snug this one up as well. With those snug, I can remove the screw jack and then I'm going to torque those. Now I'm going to torque these two front bolts with a 18 millimeter socket and a torque wrench to 70 foot-pounds. I'm just going to use a 21 millimeter socket, a ratchet, and a wrench. Put a wrench on the nut and tighten up the bolt. Then I'm going to use a torque wrench and I'm going to torque this to 128 foot-pounds.
All right, now I'm going to take these nuts off that were holding this cradle up. I'm just going to leave the screw jack underneath here just in case anything decides to fall or shift. Take those off and I'll take this bracket, get this bracket lined up. Just like that. Get these nuts started. Now before I tighten those up, I'm going to take these four bolts with my 13 millimeter socket and extension. Just get these all started. Once they're all in, then I'll just snug them up with a ratchet. Then I'll tighten up these nuts. I'll just use a 18 millimeter socket and a breaker bar. Tighten them up. Make sure they're snug.
Take this plate, get it lined back up. Take the two small bolts, get them started, one here and one goes right here. Get those bolts installed. Then take a 10 millimeter socket and ratchet and tighten them down. Snug that up. Now we'll take this cover, slide this in position there. They'll just lock in place. Now we can remove the pole jack. Slide that out of the way. Right, so I'm just going to use the pole jack to help me with the exhaust. Slide this exhaust hanger on in position. Just make sure this one's out of the way as well. We can start this one first. Just going to use a pry bar, pry this on. You could also use a little bit of soapy water. You really don't want to use any type of lubricant. Slide that on there. If you had to take the vacuum line off this rear actuator that actuates the exhaust valve, reattach that. This vehicle, it doesn't have it.
Slide this side on and that's on, so loosen this up. Take the wheel, put the wheel back on, slide it in position and just hold it, hold that on. Just take the lug bolts, get those started. Now I'm going to use a 17 millimeter socket and this torque wrench we sell at 1aauto.com. I'm going to torque these lug bolts to 95 foot-pounds in a star pattern so that it torques the wheel down evenly. I'm just going to go around again, double check.
Thanks for watching. Visit 1aauto.com, your place for DIY auto repairs, for great parts, great service, and more content.
Shop Products


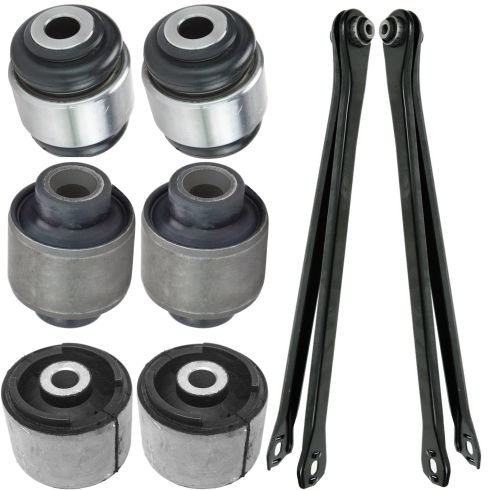
BMW 325Ci 325Xi 330Ci 330Xi Rear 8 Piece Suspension Kit TRQ PSA56145
Part Details:
- (2) Rear Trailing Arm Bushings
- (2) Rear Lower Control Arms
- 8 Piece
- (2) Rear Upper Outer Control Arm Bushings
- (2) Rear Upper Outer Lateral Link Bushings

How to Replace Lower Trailing Arm 1992-2001 Toyota Camry
How to repair, install, fix, change or replace failing, rusted, rotted, or damaged front trailing arms on 92, 93, 94, 95, 96, 97, 98, 99 00, 01 Toyota Camry
