How to Replace Leaf Spring Shackle Repair Kit 1991-2002 Ford Explorer
Created on: 2010-10-15
In this video, 1A Auto demonstrates how to replace a rusted rear leaf spring shackle in a 91-02 Ford Explorer with a repair kit.
-
step 1 :Remove the old leaf spring shackle.
- Coat the leaf spring shackle with penetrating oil the night before.
- Raise and secure the vehicle.
- Use a breaker bar and socket and ratchet and start removing the bolts securing the leaf spring shackle.
- Use a hammer to push the bolts out once you’ve removed the nuts.
- A pry bar can help this process.
-
step 2 :Install the new leaf spring shackle.
- Put the shackle into place and thread the two bolts through.
- Tighten the nuts on the two bolts with a breaker bar to get a secure, snug fit.
Tools needed
-
21mm Socket
Socket Extensions
Pry Bar
Sledge Hammer
13/16 Inch Socket
Jack Stands
Ratchet
Floor Jack
1/2 Inch Breaker Bar
Brought to you by www.1AAuto.com- Your source for quality replacement parts and the best service on the internet.
Hi I am Mike Green. I am one of the owners of 1A Auto. I want to help you save time and money repairing or maintaining your vehicle. I am going to use my 20 plus years experience restoring and repairing cars and trucks like this, to show you the correct way to install parts from 1aauto.com. The right parts installed correctly; that's going to save you time and money. Thank you and enjoy the video.
In this video we are going to replace the rear spring shackle on this 1998 Explorer. This is the same for a lot of early 90s up to 2000s Explorers and Mountaineers and Sport Tracs. Tools you are going to need are lots of penetrating oil, a nice big breaker bar or a big piece of pipe to use on your ratchet handle, a 13/16in and a 21mm socket and ratchet, sledgehammer, pry bar, and if you cheat like me an air hammer. The air hammer is not necessary, but it makes it a whole lot easier as you will see.
The rear spring shackles on these Explorers and actually on a lot of these Fords, you can see this one's got some issues, starting to rust out, it's not a hard replacement. You can see the new one from 1A Auto comes with all the hardware. It's going to go right in there. Started out by coating these and letting them soak overnight with some penetrating oil. Now I am just going to use my big breaker bar and a 13/16in socket. If you don't have a breaker bar like this, you can also use your socket wrench with a piece of pipe on it. Obviously you noticed I have the truck lifted up, and then I also have a support under the rear end. This one actually broke away pretty easy. Break the other one away. I got to switch to my regular ratchet after using the breaker bar.
Now we are going to take a nice big hammer. So to get this top bolt out, you are going to use a nice big crowbar. Stick it up in under this plate, which hopefully is still something left on your car and then pound the other side. That usually gets it started anyways. I was able to get it started with the sledgehammer, and I know I can get it out with that if I kind of just beat away at it. I am actually going to cheat a little bit here and use an air hammer. If you got one of these that's great, if not, think about getting one. You can just beat it out with a sledgehammer. This is just a glorified sledgehammer basically.
My new shackle does come with new bushings, but I am actually just going to reuse the original ones because they seem to be in okay shape. Put the top bolt in first. I am going to basically just pull down on that one. The new bolts are 21mm; use the ratchet to tighten them up at first. Then use our breaker bar to tighten them up. We hope this helps you out.
Brought to you by www.1AAuto.com. Your source for quality replacement parts and the best service on the internet. Please feel free to call us toll free 888-844-3393. We're the company that is here for you on the internet and in person.

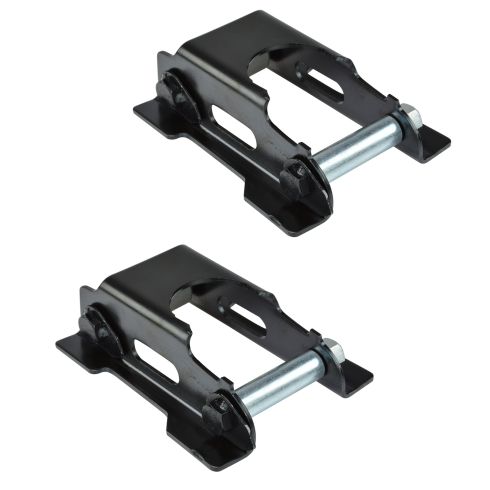
Ford Mercury Rear Driver & Passenger Side 2 Piece Leaf Spring Shackle Repair Kit TRQ PSA66610
Part Details:
- 2 Piece
- (1) Rear Passenger Side Leaf Spring Shackle Repair Kit
- (1) Rear Driver Side Leaf Spring Shackle Repair Kit
How to Replace Leaf Spring Shackle 2004-2015 Nissan Titan
This video shows you how to install a leaf spring shackle on your 2004-2015 Nissan Titan.
