How to Replace Knock Sensor on a 2003-08 Mazda 6 L4 2-3L Excluding Turbo Models
Created on: 2018-09-28
How to install, repair, fix, change or replace a bad or broken knock sensor harness on 03, 04, 05, 06, 07, 08 Mazda 6 L4 2.3L (Excluding Turbo Models)
Tools needed
-
Socket Extensions
Flat Blade Screwdriver
Torque Wrench
Soft-Bristle Brush
8mm Socket
Drain Pan
10mm Socket
Ratchet
Needle nose pliers
Throttle Body Cleaner
Hi I'm Mike from 1A Auto. We've been selling auto parts for over 30 years.
Hi guys, Sue from 1A auto here and in this episode we're going to remove our intake from our 2.3-liter on our 07 Mazda six. We're going to replace the knock sensor. So we're going to drain the coolant on our 07 Mazda six, and to do that the drain plug for the radiator is right here in the center. They make a nice little cut out for you. You can use a Philips or a flat head screwdriver, I prefer a flat head and I just twist that plastic petcock right out. Make sure you have a catch pan ready to go and your sneakers on because you're going to go running.
I'm going to do something different here, before it gets all over the place. Look at that, I'll just hold that up there until the heavy flow of it comes down. Before I reinstall the radiator drain, the petcock I pulled out the gasket, the o-ring gasket that goes with it. Because I want to seat that on the plug, I don't want that sitting up in there because it could end up sitting sideways and cause a leak.
So I got my flathead screwdriver, I'm just going to start this. We're going to disconnect the negative cable, it's a good practice to do it whenever you work on an engine. Prior to, we're going to be disconnecting sensors, fuel line. So you want to make sure that's disconnected. I'm going to pinch down on the mass air flow sensor connector and release it form the mass air flow sensor. It just pushes in here on the this air box cover, just guide the little harness out. We need to disconnect the air injection hose, so these two blue tabs they have ears on them, so you squeeze them together and twist the hose off.
I'm going to disconnect the clamp on the throttle body to the air box, that air tube is connected to the air filter housing and that is a 10mm socket I'm using. Just need to loosen it up enough so that we can wiggle that hose off. Once the air hose is disconnected from the throttle body, this whole air box is mounted on rubber bushings down below. Just grab it firmly and lift up.
To lift up the engine cover, just a plastic cover that has rubber prongs on it. Just gonna firmly lift that up, set that aside. These are the rubber bushings and the clips. Before doing the intake manifold you can see that this is on a vehicle that sat outside and then some chipmunks enjoyed themselves, or mice. I'm going to clean this up because we're going to remove that intake.
So now I'm going to disconnect the two connectors for the intake runner controls and then I have the inject a harness that I'm going to release. So you do that by each of these injector connectors right here, that tab. So we're going to access it. I'm just going to disconnect everything I need, get it out of my way. So push that tab back and lift up, that's one. Do that to all four injectors. We're going to disconnect the main injector harness, or intake harness right here. Push down on this tab, push it down pull. Now I want to get this off of the intake. Going to pull down on this tab, see if it slides out, there we go. We tape that on, the engine heat makes things break down after a while. Okay we got one more over here.
So now we have the fuel injection harness. So we're going to disconnect the ignition line down here. Let's see what we got, disconnect this plastic piece and get it out of there. I think there's a lock on it. See it's got the lock, set that aside. And I think it's a matter of just pulling it off. I like to reassemble that so I don't lose the lock and secondly when I go to attach it I just have to snap it on. I don't have to do anything with the lock. And I've got another vacuum hose here. Let's see, I think we have another red tab. Going to get a small screwdriver for that one. So we're going to pull this red tab out I think, see it's broken on the other side. No, there's no cut open to that.
So the red clip here is pushed down to release, so I'm taking a pair of needle nose and I'm right on the red plastic on both sides, pushing it down, pull up. Disregard that to the side, now we have the fuel line. Same as that other red clip, just going to back it off completely, pull it out and slide that down. Going to reassemble it so when it comes time to installing it, I don't have to worry about that. Okay let's see if you go in this way, there we go.
Disconnect the fuel rail from the two mounting bolts, 10mm socket. Okay, to disconnect the fuel rail with the injectors we want to keep them intact, so it's a firm pull. I like to hold on to the injector while I rock it back and forth. I really don't want it to come out of the rail side. Sometimes you can spray a little penetrating spray or a break clean spray just to get that o-ring loosened up. There we go. So there's the fuel injector, it's all four injectors with the rail.
Make sure you get a catch pan when you pull the injector rail out because the gas is going to be all stuck in that chamber. You don't want to spill that on the ground. And I'm just going to let it sit in there, continue draining. So you're going to disconnect the intake, there are several bolts as the ones on top you can see obviously one, two, and then three. And then if you look down in between there's a little access hole right here in the center of the intake. There's one directly here underneath that's what that access hole is for. And then there's going to be one underneath this one. You can go through the brake right here, same with the front, go through the brake. And then there is one in the far corner behind this power steering, right about there.
I'm going to start with the center one, I've got a combination here of 10mm deep socket, four inch extension with a one inch. So you have to go in to the fan shroud, back it in to the fan shroud and line it up with that access hole. Then fish it through. Use your hand, once you get it in you'll feel the bolt once you get all connected to it. This might take some time, but you're basically fishing without seeing what you're doing. There we go. See if it's attached to the socket, that would be really nice, but it's not.
I fished the extension with the socket in behind the power steering. You can kind of see through the plastic of the intake of the bolt and break that one free. It doesn't take much to break them free, once their free you can actually take them off with your fingers. I'm going to get the ones that are out in the open we can see. So that's unmistakably for the long one over there, and there's one underneath the throttle body. I can feel that with my fingers and my hands so I didn't really have to look hard for that. You'll see, you'll feel it. There's another long one. So the two long ones stay together, they're for the throttle body section.
Before I continue on the bolts I want to disconnect this harness because it's not going to go with the intake. So I want to get this out of the way while I have the firmness of the intake mounted. I just use a pair of needle nose and squeeze the two tabs if it's possible. If not, sometimes you can push down on them. Okay now it's not easy for me to get to the rest, so hopefully once the intake is released and it starts to lift up we'll continue on disconnecting the harness. I've got one more hidden down, it's right here underneath the second. There we go. That's down there too, so I'm going to use the magnet just to get that out of there. So there's one more bolt for the intake located down below. It's easy access actually, it's right there. 10mm socket. Going to break that free, lower that back down.
I'm going to give it a firm grasp and give it a pull and get nowhere. So it's stuck on there pretty good, so I just took a little flat head screwdriver and I went over here and I just wiggled it free. Okay now I'm going to reach down below before I can pull the intake all the way up. And I've got to disconnect this little harness body clip to the intake. It's not easy to get in there. And I have to disconnect this connector right here, and see if I can push in on that tab, get it out of the way first. There we go, got the connector out of the way. Actually there's one more connector I can see right here. I'm just going to squeeze that tab, pull it out. Let's see how much movement we get to wiggle this out. What do we got going on over here. Okay we have, looks like the knock sensor connector is attached right here. So we reach down, see if I can get that out of the way. A lot of connectors. This harness has a nice little plastic clips that I can squeeze. There we go, okay that's unplugged let's see what we got. How much more movement? Okay that is the knock sensor, so I'm going to disconnect it right here. See if I can move my way down this way.
Now with the intake separated I see the emission tube that has to come out from the head, so it's a 22mm wrench. I'm going to unthread that, it's going to come out with the intake and I'm going to have to reverse procedure when it comes to installing. Leave the tube in the intake, and start it before I mount the intake to the body, the head. Now with the emission tube out of the way, I can lift it up enough to see what else might be holding it down. We've got one PVC hose connected on the bottom.
So now I can lift the intake up and I can see that the PCV hose is rotted and soft and collapsing right here, and that's the last thing I have to disconnect. So this hose is going to have to be replaced. So now hopefully with everything disconnected let's see if we can get this intake out. We got one more connector right here, a hose connector, I'll use my pliers, disconnect that from the body.
These are the squeeze tabs, squeeze and push the connector through. I'm going to take both of them out. Okay, thank you and there is your intake. I'm going to remove the bolt to the knock sensor. It's a 10mm socket, break it free.
We have a knock sensor for our 07 Mazda six, this is the one from 1A Auto, it comes with the connector, it comes with the body clip attached to it, which is awesome because they always break, like this one. Two prong connector, same guides, same connector on the end. And the sensor itself, the mounting hole. If you need this part or any other part for your car head on over to 1aauto.com.
To install the knock sensor, you put the mounting bolt through the center located on the block. I'm just going to hand tighten this. In case you're wondering, yes the intake has to come off to do the knock sensor. Torque specs on this is 17.5 [inaudible 00:18:36] pounds. It's a 10mm socket. It's really important to torque things when they require it, but especially with a knock sensor. If you over tighten it you take a chance of crushing that internal sensor. There you go, you're ready to go.
So as we lower this in, we have so much to connect to it before we attach it to the actual body of the head. That PCV hose down there, I hope you can get a good angle on it. Right here, I got to reconnect that to the actual intake and make sure it's fully seated and the clamp can't come off at the same time. Okay, I'm going to need an additional light because I really can't see in there. There, I just want to make sure it's seated completely on the plastic. And that looks like I need to go more. There we go. Now we're seated, pull that red tab. Hopefully I won't hurt my fingers.
Now we've got the PCV, so I'm going to connect my knock sensor connector so now with my knock sensor connected I'm going to connect all these lovely little body clips to the intake. This one goes here. Now I can slide that in to place, and on this side I'm going to reconnect my two connectors down here and reconnect this one, and that one. This one just pushes on, same with this one. You'll here it click, I can see that it's going to go like this. There we go, perfect.
Now I've got all my connectors connected and I am ready to line up my first intake bolt. See what I almost forgot, the emission tube that goes in to the chamber over here that we have to thread in by hand and then tighten before we bolt up the intake. This is a 22mm wrench, it's just an extra emission port that pushes the air down deeper in to the chamber. I'm just going to tighten it right up, 22mm. Once this is tightened, then I can line ... install my eight intake bolts. That's tight. I'm going to support the intake up and I'm just going to install in any order because I'm not going to tighten them yet. I'm just hand starting them so that I can support this up in the air.
Two long ones, the two long intake bolts remember, went over by the throttle body plate and the other six short ones go throughout the intake. I'm also always keeping an eye on my gaskets to make sure they're all lined up in the visual divets that I can see that the rubber pokes through. It's not uncommon for one of them to come undone and unseated. So right before I torque everything down, I'm going to give it a quick visual, all the rubber still lined up perfectly.
These are the easy ones to start, the bottom ones you can't even really see them. I'm not even snugging it, I'm just bottoming out. Now with the top part supported I'm ready to do the magic and guide these low bolts that you can't see in to place. So I'm going to install the long bolt, the bottom one over here on the throttle body. And I'm going to squeeze my arm down underneath there, hope for the best and get the bottom three in. And then our last one is car goes up in the air and it's down below. That's the easiest one of all.
Okay so sometimes when you're installing a bolt on an extension in to a place where you can't put your hands, it's an old fashioned way which was taught to me over 30 years ago. Old timer, he put thick grease on there and covered the head of the bolt. So now when the socket goes on there, squeeze it on, it causes a nice thick bond. So I have a little bit more wiggle room of tipping it without it falling out.
So the last one on the top is that access port hole that I showed you when we were moving. I'm just going to put a lot of the paste on there, because I really don't want this to fall off. So what I did originally was, I got in to the fan shroud, where the fan goes and up in to the access port that you can not see. I think I saw with my mirror, I put a light.
So now we've raised our vehicle, we're putting the last intake bolt on, the easiest one. I'm going to really snug that down a little bit. That is going to be the last bolt that I am going to torque. I'm going to definitely torque all the ones that are going to meet the head for the actual intake, and then ill come down here and torque this one. So snugging, there we go, just bottomed right out. So now I'm going to lower it and torque the top.
Now we have all eight bolts in our intake on the head, and we're going to torque them. Torque spec is 12-14 foot pounds. So have my quarter inch torque wrench here and I'm going to go from the center out. When you torque anything you always want to go from the center out most of the time, unless they specify something else. There we go, two more down at the end here. We have that one down below, so once we torque that one down we're going to come up and you just do the procedure one more time to pick up any slack that might have caused from torquing. Just torque it twice. And then we have the last one down here on the bottom. Okay so the intake is torqued down and we're just going to give it one more quick pass on the top, and ready to attach the accessories to it.
So now I'm just going to reattach the harness with the little clips that clip in ears of the plastic intake. And there's probably five overall. Alright so now I'm going to clean the throttle body before I reattach it. Here we have our throttle body and it's electronic throttle body so in here is an actuator motor, you do not want to push on the butterfly, ever. You'll basically take the timing, this is timed with the pedal inside, so you can not force this opened. The gears can get messed up. So I'm going to make sure I tip it and leave the electronic part on the top. I don't want any throttle cleaner getting in to that. I just want to clean the seat where the butterfly sits and rides on the throttle body.
I have a neoprene brush and I can get some of the fluid in there, really get that scrubbed. As much as you want to force this butterfly open, you can not do that. Strongly do not recommend it. Let's try that, see if I can get it from the front. Feels like chocolate. I'm going to clean this side one last time. I'm going to put the gasket on the throttle body, I'm going to line up the plastic guided little tabs I have here. And she sits like this, so make sure that we've got everything we need out of the way. And we do, so that's going to go down in there like that. Four mounting bolts, there we go. The torque on this is 101 inch pounds, not foot inch pounds. Big difference, difference between breaking and tightening. So it's 101 inch pounds. I have my torque wrench all ready to go, 8mm socket. And I'm just going to go diagonally across, let it bottom out. Both are bottomed and I'm going to go back this way. And then I'm going to torque it to the 101 inch pounds.
Now I'm going to connect my coolant hose in the front part where the radiator is, and then there's one more in the back which is a loop style. It's like a U. Get the hoses all the way on and then I'll get my pliers and I'll squeeze the clamps on. That one is way down there. Sometimes you have to guide it up with your finger. There we go.
Connect the emission tube to the intake, that's the fuel line, that's going to go on the fuel rail. That goes to the air box. Let's see, there it is. Just push that down, finger hold. Okay so all the hoses are on. I'm going to install the fuel rail and then the injector harness.
So we have our injector rail, I'm going to line it up. And these are the o-rings. And in this case I inspected them all, they're in good shape, they're not dry rotted, there's no cracks. If there was, I would replace them and install this injector rail. And what I like to do, is I will use throttle cleaner, and I just spray it where the o-rings are and give it a quick push down. And they fall in to place. Now we can install the injector bolts. So it's two mounting bolts, and they go right in to the aluminum ears. This is a 10mm socket, it's an 8mm bolt but we care about the socket more.
The torque on this is 15 to 19 foot-pounds. It's pretty important to definitely torque down the fuel rail, believe it or not. Because you want to make sure those injectors are seated straight across. Another thing I like to make practice of whenever you work on your injectors or move the injectors, just power the car up, just turn the key in to the on position. Then turn it off and turn it back on. And that way the pump builds up pressure in the rail, and if there is a injector that's not seated properly you'll see a small fuel leak. It's better than running it and discovering it.
So this is a 10mm socket and it's 19 foot pounds. Give it a double check, perfect. I'm going to connect this fuel line, it's got a self locker on it. You just push it on, and it will click. Give it a tug, looking good. So now I'm going to go get my injector harness and reassemble that.
So because the vehicle is an 07 the harness is pretty well fitted to the way it used to be. So I'm going to connect cylinder one, two, three, and then four. I'm going put the plastic eyelets in where they were located. This is the electronic throttle body connector. That clicks down, and push that red tab down, that's a locker. That went on that bolt for guides.
Here we have the main injector harness. This is a guide, guides on this plastic ear. That snaps on. So now we just have the intake runner and we're ready to install the air box and see how this thing runs.
So you can see the three ears that push in to the rubber bushings. And that's just gonna pop right in. If you have any lubricating spray, like a penetrating spray or anything, just give it a shot to the rubber bushings. It'll help the plastic just get snapped down a lot easier. Now I have the air intake hose mounted to the throttle body, I'm going to slide that on. And now I know that these are all lined up, I'm just going to snap it down. That's how easy it was because I pre-sprayed the rubber.
Here is an emission tube from the valve cover, line up the blue box, just snap it on. And then we're just going to tighten the clamp on the throttle body and then plug in our mass air flow sensor. So the clamp on the air breather tube is a 10mm. You can also use a Philips. Just snug that down. Then we have our connector for the mass air sensor, we're going to connect that let it snap. Click, it did snap it, you just didn't hear it. And this actually has a guide on the other side of that clamp. You see the little ear here. They want you to put that harness in, which is a good idea. Stop it from rubbing and wear in to the wires.
So there you have it, we're all set. Now we're going to add coolant after working on the cooling system. We're going to make sure the petcock was closed, which I've already done. And now I'm going to add my coolant. I've already premixed it. We're going to bring it up to the top of the visual part of the radiator, not to the top of the neck. I want to bring it right up to here. And I can see that straight through, and then I'm gonna top off my overflow tank.
I'm just going to bring it to the cold mark, there's a line here. It's already got coolant in it, so I'm not going to have to top it off. It's a little bit above the cold line, which is where I'm going to leave it because as I run this it'll self burp. Bring it to temp, once it's to temp shut the car down. Let it sit for a little bit, a couple hours if you can, and check your overflow and it should be down at the low mark, perfect. And when it's warm and hot it'll be up at the high mark. You don't want it down at the low mark when it's hot, you want it at the high mark.
So let's start it up and run it. Put the cap on and then you can start the car and run it, about 45 minutes before the fans come on. Once the fans come on you can shut your car down, let it cool down, take about an hour or so. If it's fully cooled down, then you can come over to your overflow tank and check your level. If it's way down to low or it's not even in the tank, fill it to the low level and then run it some more. Never take your cap off with the radiator being hot, or the engine reaching full temperature.
Thanks for watching, visit us as 1aauto.com for quality auto parts, fast and free shipping. And the best customer service in the industry.
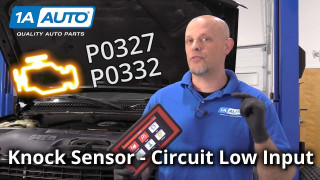
Check Engine Light Car Knock Sensor Low Input - Code P0327 P0332
This video explains the problem and diagnosis steps to resolve check engine codes P0327 and P0332.
