How to Replace Intake Gaskets 2000-06 GMC Yukon
Created on: 2020-04-06
Watch this video to learn how to install new intake manifold gaskets on your 2000-06 GMC Yukon.
Tools needed
-
Razor Blade / Gasket Scraper
Torque Wrench
8mm Wrench
Trim Tool Set
Brake Parts Cleaner
Safety Glasses
Pocket Screwdriver
Pick
Gloves
8mm Socket
Bungee Cord
Air Compressor
10mm Socket
Swivel
Cloth Rags
Because we're going to have to disconnect the fuel system, we want to take the pressure out of the fuel system. Just take this relay out right here, find the fuel pump relay. Grab that, take that out. And then you can try to start the vehicle. Our vehicle doesn't run right now. So, if you crank the vehicle and then it dies, the fuel system should be unpressurized. Now I'm going to disconnect battery, use an eight-millimeter wrench, loosen up the negative side terminal, and just set that wire aside. Take this cover off, use an eight-millimeter socket, and slide it off.
Take this snorkel off, this little retainer right here, just use a trim tool, slide that off, then loosen up the worm clamp here using eight-millimeter socket, or you can use a straight blade screwdriver, same with this one. Grab the snorkel, slide it back and slide it out. Take this nut off right here, use a 10-millimeter socket. And then these 2 10-millimeter bolts and then that one. And take this cover off and we're going to disconnect the connectors. Disconnect that one right there. It's up the purge solenoid. Disconnect the alternator connector right here.
Slide under the lock and pull it out, and this connector right here, and the MAP sensor as well, disconnect that. And I'm just going to use the bungee cord to just keep the wires out of the way. Just wrapped around the wiper arm. This wire connector right here, just unattach that from the intake, set that aside. Now we have to disconnect all the fuel injectors. There is a lock on them, this one doesn't have that lock on it, but you pull back on the lock and then you push down on that little lock tab, and then slide the connector out. This one does have the lock. So the lock, you just grab the lock and just slide it up, just a little bit, and then you should be able to push on the connector.
Sometimes it's easier to slide the whole lock out. This is how the lock works. So when it's locked in there, this is all the way down. Slide this out, you should be able to slide this out a little bit. You don't have to slide it out that much. That's how it's locked. You should be able to slide-out to there and then push down on the tab and release it. But like I said, sometimes it's easier, just slide this whole thing out. Push it down, slide it out. Do that for all eight of them. Just connect the connector to the throttle body.
Just pull back on this little lock. Once it's back that far, push down on the tab, disconnect it. Now you could leave the throttle body attached. There's just coolant hoses that go to it. So you can either take those hoses off and just leave that all attached, take it all off on the intake, or take the throttle body off. I'm going to use a 10-millimeter socket, take these nuts off, and sometimes the stud comes out completely, that's okay.
Let's get the other two out. You want to be careful with this. It is sensitive, you don't want to drop it. Slide this hose out of the way over here, and disconnect this hose right here, this goes to the valve car. You can either disconnect it down here or up here. And it's been on there for a long time so it's kind of hard to get it loose. Just try to twist it back and forth, screwdriver or trim tool, or something just trying to push on it. This should probably be replaced. The rubber is very dry. Just try not to crack this little port. There we go. See the hose is starting to rip already. Move that to side.
Disconnect this EVAP line, might need a screwdriver or something to push on the tab, it slides up. Now when we take the intake off, since I'm not pulling the injector rail up, we're just going to have to fit this through there. So just keep that in mind. And back here, disconnect this line that goes to the valve cover, pump that up. You could disconnect it up here if you wanted to. Just put that out of the way. Now, if you weren't able to bleed the pressure off the fuel system, like I showed you earlier, taking the relay out and cranking it, just take the cap off right here.
Take some rags and a screwdriver. And you're just going to push on this Schrader valve. Just be careful, it's good idea to wear safety glasses while you're doing this. And just release the pressure, there wasn't a lot of pressure in this one. But sometimes they spray pretty good. It's good to cap back on so I don't lose it. Now we'll disconnect the fuel line. Just pull this lock off, just slide it up, and then pull it out. You're going to need a special fuel line release tool, slide this over the pipe, pull the line forward, and then push the tool into the line.
And once the tool is in the right spot, you should be able to pull the line back. Just like that, pop it off. Now you going to take the intake bolts out. There's one there, one there, one there and then there's two in the back on this side, on the opposite side, there's two in the front, one in the middle, and then two further back. So there's 5 per side, 10 in total. I'm going to use an eight-millimeter socket, it helps to use a wobble socket or a swivel socket. And it's a good idea not to use an electric tool with the gas being out, you don't want to cause any sparks.
So I'm just going to use an air tool. All right, all those bolts are loose. Just grab the intake, slide it up. Just remember, this hose has to go underneath the fuel rail over here. And just slide it through there. Be careful, it is plastic, you don't want to crack it. And when you go back in, you're going to have to feed that through there again and slide it up. So it's pretty dirty under here. I want to clean some of this up. I don't want any of this stuff to fall into the intake ports. What you could do is put a rag in each one of those ports, and then clean it all up if that's what you want to do.
Or just be careful. And you don't really want to use an electric vacuum on this because the potential of getting some of the fuel in there and then catching the vacuum on fire. So just be careful, all right. So I put rags in all the ports I just need to remember to take those out when I go to put the intake back on. Use a blowgun, just try to blow most of this away. Before I put the intake on, I just wanna take some brake parts cleaner and just clean the surfaces where the intake gasket is going to sit. You don't have to clean all this up. Crystal clear anything but just with a gasket is going to sit make sure that's nice and clean.
You can gently use a razor blade to clean some of this up. Just be careful. You don't want to gouge the metal or you don't want to cut yourself. Take the old gaskets off, there's a little clip right here. It's another clip right here. Then another one on the bottom, take this off. Try not to tip the intake completely upside down. Try to keep it on its side so none of the dirt goes into the ports. And then just take a little rag and some brake parts cleaner, and just wipe around the intake. Then take the new gasket, line it up, and click it into place right there and on the bottom.
Make sure that looks good. Do the same on the other one. Don't forget to take these rags out. You can check all the ports, just look down and make sure there's nothing that went in there. You can always spray a little compressed air. Now when we go to put the intake back on, we have to slide this back through the fuel rail, you could always disconnect it right here, and just put this on the intake, and then reconnect it down there, if that makes it easier for you. I'm gonna take the intake, this line is going to go out through right here.
And then just line it up. Up in this line. Just right back there. And just wiggle the intake a little bit, make sure you didn't crush any of the wires. Make sure this wire is accessible and goes to the knock sensors. You can actually put this. Just attach that right there. And now, so you don't lose that and get all the bolts started. Now I'm just going to snug them down first, there is a sequence to tighten these up.
But I'll snug them down first and then we'll do the torqueing and the sequence after. So number one, I'm going to torque this bolt to 44-inch pounds. And that's the center one on the passenger side. That's number one. Number two is going to be in the center one on the driver's side. Number three is going to be on the driver's side the next one back. On number four from the middle one, the next one forward. Number five from the middle one back one. Number six on the driver's side from the middle forward one. Number seven is the next one forward. Number eight is the passenger side rear one. Number nine is the driver's side rear. And number 10 is passenger side front. So that was all the first pass.
Now you're going to do the same sequence, and you're going to change your torque wrench to 88 inch-pounds, and do the same exact sequence. Now hook up the fuel line to line that up, lock it in place. Make sure that it's good. Ensure you put this lock on, just slides on, and then locks down. That's just going to prevent it from coming off. Now hook up this line or hose right here. It goes to the valve cover and hook this line up over here. And the split, this should be replaced but that'll work for now, and the EVAP line. Just make sure it locks in place. And that's good.
Now check your throttle body gasket if it's crushed. Normally you have to replace it every time but if it looks okay, you can probably try to reuse it. This one looks good. And take the studs, or just the nuts if the studs didn't come out, it goes back on. Now I'm going to torque these to 89 inch-pounds. Now, reposition that coolant hose, those clamps, take the electrical connector, line it up, lock it in place, push down on the lock. It's good. Now we want to plug these injectors back in. Just take the locks, reposition the locks, all those go and plug those in.
Make sure they're secure, they're the same with the other seven. Let's disconnect this bungee cord and run the wires the same way they came out. This bracket is going to go right here. Those wires are going to go like that. You can connect this connector right here. That goes to the knock sensor wire right there. And then this connector is going to go to the MAP sensor in the back right there. Now take this bracket, line that up.
And take the bolts, get those all started. Put it on this bracket right here. That's good. Take these connectors plug in the alternator, and this purge valve, plug down on it and take the snorkel, line it up over the intake or the throttle body. Line this bracket up right here and over the airbox, or mass airflow sensor. Tighten up this one pump right here, snug, and the same right here. Take the cover, line the cover-up in the back. And then get the bolts started. Then tighten it up, snug. Now let's reconnect the battery. Put the negative terminal on and snug it up, and then wiggle it. Make sure it's not loose. You're good to go.
Shop Products


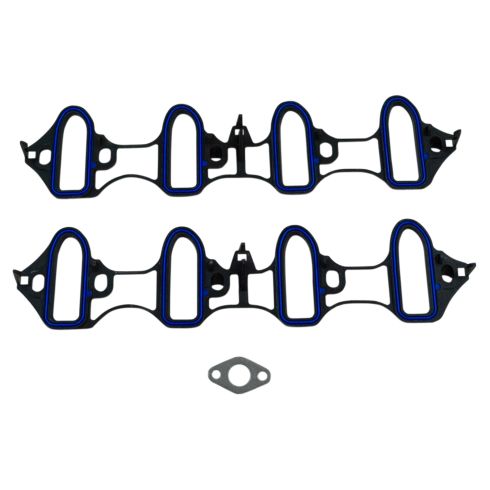
Intake Manifold Gasket Set TRQ SGA11381
Part Details:
- Highest Quality Materials
- Direct Fit Replacement - Guaranteed to fit and function for your specific application
- Quality Tested - built to a strict level of product standards.
- LS Swap
- Fiber Plastic

How To Replace Intake Manifold Gaskets 2002-07 Mazda 6
How to replace a torn, loose, or leaking intake manifold gasket on 02, 03, 04, 05, 06, 07 Mazda 6.
