How to Replace Inner Tie Rods 2011-19 Ford Police Interceptor Utility
Created on: 2020-05-15
Check out this video to learn how to install a new TRQ inner tie rod on your 2013-19 Ford Police Interceptor Utility, or Ford Explorer.
Tools needed
-
Torque Wrench
Socket Extensions
Pry Bar
Jack Stands
19mm Socket
Liquid Thread Locker
Pick
21mm Socket
Bearing Grease
21mm wrench
Inner Tie Rod Removal Tool
Socket Driver
Large Locking Pliers
Wheel Chocks
Straight Cutters
Hose Clamp Pliers
10mm Socket
Wire Ties
Ratchet
Floor Jack
1/2 Inch Breaker Bar
Before you start, you wanna be aware that after you're done this job, you're gonna wanna go to an alignment specialist so that you can have the vehicle aligned so you don't wear out the tires prematurely. Take off the center cap, you can use a pry bar. If you don't want to scratch the wheel, you can use a rag or a cloth. Get underneath here, pop it off. All right. Take lug nuts off, use a 19-millimeter socket and remove the wheel. Now, I'm gonna loosen up this jam nut, use a 21-millimeter wrench. And that's good. It's just gonna be loose. Now, I'm gonna take this nut off, use a 21-millimeter socket. And sometimes it'll start spinning, the stud is spinning, so I need to hold that. So, I can take a 21-millimeter wrench and a 10-millimeter socket. And this is just gonna hold the stud from spinning. Take that nut off and slide the tie rod out of the knuckle. There you go.
Now, I'm gonna unscrew the tie rod and just count how many turns you have. So, 1, 2, 3, 4, 5, 20, 21. So, write that number down so when you go to put it back together, it goes together somewhat where it was when you took it apart. Now, we're gonna use some locking pliers and just put them on the inner tie rod so it doesn't spin. I'm gonna take a 21-millimeter socket and just take the jam nut off completely. Now. you're gonna take this clamp off. You can use some hose clamp pliers or even some regular pliers. Just slide it off. And then we're gonna take the inside clamp off and just use a straight... Now, you can use a straight pick and just try to get in there. Just wanna try to spread it out a little bit. And normally you can't reuse this but if you're careful enough, you might be able to reuse it. And it popped. And slide that off. And sometimes you can bend this back and reuse it, sometimes you just need a new one. And just grab the boot and just slide it off. You can use a pick right here and just try to help slide this off a little bit easier. I'll just pull it real hard to get that off.
All right. Now, we're gonna use a special tie rod tool. There is different tools that you can use and just attach it like this, it will tighten these nuts down. Now, I'll just put an extension on here and a breaker bar and loosen it up. There we go. All right. At this point, I can take the tool off or just take it off once I take the tie rod off. And there we go. You can take the new inner tie rod. If you choose, you can put some thread locking compound on the threads. Looks good. And just get it started. So, you could use the same tool to put it on or something a little bit different, something like this. This has an adapter. Slide this over here and just lock that on. Now, I can torque it. I'm gonna torque that to 66 foot-pounds. There we go. So, I'm gonna install the boot and put the clamp back on. And I'm just gonna take a little bit of grease. I'm just gonna put the grease right here. That's where this part of the boot is gonna sit right there. Put a little more to help slide it on. Get that lined up again and slide it over the body of the steering rack. And that's good right there.
All right. Now I'm gonna tighten that clamp up. I have some special pliers that are gonna tighten the clamp up. They squeeze it, push it down a little bit. And I just had to bend the shields back a little bit just so I can get these in here. Get that to line right up. Looks good. And just squeeze it. And I'll put this clamp on. That's good. And put the jam nut on. Now, I'll take the outer tie rod in and count my turns 1, 2, 3, 4, 5, 6, 7, 8, 9, 10, 11, 12, 13, 14, 15, 16, 17, 18, 19, 20, 21. Take 21 turns. And that's just gonna get the alignment closer. You still need to have an alignment done. All right. Now, slide this into the knuckle. Take the nut and tighten the nut up. I'm gonna use my wrench on the nut, use the socket on the stud and just tighten this up. And now you can torque this to 111 foot-pounds. Here we go. All right. Now, we're gonna tighten up this jam nut. If you have the ability to use a torque wrench, you can tighten that to 46 foot-pounds. Take the wheel, put it on, put the lug nuts on. And now I'm gonna torque these lug nuts to 110 foot-pounds. And I'm gonna do that in a star pattern to tighten the wheel down evenly. And just go around again, double-check. Center cap, tap it back on. Good to go.
Shop Products


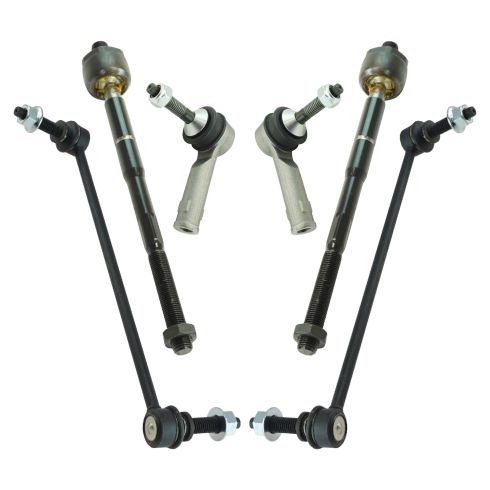
Ford Front 6 Piece Steering & Suspension Kit TRQ PSA28994
Part Details:
- (2) Front Sway Bar Links
- 6 Piece
- (2) Front Outer Tie Rods
- (2) Front Inner Tie Rods
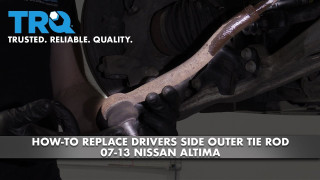
How to Replace Outer Tie Rod 2007-13 Nissan Altima
Watch this video to learn how to replace the outer tie rods on your 2007-13 Nissan Altima.
