How to Replace Inner Tie Rods 2000-06 Chevy Tahoe 2nd Generation
Created on: 2020-05-28
Watch this video to learn how to install a new inner tie rod on your 2000-06 Chevy Tahoe.
Tools needed
-
Adjustable Wrench
Torque Wrench
Hammer
Rust Penetrant
Pry Bar
18mm Socket
Grease Gun
7/8 Inch Wrench
Pickle Fork
Side Cutters
8mm Socket
22mm Wrench
Drill
Cotter Pin
Ratchet
1/2 Inch Impact Gun
22mm Socket
Before you start, you wanna be aware that after you're done this job, you're gonna wanna go to an alignment specialist so that you can have the vehicle aligned so you don't wear out the tires prematurely.
I'm gonna remove the wheel. Use a 22-millimeter socket. Take the lug nuts off. And take the wheel off. I'm gonna loosen up the jam nut. You can use a 22-millimeter wrench or a 7/8 wrench. Just get that loose. That's good. I'm just gonna spray a little rust penetrant on here. And use an 18-millimeter socket, take this nut off. And if the nut doesn't come off and the stud starts spinning, you can use an 8-millimeter socket to hold that stud from spinning, and then just use the wrench to take the nut off. Now you can take a hammer and just give a tap on the bottom of the tie rod, or take a pickle fork and separate it this way. Just if you use a pickle fork, it's probably gonna rip the boot right here. I'm just gonna give it a hit right here. There we go. And now we're gonna take the outer tie rod off. As we unscrew this, just count the threads. So 1, 2, 3, 4, 23, 24. So write that number down. And when you go to put it back together, you're gonna count them to put the other one in the same position that that one was in.
Now I'm gonna take off the inner tie rod end. I'm gonna use a large adjustable wrench because I don't have a wrench that's big enough to fit this. Slide this over and loosen it up. And eventually we'll get that off. Take the inner tie rod end and get this started. Now we're gonna tighten this up with the adjustable wrench. If you have the ability to torque this, you wanna torque this to 74-foot-pounds. Just do the best you can. That's good. Then you wanna take a grease gun and hook it up to this grease fitting and give it a couple pumps. You can do it until you start seeing the boot move a little bit, then you know there's plenty of grease in there. And take the new tie rod end. Get this started. Make sure you count 1, 2, 3, 4, 5, 22, 23, 24 and line this up in the knuckle. Take the castle nut, get that started. Now, what you can do is to prevent the stud from spinning, you can take a pry bar, just pry in between the knuckle and pry down on the tie rod, use an18-millimeter socket and tighten this up. And tighten this to 37-foot-pounds. And then just check to see where the hole is for the castle nut. And if you need to, you can snug it up a little bit more to get it to line up. And that that hole lines up. Now take the cotter pin, slide it through, actually we'll slide it through this way and take some side cutters and just bend it. Tap it out of the way, and then trim off the excess. And we'll snug up the jam nut and tighten that to 50-foot-pounds. Put the wheel back on and the lug nuts. I'm gonna take these lug nuts down to 140-foot-pounds, and I'm gonna do it in a cross pattern to tighten the wheel down evenly. Just go around again. Double-check.
Shop Products


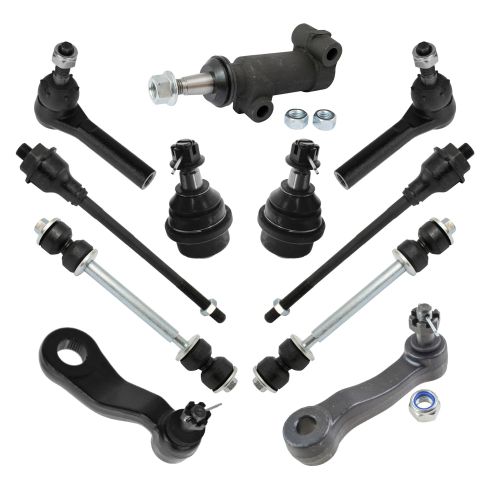
Chevrolet GMC Hummer Front 11 Piece Steering & Suspension Kit TRQ PSA56606
Part Details:
- (2) Front Sway Bar Links
- (2) Front Lower Ball Joints
- 11 Piece
- (1) Idler Arm
- (1) Pitman Arm
- (1) Idler Arm Bracket
- (2) Front Outer Tie Rods
- (2) Front Inner Tie Rods
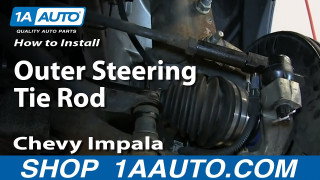
How to Replace Tie Rod 2000-13 Chevy Impala
Check out this video to learn how to replace the tie rods on your 00-12 Chevy Impala.
