How To Replace Inner Taillight 2000-02 Chevy Cavalier
Created on: 2013-08-02
How to install, repair, fix, change or replace a broken, damaged, burned out, cracked, faded, cloudy or chipped tail light / brake light on
-
step 1 :Changing the Bulbs
- Twist the socket out counterclockwise.
- Pull the bulb out.
- Push a new bulb in.
- Twist the socket clockwise to lock
-
step 2 :Removing the Back Up Light Assembly
- Twist the socket out.
- Remove the three 13mm nuts.
- Pull the assembly out and off.
-
step 3 :Replacing the Back Up Light Assembly
- Push the new assembly down into place.
- Replace the three 13mm nuts.
- Twist the socket into place.
Tools needed
-
13mm Socket
Socket Extensions
Ratchet
Brought to you by 1AAuto.com, your source for quality replacement parts and the best service on the Internet.
Hi, I'm Don from 1A Auto. I hope this how-to video helps you out, and next time you need parts for your vehicle, think of 1AAuto.com. Thanks.
In this video, we are going to show you how to service the inner taillight or the trunk-lid-mounted light, which is actually the backup light. This is a 2000 Chevy Cavalier, same for any 2000 to 2002. If you're just looking to change the bulb, we show you that, and you don't need any tools for that. If you do need to replace the whole assembly because of damage, you'll need a 13mm socket with a ratchet and extension.
If you're just looking to change the bulb, it's easy enough. Reach up in with your trunk lid open, turn counterclockwise, and the backup light all comes down. Pull it out and push the new one back in. If you're looking to change the whole assembly, there are three nuts that hold the non, to write inside and one outside their. The three nuts are 13mm, so I'm using a, we're using a 13mm socket with a ratchet and extension, and you can probably, except for this one nut here, might be a little difficult to get to with a wrench, so having that socket ratchet extension is usually the best tool. Okay, to take it off, it pulls right off. A new one, pretty much easy enough. Put it right back down on, and then start your routine mm nuts in place and tighten them up. You don't want to over-tighten them. You just want them on there nice and firm.
We hope this helps you out. Brought to you by www.1AAuto.com, your source for quality replacement parts and the best service on the internet. Please feel free to call us toll free 888-844-3393. We're the company that's here for you on the internet, and in person.
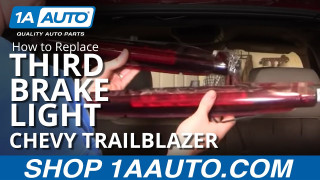
How to Replace Third Brake Light 2002-09 Chevy Trailblazer
Watch this 1A Auto instructional video to find out how to replace the third brake light on your 02-09 Chevy Trailblazer.
