How to Replace Injector Harness 2003-07-07 Cadillac CTS
Created on: 2016-08-17
This video has several steps to access, remove, pin, and install a fuel injector harness. Follow along and learn how to do this repair yourself
-
step 1 :Removing the Wiper Arm
- Squeeze and pop off the windshield wiper nut caps off
- Use a piece of tape to mark the position and angle of the wiper blade
- Remove the two 15mm nuts from the wiper arms
- Work the wiper arms off of the splines
-
step 2 :Removing the Windshield Wiper Transmission Assembly
- Remove the weatherstrip
- Remove the four 7mm screws from the cowl panel
- Remove the plastic
- Remove the 10mm nut up against the fender
- Remove the two 10mm bolts securing the wiper transmission to the assembly
- Lift up the wiper transmission assembly and disconnect the wiring harness
-
step 3 :Removing the Intake Manifold
- Remove the oil fill cap
- Remove the engine cover
- Install the oil fill cap
- Loosen the air intake hose clamp from the throttle body
- Remove the yellow safety on the throttle body electrical connector
- Release the connector from the throttle body motor
- Pry the tab on the fitting and remove the fitting from the throttle body
- Pry off the two vacuum fittings with a flat blade screwdriver
- Pry the wire loom from the intake with a flat blade screwdriver
- Remove the vacuum booster line from the side of the intake
- List the sound deadening material and disconnect the two wiring harnesses
- Remove the four 10mm harness hold down bolts
- Remove the three 10mm bolts from the intake
- Loosen the 18mm bolts near the power steering fluid
- Remove the six 13mm bolts from atop the intake
- Release the harness retainer from the throttle body
- Lift the intake manifold
-
step 4 :Removing the Injector Harness
- Lift up on the safety from the injector connector and disconnect the harness
- Remove the hard cover from the injector wiring harness
- Clip the wire past where it's damaged
- Strip the ends of the remaining wire a little
-
step 5 :Pinning the Harness
- Make sure the center plate is up and free
- Push the terminals in until they click
- Press down the center plate
- Check that the terminals are flush with the center plate slots
- Measure the wires to that of the length you cut off of the old wire
- Cut the ends of the new wire to be a bit longer
- Strip off the wiring cover
-
step 6 :Installing the Harness
- Place a heat shrink over the wire
- Twist the new wire
- Braid the two wires together
- Place a wooden block beneath the wire
- Apply flux to the bare wire
- Sodder the wire with a soddering iron
- Slide the head shrink into place
- Heat the shrink
- Rewrap the pigtail ends with electrical tape and any remaining wire that had tape beforehand
- Connect the wiring harness and lock the safety
- Reinstall the wiring harness cover
-
step 7 :Reinstalling the Intake Manifold
- Remove the old upper plenum gaskets
- Clean the edges and oil and debris off with brake cleaner
- Repeat the process for the bottom ports of the intake manifold
- Insert the gaskets onto the engine
- Place the intake manifold onto the engine
- Tighten the six 13mm bolts onto the intake manifold
- Torque the bolts to 17 foot-pounds
- Connect the electrical connectors at the rear of the manifold
- Reconnect the PCV lines, brake booster, and vacuum lines
- Connect the fitting to the front of the manifold
- Tighten the four 10mm harness hold down bolts
- Spin the 10mm bolt into the bracket
- Tighten the 18mm bolts near the power steering
- Reinstall the sound deadening material
- Connecting the throttle body connector and safety
- Insert the airbox to the throttle body
- Tighten the clamp with a flat blade screwdriver
- Remove the oil fill cap
- Replace the engine cover
- Tighten the oil fill cap
-
step 8 :Reinstalling the Windshield Wiper Transmission
- Connect the electrical connector to the wiper transmission
- Insert the wiper transmission into place
- Tighten the two 10mm bolts to the transmission assembly
- Insert the driver side cowl cover into place
- Tighten the 10mm nut to the cowl cover
- Insert the passenger side cowl cover into place
- Tighten the 10mm nut to the cowl cover
- Reinstall the weatherstrip
-
step 9 :Reinstalling Wiper Arms
- Line up the wiper to the tape mark
- Torque the bolt to 26 foot-pounds
- Replace the bolt cap
- Close the hood
- Remove the tape
- Check for proper operation of the wiper motor
Tools needed
-
13mm Socket
Socket Extensions
Torque Wrench
15mm Socket
19mm Socket
Brake Parts Cleaner
Solder Kit
Utility Knife
Electrical Tape
Flat Blade Screwdriver
Heat Gun
7mm Socket
Painter's Tape
10mm Socket
Ratchet
Cloth Rags
Wire Cutters
Brought to you by 1AAuto.com, your source for quality replacement parts and the best service on the Internet.
Hi, I'm Mike from 1A Auto. I hope this how-to video helps you out, and next time you need parts for your vehicle, think of 1AAuto.com. Thanks.
In this video, we're going to show you how to repair, or replace, the injector connector harness in this 2006 Cadillac CTS 2.8L V6. If you like this information, please click that subscribe button. We have ton more information on this vehicle, as well as many other makes and models. If you want these parts to fix your car, they're available at 1AAuto.com. You can follow the link in the description.
Here are the items you'll need for this repair: 7mm, 10mm, 13mm, 15mm, 19mm socket, ratchet, and extension, soldering kit and electrical tape, flat blade screwdriver, wire cutters and box cutter, torque wrench, brake cleaner, rag, lighter or heat gun, painter’s tape
Remove the black caps over the nuts for the windshield wiper arms. All you have to do is squeeze them together, and pop them off. You're going to use a small piece of painters tape. Make sure you use the straight edge to mark the position and angle of the wiper blade, so we can reinstall our wiper arms properly.
Remove the two 15 millimeter nuts, securing the wiper arms down. The 15 millimeter socket and ratchet. If you're only replacing one arm, you'll only have to do this to that particular one. Work the wiper arms off of the splines. Do this by grabbing them at the joint. Simply pulling up and pushing down. Eventually, it'll work its way off the splines, and you can remove your wiper arm.
Peel off the leather strip. Remove these four 7 millimeter screws. We're going to use the 7 millimeter socket and ratchet. Lift up. Carefully release this plastic, as it's hooked under the windshield. You can see the little hooks right here. Just be careful to pull out and away with those.
Remove this 10 millimeter nut up against the fender on the driver’s side. Lift up and off of the splines for the wiper arms.
Remove the driver's side of the cowl cover. Remove these two 10 millimeter bolts, securing the wiper transmission and assembly into the vehicle. It's a little easier to access this top one from the other side of the hood. We're going to use the 10 millimeter socket, ratchet, and extension. Lift up and toward the center of the vehicle to release this tab. Flip over the assembly. Release the connector. Remove the assembly from your vehicle.
We're going to remove the engine cover. Remove the oil cap. Lift up and pop off the cover, and reinstall the oil cap to prevent any dirt and debris from falling in while we're working. Using a flat blade screwdriver, loosen the intake boot clamp. Pop this back off the throttle body. Remove the yellow safety on throttle body electrical connector.
Push down on the tab, and release it from the throttle body motor. On the bottom of this fitting is a little tab. You want to push that out with a flat blade screwdriver. Remove the fitting from the nipple. Remove these two vacuum fittings. Simply going to pop them out, carefully, pry them out with a screwdriver.
Using a flat blade screw driver, pry the wire loom up off of the intake. Remove the vacuum booster line from the side of the intake. Lift up this sound deadening material, and release these two connectors. Remove these four bolts with a 10 millimeter socket and ratchet. Once all the bolts have been removed, move the brackets they were securing off the side of the manifold and out of the way.
Using a 10 millimeter wrench, remove these three bolts. Loosen this 18 millimeter bolt at the bottom of the bracket. Crack the bolt loose with an 18 millimeter socket and ratchet. Remove these six 13 millimeter bolts with a 13 millimeter socket and ratchet. Using a flat blade screwdriver, release this harness retainer from the throttle body. Remove the intake manifold.
Lift up on the safety for the injector connector. Push down, and remove it. You can see ours is chaffed through over here, so we'll be cutting and splicing in our new repair harness to get our vehicle running right.
We're going to remove this hard plastic cover on our harness. We'll use a small flat blade screwdriver to pop up these tabs, and pry off the top part of the cover. Remove this cover. Lift out this part of the harness. Peel the tape off of the harness. Ours is very brittle, but if yours is still fresh, you may have to peel it off with a razor blade. Once it's peeled back, we'll remove the next later of tape here. Just find an edge and peel it up. Once you've found the edge, peel the tape off of the harness.
Now that our wire's exposed, we can cut it out, and splice in our new piece. See where our wire is damaged. We'll go a little bit past that, as any corrosion and moisture that's gotten up there, is able to travel through the wire. Using a pair of wire cutters, we'll cut these two legs off and stagger the length a little, so we don't end up with a big lump when we splice our new pigtail in. We'll strip the ends of the wire, just a little. When initially pinning one of these fuel injector repair pigtail harnesses, you'll want to make sure this center plate is up and free. See we can wiggle it around there with a flat pick. If you try to install this on to your injector to check, it'll walk down. You won't be able to move it, and the wires from the harness won't seat full in. Ensure that this is up and in the unlocked position.
Insert the terminals in. They'll only fit in one way. Push them in till you hear that click. Give them a little tug to make sure they're not coming out. Do the same thing with the other side. Then push down this center plate. Make sure that your terminals are nearly flushed with the ends.
Here we have our old injector harness that we removed from the ‘06 CTS. You can see wires have chaffed here. This can cause the injectors not to fire properly, which can create lean conditions, as well as misfires. It chaffs over, and they short out. It's possible that it can cause other issues.
If you look, you'll see that the two terminals are offset toward the bottom. This means that we know our injector connectors are facing the same directing. You can see I've cut one wire longer than the other. We'll cut this wire, as the shorter one. Just a little bit longer than our short wire here, because we'll have to strip some of this end off in order to make a connection back into our vehicle. We'll do the same thing. Little longer over here, and just a bit longer than we actually cut our old harness. Then, we'll go ahead and strip the end of our wire. You can go a little longer, little shorter, depending on how you like to make your connections. I like to get a good twist to them. Now we're ready to put it back in the vehicle. Put heat shrink over our wires. The longer wire will connect to our shorter; and the shorter to the longer wire here. You'll notice that these are stripped at about twice the length of the wire on the actual vehicle harness. We'll braid these two together. You want a proper double helix. You do not want one to wrap around a straight piece of wire. Once that's twisted up, lay if flat over the other exposed piece. Try to wrap it around once, it will help it keep together. Be sure that you actually twist up this wire before you braid the two of them together.
Now, we'll get a soldering block. Solder together our connections. We're going to apply some flux to the bare wire. It'll keep everything clean and make a nice connection. Replace the wooden block, underneath our wire, as a soldering block. Press down firmly on the wire with a hot soldering iron. Once the wire is heated up, melt some solder on there. Slide your heat shrink, evenly, over your soldered connection. Heat it up with a lighter, or heat gun. Be sure not to leave it on there too long, because it will melt the casing of the wire. Good quality heat shrink is actually filled with a silicone type gel that will actually come out the ends as it shrinks creating a nice weatherproof seal. Which is exactly what we want for something on a vehicle, especially under the hood.
Now we'll re-wrap this with electrical tape. Put it back onto our injector. Replace our cap, and our intake manifold. We'll first re-wrap the end where our pigtail is. Wrap that up nice and tight. We'll then wrap back into our main harness, and over the end of the wire loom to make sure that it stays sealed up nice. Lay it back down into its slot. Plug it back on to our fuel injector. Lock our safety down. Reinstall the cap on our harness.
Remove your old intake manifold upper plenum gaskets from the intake runners. We'll spray a little brake cleaner on a clean rag or paper towel. We'll wipe all the oil and debris off of the gasket surfaces, both on the plenums of the intake here and on the ports of the manifold itself. Just want to make sure those are nice and clean. Do the same thing here on the bottom side of the intake manifold itself. Wipe off that contact surface on the ports. If you feel any burs or debris build up file that off carefully.
You'll see that there's a small tab that sits into a hole on the top of the runners, as well as a hole that sits onto this dowel on your new intake gaskets. Go ahead and line all that up, and we'll install our intake manifold. Start your 13 millimeter bolts, once you have the manifold set onto its tabs. The longest ones will go into these four counter sunk holes in the center, and the shorter two will go on these outside ones. Tighten all these downs with the 13 millimeter socket and ratchet. Torque these bolts to 17 foot-pounds.
Reconnect the electrical connectors at the rear of the manifold, the brake booster vacuum line, and the two PCV lines; one of each side. Reconnect this fitting to the nipple at the front of the manifold, until that clicks into place. Reinstall the four 10 millimeter bolts for the harness hold downs. Three on the passenger side; one on the driver. You'll then tighten them down with a 10 millimeter socket and ratchet. Line up this bracket. Spin this 10 millimeter bolt in. Tighten up the bolt we loosened at the base of this bracket with an 18 millimeter socket and ratchet. Snug this bolt with a 10-millimeter wrench. Reinstall the sound deadening material onto its pends, as well as the throttle body connector. Lock that safety back into place.
Reinstall the air box on the end. Make sure this vacuum line at the back of that box is still connected. Tighten the clamp with a flat blade screwdriver. Remove the oil fill cap. Reinstall the engine cover. Reinstall your oil fill cap. Reconnect the electrical connector. Set this opening onto the pin. Start tightening down your two 10 millimeter bolts.
Reinstall the driver’s side of the cowl cover first. Be sure that all the plastic hooks line up under the windshield. Reinstall the 10 millimeter nut. Reinstall the passenger side of the cowl cover. Again, make sure all of these hooks line up, and go underneath the windshield.
Reinstall your 7 millimeter screws. Reinstall the rubber seal. The channel simply presses on to this ridge here. Line up your wiper to the tape mark we made on the windshield earlier. Torque to 26 foot-pounds. Line up your wiper to the tape mark we made earlier. Start the nut by hand. Torque the nut to 26 foot-pounds. Reinstall the plastic cap. Close the hood. Remove the tape marks from the windshield. Check for proper operation of your wiper motor.
Thanks for tuning in. We hope this video helped you out. Next time you need parts for your car, please visit 1AAuto.com. Also check out our other helpful how-to and diagnosis videos.
Shop Products


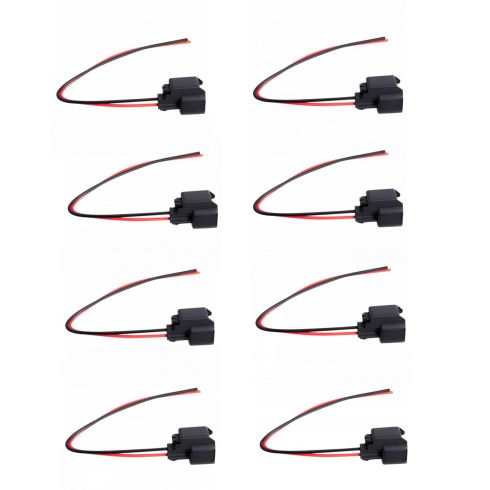
Fuel Injector Harness 8 Piece Set TRQ FIA60408
Part Details:
- 8 Piece Set
- (8) Fuel Injector Harnesses
How to Replace Fuel Injectors 2000-06 Chevy Tahoe
This video shows you how to install new TRQ fuel injectors on your 2000-06 Chevy Tahoe.
