How to Replace Ignition Coil 1993-97 Dodge Intrepid
Created on: 2011-09-14
How to remove, install, repair, or replace your broken misfiring or damaged ignition coilon 1993-1997 Dodge Intrepid models.
-
step 1 :Disconnecting the Battery
- Disconnect the negative battery cable with a 10mm wrench
-
step 2 :Removing the Air Intake Hose
- Loosen the intake hose clamps with a flat blade screwdriver
- Pull off the air intake hose
-
step 3 :Removing the Ignition Coil
- Disconnect the ignition coil wiring harness
- Disconnect the spark plug wires from the ignition coil, one at a time
- Connect the plug wires to the corresponding spot on the new coil
- Remove the four 10mm bolts from the ignition coil
- Pull off the ignition coil
-
step 4 :Installing the Ignition Coil
- Disconnect the spark plug wires from the new ignition coil, one at a time
- Connect the plug wires to the corresponding spot on the old coil
- Put the new ignition coil into place
- Insert the four 10mm bolts into the ignition coil
- Disconnect the spark plug wires from the old ignition coil, one at a time
- Connect the plug wires to the corresponding spot on the new coil
- Connect the ignition coil wiring harness
-
step 5 :Installing the Air Intake Hose
- Put the intake hose into place
- Tighten the intake hose clamps by hand
-
step 6 :Reconnecting the Battery
- Connect the negative battery cable with a 10mm wrench
Tools needed
-
1/4 Inch Ratchet
Socket Extensions
Flat Blade Screwdriver
10mm Wrench
10mm Socket
Ratchet
Brought to you by 1AAuto.com, your source for quality replacement parts and the best service on the Internet.
Hi, I'm Mike Green. I'm one of the owners of 1A Auto. I want to help you save time and money repairing or maintaining your vehicle. I'm going to use my 20-plus years experience restoring and repairing cars and trucks like this to show you the correct way to install parts from 1AAuto.com. The right parts installed correctly: that's going to save you time and money. Thank you and enjoy the video.
I'm going to show you how to replace the coil on the 1997 Intrepid with a 3.5L V6. The tools you'll need are a flat blade screwdriver, a 10mm socket with either an adapter or a 1 inch extension if you have a quarter inch drive tools and you'll see what I mean in the video.
With a 10mm wrench, disconnect your negative battery cable. To give us the room to work, we're going to pry up on these clamps and loosen them. Pry up there and loosen that and pull this whole intake tube out of the way.
On the passenger side of the engine, here is your coil right here. Here's my new one from 1A Auto for reference. You can see it's got four bolts holding it in. Unplug this lead and move it up out of the way. With that tube out of the way, you can see your coils right here and the new one from 1A Auto. What you can do is unplug it.
What I like to do is with my new one right here, I just remove each plug wire one at a time and reattach it right on the new one in the same spot. You don't even have to worry about getting them incorrect. We'll just speed it up here a little bit as we take those last 3 wires off and put them in the corresponding place in the new coil. What I find best for getting to these bolts is you've got a half inch drive ratchet with an adapter of 3/8"�. It gives you just enough length.
I'm going to super-speed it up here. It takes a little time if you have hand tools because there is limited room to move the wrench back and forth, but I figured I'd show you the way I got to it with just regular, pretty much, common hand tools. As you see later in the video, I get a little inpatient and break out my air ratchet. I just want to bring the old one up and out. Believe it or not what I'm going to do, is move it in the same position. Actually, just for a placeholder again, I'm going to transfer everything back over. The reason you want to do is just to make it as easy as possible.
We put this down in here with the connector on top, to make it easy as possible to work in here. Just real quick, all I'm doing is taking the four bolts holding the coil in place, sliding them and making sure I get them threaded in a few turns. You want to make sure you don't cross thread them.
I showed you one method. Also, if you have quarter inch drive tools, then make a one inch extension and then with an air ratchet, it makes it really nice. Now with it bolted back in, once again, do our lower ones first. Now, I am fast forwarding through this but you do want to be very careful. You want to make sure that the plug wires go in the same place as they were plugged in originally, or you could really damage your engine.
Put this back on. I usually start with these ends on the tube itself, and we reconnect the battery.
We hope this video helps you out. Brought to you by www.1AAuto.com, your source for quality replacement parts and the best service on the Internet. Please feel free to call us toll-free, 888-844-3393. We're the company that's here for you on the Internet and in person.
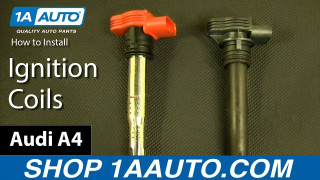
How To Replace Ignition Coils 2005-15 Audi A4
New Ignition Coil from 1AAuto.com How to repair, install, fix, change or replace a bad or broken ignition coil / coil pack on 05, 06, 07, 08 Audi A4
