How to Replace Ignition Coil 2001-03 Chrysler PT Cruiser
Created on: 2011-07-07
Check out this video as we guide you through the process of replacing the ignition coil on your 01-03 Chrysler PT Cruiser.
-
step 1 :Remove the ignition coil
- Remove the 13 mm socket with an extension and remove the intake manifold mounting bolts.
- Use a 13 mm socket and ratchet to disconnect the EGR tube.
- Now with an 8 mm socket and ratchet remove the 8 mm bolt on the EGR tube.
- Take your 8 mm socket and extension, remove the five bolts securing the intake manifold.
- Lift up the intake manifold and prop it up with a block of wood.
- Unplug the spark plug wires.
- If you are concerned about forgetting which order to plug them back in, use a marker to label them.
- Disconnect the wiring harness connection.
- Remove the four bolts and lift your coil up and out.
-
step 2 :Install the new ignition coil
- Mount the new ignition coil
- Bolt it into place.
- Connect the wiring harness.
- Plug in the spark plug wires.
- Carefully replace the intake manifold.
- You may want to replace the intake manifold gasket to prevent a leak from forming, as unbolting the intake manifold deteriorates the gaskets sealing ability.
- Bolt the five 8 mm bolts down, tightening them evenly.
- Reconnect the EGR tube, bolting in the 8 and 13 mm bolts.
- Replace the 13 mm mounting bolt.
Tools needed
-
13mm Socket
Socket Extensions
Flat Blade Screwdriver
8mm Socket
10mm Socket
Ratchet
Block of Wood
Brought to you by 1AAuto.com, your source for quality replacement parts and the best service on the internet. Hi, I'm Mike Green. I'm one of the owners of 1A Auto. I want to help you save time and money, repairing and maintaining your vehicle. I'm going to use my 20 plus years of experience, restoring and repairing cars and trucks like this, to show you the correct way to install parts from 1AAuto.com. The right parts installed correctly, that's going to save you time and money. Thank you and enjoy the video.
In this video, we're going to replace the ignition coil on this four cylinder PT Cruiser, not that difficult of a repair, although it is a little time consuming because you've got to take a couple of things apart. This is the same for many of the '01 to '09 PT Cruisers. The tools you'll need are 8 mm, 10 mm, 13 mm wrenches or sockets with a ratchet and extension, small flat blade screwdriver and a block of wood. You see your engine coil is located right down in here, okay you can see one of the bolts right there, another bolt over there. I can't help but I have to give the Chrysler engineers a little bit poop here, this is utterly ridiculous, if they had just taken this coil and moved it over onto this big open spot right here, this repair would take about five minutes but instead what they did is they hid it under the minute intake manifold. Rather than just removing four bolts and some connections, you actually have to remove five intake manifold bolts, here, here, here, here and here. You have to remove a mounting 13 mm mounting bolt, which is right in under here and then you have to disconnect your EGR tube, which is right back in here, it's hard to see. I'll go from the top. It's this tube coming in right here. It's got a 13 mm bolt over there and 10mm bolt here.
First, I'm going to take 13 mm socket with a long extension and a ratchet and I'm going to go in from behind and get this 13 mm mounting bolt here. Okay, fast forward a little bit as a remove that bolt. Now with just my 13 mm socket on a ratchet, going in back here and the 13 mm bolt on the EGR tube. Now I'll fast forward again. I loosen it with the wrench and then that bolt actually pretty easily turns and spins out by hand. Now I've got an 8 mm socket and I've got an air ratchet in just the interest of speed here, so I'm going to get the 8 mm bolt on my EGR tube. Okay now, just so you can see, here's the part, it's just the flange for EGR tube. You let fall down on the pipe and then that tube is loose. Back with my air ratchet and obviously you can you use a regular ratchet but this makes it a little quicker, 8 mm socket and a little extension and we'll remove these manifold bolts. Okay and we'll speed it up again here for you, no need to have to listen to that whining of the air ratchet or the repetitiveness of it. We'll get through this quick.
Now with all that loosened up, just take your intake manifold, lift it up, just going to use a little piece of 2x4, stick it in there just to support it. Now you can see I have nice open access to my coil. Now remove your plug wires. When you unplug these, they are pretty much stay in place, you can label them if you want to but with only four of them it's pretty easy to remember where they go. You just twist and pull. From this side, the same thing, twist and pull, twist and pull. Okay, from under here, another little over engineering, so there's a locking clip here that you need to push out backwards and then there's another locking mechanism here. Why they need to double lock it, I'm not sure. Okay, here I'm going to use a small screwdriver, I'm going to start by pushing the red locking clip back and then repositioning and trying to push it through. Okay and that little red thing went flying down in there and guess what, I'm not worried about it because not only does it have that in it but it's got a perfectly secure lock here. You press on this tab. I'm sure it will be difficult to get it off of course, press on that tab and pull it off. Okay, a 10mm socket and ratchet and we can get to this, basically one bolt that you had to do all that work to get to. Okay and we'll speed it up here again as you can tell I'm getting a little exasperated about both the under engineering and over engineering on this vehicle. As much as my complaining is it's really not that hard of repair once you know how to do it.
You want to put a nice long extension on, it allows me to pretty much go from the top to the rest of the bolts. Okay, so now we'll fast forward removing those other three bolts. Now your coil can just lift up and bring out really either side, I bring it out the passenger's side. Okay, there's the original coil. New coil from 1A Auto. You see they're all pretty much the same and most importantly the connectors are the same. The coil goes in, point the connector towards the driver's side, put it down into place. Okay, going to hit a little fast forward again here as I start all four bolts first. You put the bolts down in and than just move the coil back and forth a little bit, the bolt goes down further and then threads in and then keep the fast forward going as I get out the air ratchets and preliminarily tighten all four of the bolts that are holding the coil. Now I use a hand ratchet to just check and make sure that they're all snug and you don't want to over tighten them. Reconnect our harness, push on there nice and tight. This four cylinder goes over here. This little one bends right in here. This one connects right here. This one connects here. Now I can take our piece of wood out of here and then this is what you want to be careful of, you don't want to pinch this bracket in between so what you can do is lift it up, balance it on there like that, put your manifold down and then just knock it right almost into place there. Line the manifold up and now we'll start all of our bolts. Get that one first with the bracket, just put into place. Okay and we'll fast forward through this and we're just putting them in and starting them, we're not tightening them up yet.
Reconnect this hose. Now I'm just reaching right under and putting this bolt into place. Shake the whole manifold, pull it around a little bit, start that bolt. I've got my two bolts for my EGR tube. What you've got to do is that flange usually drops down so ... Actually my tube is still in the manifold, which is good. I'm going to reach down here with this hand, find that flange, slide the flange up. I'm just going to look at the flange, make sure you put the large bolt in the large hole first. I'm just looking in back here, same thing, put the bolt in, pull the manifold over a little bit and start it. You might have to lift up a little bit on the manifold, get the bolt started in. Then our 8mm bolt on the other side. Start that in. Tighten our manifold first. Okay, we're going to speed it up as we just use our air ratchet and we're going to tighten those bolts preliminarily, we're not going to tighten them all the way up yet. Now we change to the hand ratchet and then we tighten them and you want them firm, you don't want to over tighten them. They should be tighten to, I'd say about eight to nine foot pounds. Keep the speed going as we use our air ratchet, tighten that back EGR bolt and then use the hand ratchet. Put on our extension and tighten that mounting bolt there and then last but not least, we'll tighten up that EGR valve bolt and you should be all set.
We hope this helps you out, brought to you by www.1AAuto.com, your source for quality replacement parts and the best service on the internet. Please feel free to call us toll free 888-844-3393. We're the company that's here for you on the internet and in person.
Shop Products


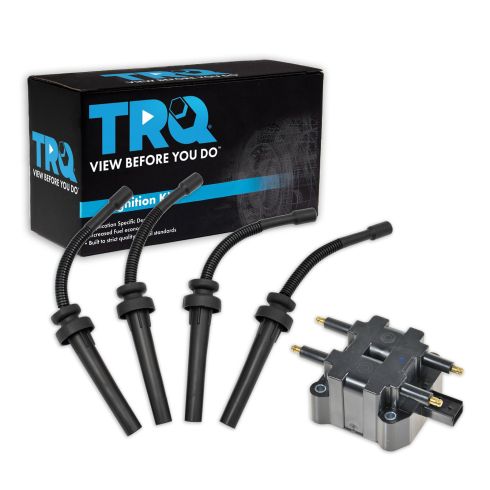
Dodge Chrysler 2 Piece Ignition Kit TRQ TKA01172
Part Details:
- 2 Piece
- (1) Spark Plug Wire Set
- Direct Replacement
- Black
- (1) Ignition Coil
How to Replace Ignition Coils 1998-2012 Ford Crown Victoria
Watch this video to learn how to install ignition coils on your 1998-2012 Ford Crown Victoria.
