How to Replace Hood Release Cable 1996-2000 Honda Civic
Created on: 2013-12-27
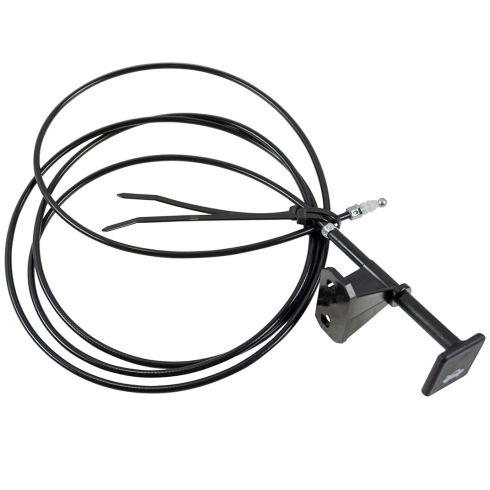
1A Auto shows you how to replace a broken hood release cable and handle in a 96-00 Honda Civic.
-
step 1 :Removing the Grille
- Remove the five clips from the top of the grille with a flat blade screwdriver
- Pull the grille forward
- Remove the four Phillips head screws from the bottom of the grille
- Pull the grille forward and off
-
step 2 :Removing the Hood Latch
- Remove the three 10mm bolts from the hood latch
- Pull the hood latch up and out
- Pry the hood release cable out of the hood latch with a flat blade screwdriver
-
step 3 :Removing the Hood Release Cable
- Remove the plastic cable clips from the bumper with needle nose pliers
- Feed the cable through the latch hole
- Remove the clips from the cable
- Remove the next clip from the bumper
- Pull the cable through the grille area
- Remove the clip from the cable
- Remove four Phillips screws from the wheel well
- Remove the Phillips head clip from the wheel well
- Pull out the cable clips from the inner fender
- Pry out the two plastic clips from the interior door trim
- Pull off the door trim panel
- Remove the two 10mm bolts from the hood release switch
- Tie a string to the latch end of the hood release cable
- Pull the hood release cable from inside the car until it comes to a stop
- Pull the cable plug out of the wheel well
- Slide the plug to the end of the cable
- Cut the plug off with wire cutters or a razor blade
- Feed the cable through its hole until it is out
- Untie the string from the cable
-
step 4 :Installing the New Hood Release Cable
- Tie the string to the end of the new hood release cable
- Pull the string through the vehicle to pull the cable into place
- Pull the cable through the hood latch area
- Remove the string from the cable
- Connect the plastic clips to the hood release cable
- Push the cable through the hood latch hole
-
step 5 :Reinstalling the Hood Latch
- Clip the cable to the hood latch
- Push the hood latch into place
- Insert the three 10mm bolts into the hood latch
- Push the cable clips into place
- Slide the cable plug into place
- Put the hood release switch into place
- Insert the two 10mm bolts into the hood release switch
- Push the trim panel into place
- Insert the two clips into the trim panel
- Insert the Phillips screws into the wheel well
- Insert the plastic clip into the wheel well
-
step 6 :Reinstalling the Grille
- Push the grille into place
- Push the five plastic clips into the top of the grille
- Insert the four Phillips screws into the bottom of the grille
-
step 7 :Testing the Hood Latch
- Push down the latch with a screwdriver
- Test the hood release switch with the hood open
- Test the hood release switch with the hood closed
Tools needed
-
Razor Blade / Gasket Scraper
Wire or String
Socket Extensions
Flat Blade Screwdriver
Phillips Head Screwdriver
10mm Socket
Ratchet
Needle nose pliers
Wire Cutters
Brought to you by 1AAuto.com, your source for quality replacement parts and the best service on the Internet.
Hi, I'm Don from 1A Auto. I hope this how-to video helps you out, and next time you need parts for your vehicle, think of 1AAuto.com. Thanks.
In this video we show you how to replace a hood release cable on this 1998 Honda Civic. It's the same part and process on these Civics from '96 to 2000 and the items you'll need are a new hood release cable from 1AAuto.com, a flat blade screwdriver, a Phillips screw driver, a 10 millimeter socket and ratchet with an extension, a pair of pliers, wire or string, and wire cutters or a razor blade.
We're going to start off by removing the grille. You want to remove these five clips. To do that you just pry up the center and pull the center out and the bottom part will just come right off. We'll fast forward as Dan does the other four. Now, your grille is still held in with these four screws. Now, to remove these four Phillips screws you have to reach in through this grille on your bumper and just feel around for them and remove all four of them. Once they're removed the grille comes right off.
Next, you want to remove these three 10 millimeter bolts holding in your hood latch. Pull the hood latch up and out. Then, you want to disconnect your cable. To do that you pry it out of the bracket, pull it forward and then pull it out.
Your hood release cable is secured by several clips. To remove these you just push in the tabs and push them down through the hole. For this one, you want to do the same thing. Then, just pull on the cable once you get it started. Next you want to feed the cable up and through that hole where the latch went, and remove those clips, just separate them and then pull right off. Now you want to remove this clip right here. Again push on the tabs and pull that clip through, and pull your hood release cable down to the latch hole and into this section. Again, remove the clip by separating it. In the back of the wheel well there are four Phillips screws to remove. Then closer to the front of the wheel well, there is a clip that has a Phillips screw in the middle that you pull that out and take out the clip. We'll just fast forward here as we remove those fasteners. Now, up inside your inner fender, you'll see this clip right here, and you want to just pull on either side of it and pull it straight out. Then, further up, close to the front of the vehicle, you'll see another one, and do the exact same thing to this one. Now inside the vehicle you want to just pry out this clip down here and then there should be another one up here, but ours is missing, and you would just pry that out too, and then pull this panel off, and your hood release cable is held in right here by two 10 millimeter bolts. You want to just go ahead and remove those. Back at the other end of the hood release cable just tie a wire or string to the end of it. Now you want to just pull the hood release cable until it comes to a stop. Now, the reason it stops is, because inside your inner fender, here, in the hole where the wire goes into the vehicle, you'll see this plug. You want to pull that plug out and slide it up the wire. Your new hood release cable comes with a new one, so this one we're just going to cut off using a wire cutter or a razor blade. Now you want to feed the ball on the hood release cable through that hole and then just start pulling the wire until it comes out. Once you've got some slack you can remove your hood release cable.
The old broken cable is on the left; the new one from 1A Auto is on the right. You can see they're identical and it's going to mount the same and work like brand new. Take your new hood release cable and tie that wire or string to it. Now you want to just pull on the wire. Keep pulling it through the vehicle. At this point, you will need to push the ball through that hole again because it will most likely get caught right there. Then just keep feeding it through and pulling from the other side. Now you want to keep pulling it up through where the grille was. Once you get about this much length, you want to remove that string or wire from the end of your new cable. Put the clips back onto your hood release cable.
Now, you want to wrap the cable back up through that hood latch hole and then re-clip the cable into your hood latch, and push it into that little bracket there, feed the hood latch down into place. Then we'll just fast forward here as Don replaces those three 10 millimeter bolts. Push those clips back up into place. Replace the cable clips up inside the wheel well. Slide the new plug into place and just push it in so that it completely seals up that hole. Replace the two 10 millimeter bolts on your hood release switch. We'll fast forward here as Don does this.Replace that trim panel and the two clips that hold it into place. We'll fast forward as Don replaces those bolts in the wheel well, as well as that Phillips clip.
Replace your grille and then push the lower part of the clip in and in the center to lock them. Replace those four Phillips screws on the bottom of the grille. Now use a screwdriver to push down the latch so we can test it and then go into vehicle and pull your hood release. There it is. Then try it again with the hood down. It works. You're all set
We hope this video helps you out. Brought to you by www.1AAuto.com, your source for quality replacement parts and the best service on the Internet. Please feel free to call us toll-free, 888-844-3393. We're the company that's here for you on the Internet and in person.
Shop Products

How to Replace Hood Release Cable 2000-07
This video shows you how to replace the hood release cable on your 00-05 Ford Focus. Learn how to do it yourself with help from 1A Auto!
