How to Replace Hood Release Cable 2000-06 Chevy Tahoe
Created on: 2020-07-15
This video shows you how to install a new hood release cable on your 2000-06 Chevy Tahoe.
Tools needed
-
13mm Socket
Pry Bar
8mm Wrench
10mm Wrench
Trim Tool Set
Hose Pliers
Flat Blade Screwdriver
Stepper Bit
7mm Socket
Drill
10mm Socket
Ratchet
Needle nose pliers
Marker / Writing Utensil
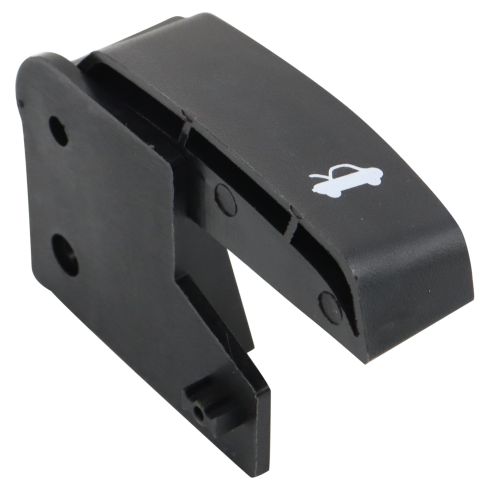
All right. We want to disconnect the battery. Disconnect the negative cable. Use an 8-millimeter ratchet wrench or a wrench and slide that out of the way. We're gonna take this panel off. Just use a trim tool, take all these clips off just like that. And then grab this panel. Just slide it off. Now while we take the latch off, you want to mark this before you take it off. Just use a marker and just try to put it back on the same position where you took it off. You could also mark the bolts. I'm going to use a-10 millimeter socket to take these three bolts out. Now, just take the cable out of the latch. Just slide this like that. And you can use some needle nose pliers, just squeeze the ends of the cable. It should slide right out just like that.
Now I'm going to take this trim piece off. You can use a trim tool. Just get underneath it, just pop it up and slide it out of the way. Now I'll take this trim piece off. Just slide this out. It's bent. That's what happened. And slide that out. And there's supposed to be a clip right there and a clip right there and this one got stuck in there and broke off. Now I'm going to pull this junction box cover off. There's a little plastic nut right here. You have to take that off and then take the cover off just like that. I'm going to disconnect the connectors. Just keep in mind you can always take a picture of where the connectors are so you know where they go although they're not going to go in the wrong spot. They only go in one position. So just push down, lock tab, and slide the connectors out. And the last one.
And there are two tabs on either side. Push those tabs in. You should be able to rock this forward and slide it out of the way. You can use a 7-millimeter socket and there's a bolt that holds the connector on. Loosen that bolt up. There we go. Move this wire from this little retainer right there. Now I'm gonna take this bracket out of the way. There's a 10-millimeter bolt or 10-millimeter nut right there. Use a socket, take that out. And there's a 13-millimeter nut right there. Use a socket. Take that out. Slide that bracket out of the way. Now I'm just going to take the parking brake release handle out of the way. Use a 10-millimeter socket to take this bolt out and there's the four-wheel-drive module. There's a clip that just holds it on. You can take that clip off. You can disconnect it or you can just swing it out of the way. Just push on the tabs for the connector and slide the connector out and same with this one. You can use a screwdriver straight blade screwdriver to get under the tab. Slide that out of the way.
Now there are two nuts at the top of the parking brake lever assembly, you can use a 13-millimeter socket to take those both out. It's kind of hard to see those nuts. Here's the other nut. Disconnect this electrical connector that goes to the parking brake lever or pedal assembly. Just slide it off. This bracket is actually in the way. I'm going to take these two 10-millimeter nuts off. I'm just going to use a 10-millimeter ratchet wrench to loosen those up, take those out. Just slide this out of the way. Just slides off. Now just use a pry bar to pry the pedal assembly out a little bit. There we go. Just slide it out of the way. You don't have to disconnect it completely. You just got to be able to access underneath here. And watch your fingers because there are some sharp edges. Just leave that there. Now I'm going to take this nut off. Use a 13-millimeter socket. Take that out.
Grab the release handle. Just keep in mind where the rooting of this cable goes behind these wires right here, but it goes over those wires. Now take the cable. Now there are some retainers that hold the cable down. Just take it off there. Keep in mind how this cable goes. Slide that out. There's another right here and another right there. There's another holder right here. Just gonna slide the cable over here just so it's easier to pull through. Just watch the paint. And then from inside the car, there's a grommet that goes through the firewall. You just pull on that grommet. You should be able to pull it out, pull it straight through into the vehicle. And there it is.
This is where the hole is that the cable goes through from the inside. Now, I'm gonna fish this cable through. I'm going to show you right now how this goes. Now there's a step on this grommet right here. For this vehicle, it's only going to go to the first step. It's not going to go all the way to the third step based on the size of the hole that goes through the firewall. Just slide that through behind these wires over the other wires and through the firewall. When you get up to the firewall, just push it in.
I just pulled this plate off real quick just so you could see this better, but if you could see the rubber grommet, you can see how it's through the firewall right there. If you have to use some soapy water to try to get that to come through a little better, or you can use some hose pliers. Just grab onto the rubber grommet and just try to pull it to get it to the right spot. That looks good. It's sealed all the way around.
Now I have this bracket out of the way. If you want to take it out of the way, you can just take these four 13-millimeter bolts out and just slide the cable down there, back into that hold down and there is one right here and just route it the same way it came out. Just go under this bracket. There is another bracket right here that should be attached and slide it through here and into that hold down right there. And that's good right there.
Now, if you go to put this bracket on and the hole isn't really big enough for this stud, what you can do is just home this hole out a little bit. Just use a bigger drill bit to make that a little bigger so it fits. Just going to use a stepper drill bit. Just go to the next size. Yep. Perfect. And take the nut. Get the nut started and tighten it down. Just snug. Now take the parking brake pedal assembly and line it up. Be careful not to squish any wires. That's good right there. Right now we're gonna take the nuts and put the two nuts up top. You're gonna leave that nut off that stud down below because you have to put the other bracket on. So get these started and then snug up those bolts.
Now I'll take the bracket that holds the transfer case module, the four-wheel-drive module. Slide this in position. Get that bracket back there, put those two nuts on and snug those nuts down. Now, you can take this module. You can plug these connectors in first if you want. And it says right on it, a black one or the gray one, and slide that in position. Lock it in place. Now take the parking brake release handle. There's a little tab right here. Just slide it in there and put the bolt back in and snug it up and hook the wire that goes to the parking brake up just on that tab right there. That's good. Put the bracket in position. It's going to go over the stud over here and then over the other stud over here. And take this nut, put that over that stud and take this nut over here.
Now take the connector and put the junction box, plug that into the back. Take your 7-millimeter socket. Tighten that bolt down. Just snug it down. Not too tight. Just once it stops then you're good. All right. That's good. Now, line these two tabs up first on the bracket and lock it down. Then can line this harness up over here. There is a little retainer that holds it. Hold down. All right, that's good. And then plug the connectors in. All right. Ready? And this one's gonna go right here. Just lock it in place. And this brown one is going to go right here. And this other one, go up top all the way to the right.
Now, your vehicle might have other connectors so just put them back where they went. Now I'll take this cover, line it up, and put the plastic nut back on. You can just push it on, you don't have to twist it. Now I'll take this panel. If your clips aren't broken, then you can line those up here and just push them in this direction. Now take this panel and slide it in position. Get it lined up. Looks good. And take the hood latch and the cable, slide the cable through. You might have to twist this a little bit and lock that in place. Line that up. That's good. And get the bolts lined up. Now line this up with your marks and tighten down the bolts.
Now you just want to make sure the hood pin where it latches to the hood just lines up and it looks good. So you can close it. Give it a try. Perfect. Now we can put this cover on and put the push pins back in. Now we can hook up the battery, line it up and get it started and snug it up. Just make sure it's not loose. Looks good.
Shop Products

How to Replace Hood Release Cable 2002-06 GMC Envoy XL
If the hood release cable and lever need to be replaced, check out this video for instructions on how to replace it yourself
