How to Replace Hood 1997-2001 Toyota Camry
Created on: 2016-06-22
How to install, replace, remove the hood on a 1998 Honda Civic
-
step 1 :Removing the Hood
- Open the hood
- Secure the hood prop
- Pull back on the hood insulation to access the washer line
- Disconnect the single washer line from the Y-connector
- Disconnect the retainer from the bottom of the hood
- Remove the 12mm bolts on each side of the hood
- Fold the hinge down
- Carefully lower the hood
- Rest the hood below the windshield line
-
step 2 :Installing the Hood
- Insert the hood into place with an assistant
- Start the 12mm bolts
- Lift the hood prop
- Lower the hood
- Check the spacing
- Lift the hood
- Connect the washer hose
- Tuck the lines under the hood installation
Tools needed
-
12mm Socket
Ratchet
Assistant
Brought to you by 1AAuto.com, your source for quality replacement parts and the best service on the Internet.
Hi, I'm Mike from 1A Auto. I hope this how-to video helps you out, and next time you need parts for your vehicle, think of 1AAuto.com. Thanks.
Open the hood and secure the hood prop. Carefully pull back on the insulation under the hood. Remove the washer line. Disconnect the single washer line that runs back toward the vehicle from the Y connector by pulling them apart.
Disconnect the retainer from the bottom of the hood and allow the hose to hang out of the way. Using a 12mm socket and ratchet remove two bolts on each side of the hood that secure the hinges to the bottom of the hood.
Remove the bolt, fold the hinge down and carefully rest the hood below the windshield line as not to crack the glass. Repeat this step on the opposite side. When the bolt's removed, fold the hinge down, rest the hood below the windshield line.
With the help of a friend raise the hood up, remove the hood support, and place your hood somewhere safe.
Reinstall the hood. Lift up on the hinge and start your bolts. Once you have two bolts started, re-secure the hood prop and finish installing your hardware.
Line up the bolts to the marks on the hinges from where they were installed before without tightening them fully. Just snug them up a little to keep the hood in place while we align the other side.
Carefully check the alignment of the hood without closing it fully. Insure that you have the same gap on both sides of the hood. After insuring that the alignment of the hood is correct finish tightening the four 12mm bolts. Reinstall the retainer for the washer line. Push the hose back onto this Y connector, and tuck you lines back under the hood insulation. Move the hood pop, close your hood and you're ready to go.
Thanks for tuning in. We hope this video helped you out. Next time you need parts for your car, please visit 1AAuto.com. Also check out our other helpful how-to and diagnosis videos.
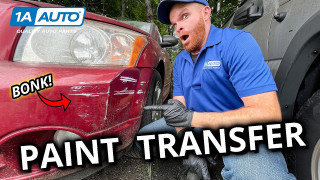
Someone Bumped or Scraped Your Car or Truck How to Remove or Repair Paint Transfer
Len explains the layers of paint on a car or truck, and how that relates to repairing that damage, and what you can do to buff out light scratches and scuffs!
