How to Replace Heater Control Valve 1997-2010 Mercury Mountaineer 4-6L V8
Created on: 2014-10-13
Find out how to remove and install a new heater valve, including how to add new coolant with this how-to video
-
step 1 :Removing the Heater Valve
- Remove the 8mm bolt from the heater valve
- Remove the hose from the valve
- Clamp each coolant hose with a pair of locking pliers
- Pry off the hose clamps with a pair of pliers
- Remove the heater valve from the coolant hoses
- Remove the two Phillips screws from the heater valve
-
step 2 :Installing the New Heater Valve
- Remove the new screws from the heater valve
- Insert the heater valve into the bracket
- Tighten the original Phillips screws to the bracket
- Insert the heater valve into place
- Slide the hose clamps into place
- Release the locking pliers from the coolant hose
- Tighten the 8mm bolt to the heater valve
-
step 3 :Refilling the Coolant
- Refill the coolant to the fill line
Tools needed
-
Adjustable Wrench
Phillips Head Screwdriver
8mm Socket
Ratchet
Brought to you by 1AAuto.com, your source for quality replacement parts and the best service on the Internet.
Hi, I'm Mike from 1A Auto. I hope this how-to video helps you out, and next time you need parts for your vehicle, think of 1AAuto.com. Thanks!
In this video, we're going to show you how to replace the heater valve on this 2003 Mercury Mountaineer. The items you'll need for this are a new heater valve from 1AAuto.com, an 8 millimeter socket and ratchet, a Phillips screwdriver, pliers, and two pairs of locking pliers.
You can see we got some coolant on our wheel, and it made the puddle right next to the tire. If you follow it up, you'll go right to the heater control valve.
Your heater valve is located right here, and it's held in with on 8 millimeter bolt. The best way to remove that is through the wheel well with a socket and ratchet. We'll just fast-forward as Mike removes that. Then just pull this hose free. Lift this up so you have better access to it. Then clamp onto each hose with a pair of locking pliers. Then, using a pair of regular pliers, just slide those clips on the hoses down. Then pull the hoses free.
Our first Phillips screw removed no problem. This other one was a little more difficult. You can just use a hammer to jolt the screw. You just hammer it while twisting on the Phillips screw driver. It loosened it up enough so we could remove it the rest of the way. The heater valve's now free.
On the right is the older heater valve; on the left is the new one from 1A Auto. You can see they're identical, and they'll fit exactly the same.
Remove the new screws from your new heater valve. Then put the bracket back in place and use the two original, longer Phillips screws as they'll hold better to re-secure the bracket. Feed the heater valve back down into place, and then put your hoses back on. Then slide those hose clamps back up into place. Remove those two pairs of locking pliers. Now push the bracket back down and line it up. Push this hose back into your heater valve. Once you have that bracket lined up, just replace that 8 millimeter bolt and tighten it up.
Any time you do any service to the cooling system, you want to make sure you add radiator fluid. This is Ford motor product, you need to use the gold style fluid, or make sure it's compatible. This is a cold fill line. You want to be within this range. Make sure the engine is cool when you're filling it. If you've done extensive service or drained a lot out of it, you'll want to do this, start up your engine, run it, let it cool down, and you'll probably do it a few times before you add back all the coolant in. Any time you service your cooling system, refill it and recheck it a few times the first few times you drive it.
We hope this video helps you out. Brought to you by www.1AAuto.com, your source for quality replacement parts and the best service on the Internet. Please feel free to call us toll-free, 888-844-3393. We're the company that's here for you on the Internet and in person.
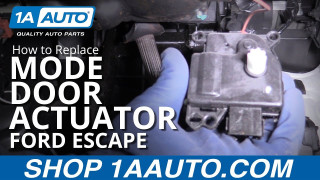
How to Replace Mode Door Actuator 2008-12 Ford Escape
Check out this video if the vents in your 08-12 Ford Escape don't work in all modes. The 1A mechanics will show you how to replace the mode door actuator.
